 ultimate_guide
Walk-In Cooler Maintenance: 7 Best Ways to Prevent Failure
Table of Contents
- Best Ways to Maintain Walk-In Cooler: A Preventative Framework
- Why Preventative Maintenance Saves Money and Uptime
- Cleaning Evaporator and Condenser Coils
- Inspecting Door Gaskets and Seals
- Walk-In Cooler Maintenance Checklist: Monthly and Seasonal Tasks
- Walk-In Cooler Energy Efficiency: Optimization Strategies
- Walk-In Cooler Troubleshooting: Identifying Common Problems
- When to DIY vs. When to Call a Professional HVAC Technician
- Walk-In Cooler Repair Cost: Understanding Maintenance Investment
- External Sources
- Frequently Asked Questions
Walk-In Cooler Maintenance: 7 Best Ways to Prevent Failure
Last Updated: July 31, 2026
Best Ways to Maintain Walk-In Cooler: A Preventative Framework
According to the U.S. Environmental Protection Agency, commercial refrigeration systems account for roughly 15% of total energy consumption in food service operations. The best ways to maintain walk-in cooler equipment directly impact both food safety and operational costs, yet most facility managers treat maintenance as reactive rather than preventative.
At Home Tech, we've spent over a decade servicing walk-in coolers and freezers for restaurants, grocery stores, and food service operations across the Phoenix metro area. What we've learned is simple: businesses that avoid costly emergency repairs follow a structured maintenance schedule. A compressor failure can cost thousands in emergency service fees plus spoiled inventory. A door seal degradation wastes energy and compromises food safety.
Below, we'll show you exactly how to maintain your walk-in cooler with strategies that prevent equipment failure.
Why Preventative Maintenance Saves Money and Uptime
Your walk-in cooler maintenance budget is an investment, not an expense. When a refrigeration system fails unexpectedly, the true cost extends far beyond the repair bill. You lose perishable inventory, face potential food safety violations, and experience operational downtime that disrupts your entire business.
Preventative maintenance catches small problems before they cascade. A clogged drain line becomes a mold-infested evaporator coil. A worn door gasket forces the compressor to work harder, shortening its lifespan by years. Compare that to emergency compressor replacement, which can exceed two thousand dollars, and the math becomes clear.
Cleaning Evaporator and Condenser Coils
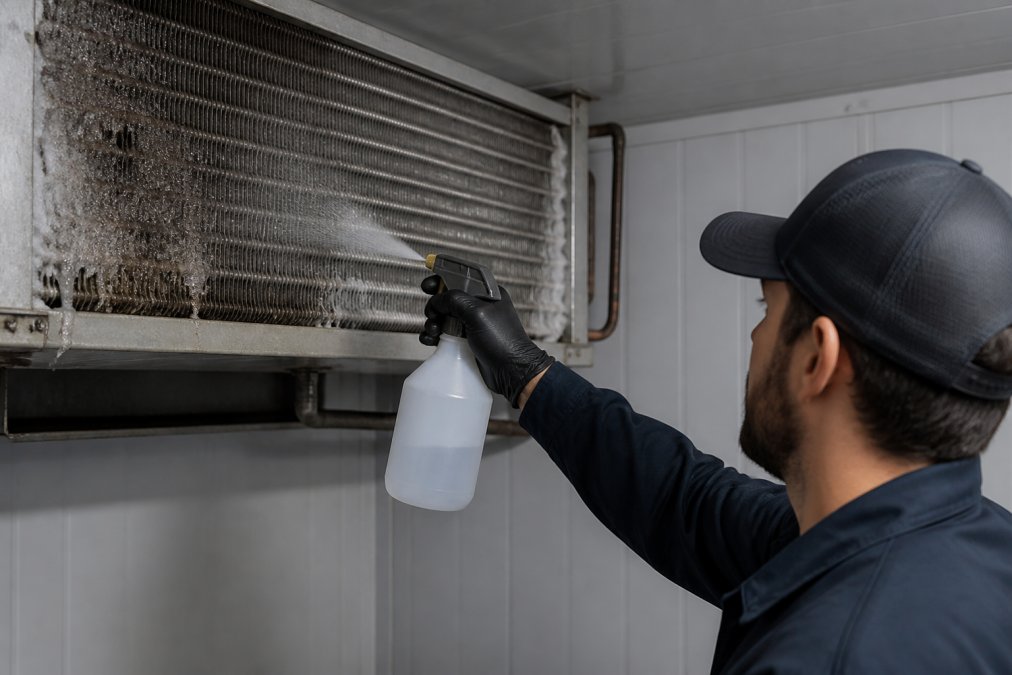
Coil cleaning is the foundation of walk-in cooler maintenance. Your evaporator coil sits inside the cooler and absorbs heat from the air, while the condenser coil (part of the condensing unit outside) releases that heat to the environment. When either coil accumulates dust, debris, or frost buildup, the system works harder to maintain temperature, consuming more energy and wearing out faster.
Step-by-Step Coil Cleaning Process
Turn off the unit and ensure the defrost cycle has completed. For the evaporator coil, use a soft brush or compressed air to gently remove loose dust and debris from the fin surfaces. For stubborn buildup, apply a specialized coil cleaner like Evaporator Fresh Coil Cleaner #17984, which is formulated to work safely in cold environments.
The condenser coil requires similar attention but occurs outside the cooler unit. Use a fin comb to straighten any bent fins before cleaning. Compressed air removes debris from the exterior coil, followed by a degreaser spray if buildup is heavy.
Perform this cleaning every three months, or more frequently if the cooler operates in a dusty environment. Quarterly coil cleaning is one of the highest-impact tasks you can perform to keep your system efficient.
Preventing Mold and Drain Line Blockages
Mold growth on evaporator coils happens because the cold surface collects condensation, creating an ideal environment for bacterial growth. The drain pan beneath the evaporator coil channels this condensation away, but if the drain line clogs, water backs up and accelerates mold formation.
Inspect your drain line monthly by checking that water flows freely from the drain pan outlet. If you notice water pooling in the pan or smell musty odors inside the cooler, the drain is likely blocked. Clear blockages using a small wire brush or compressed air, working gently to avoid damaging the line. Pour a mixture of mild detergent and hot water down the drain line every month to keep it clear and discourage bacterial buildup.
Inspecting Door Gaskets and Seals
A worn or damaged door gasket is one of the most common sources of energy waste in walk-in coolers. The gasket creates an airtight seal when the door closes, keeping cold air inside. When the gasket deteriorates, cold air leaks out, forcing the compressor to cycle more frequently and work harder to maintain temperature.
Testing for Air Leaks and Replacing Worn Gaskets
Test your door gasket by closing a dollar bill in the door and pulling gently. If the bill slides out easily, the seal is compromised. Perform this test around the entire door perimeter. Visual inspection also reveals problems, look for cracks, tears, or areas where the gasket no longer makes contact with the door frame.
Replacement gaskets are available in snap-in (dart) and push-in styles, depending on your cooler model. Before installation, soak the new gasket in hot water for several minutes to make it flexible enough to seat properly in the channel.
Inspect gaskets quarterly and replace them every 2-3 years, or sooner if you notice deterioration.
Walk-In Cooler Maintenance Checklist: Monthly and Seasonal Tasks
Structured maintenance prevents surprises. Use this checklist to ensure nothing falls through the cracks.
Monthly Inspection Checklist
- Test door gasket with dollar bill test around entire perimeter
- Inspect evaporator coil for visible frost or debris buildup
- Check drain pan for standing water or odors
- Pour mild detergent solution down drain line
- Verify temperature reading on thermostat matches setpoint
- Listen for unusual compressor sounds or fan noise
- Check hinges and latches for smooth operation
- Inspect floor for debris or spills that could block drainage
Seasonal Deep-Cleaning Schedule
Spring (March-April):
- Deep clean evaporator and condenser coils
- Replace air filters if your unit has them
- Inspect refrigerant lines for visible leaks or damage
- Lubricate door hinges and latch mechanisms
Summer (June-July):
- Increase inspection frequency to every 2 weeks (peak cooling season)
- Monitor temperature stability during high-volume periods
- Clean condenser coil more frequently if outdoor unit is dusty
Fall (September-October):
- Perform comprehensive defrost cycle test
- Inspect insulation around door frame and seams
- Check all electrical connections for corrosion
Winter (December-January):
- Monitor for frost accumulation during defrost cycles
- Inspect for condensation or ice buildup inside cooler
- Test emergency alarm systems if equipped
| Task | Frequency | Time Required | Impact |
|---|---|---|---|
| Door gasket test | Monthly | 5 minutes | Prevents energy waste and temperature loss |
| Coil cleaning | Quarterly | 30-45 minutes | Maintains efficiency and prevents mold |
| Drain line flush | Monthly | 10 minutes | Prevents blockages and odors |
| Hinge lubrication | Quarterly | 10 minutes | Extends hinge life and ensures smooth operation |
| Temperature verification | Monthly | 2 minutes | Confirms food safety compliance |
| Defrost cycle inspection | Seasonally | 15 minutes | Prevents ice buildup and system damage |
Walk-In Cooler Energy Efficiency: Optimization Strategies
Energy consumption directly correlates with maintenance quality. A well-maintained walk-in cooler operates at peak thermal efficiency, consuming less power while maintaining consistent temperatures.
Improving Thermal Efficiency and Reducing Operating Costs
Ensure your cooler is properly insulated and free of air leaks. Check the insulation around the door frame and along seams for gaps or deterioration. Optimize your temperature setpoint, most walk-in coolers maintain 35-38°F for produce and dairy, but verify your specific requirements with your health department.
Manage airflow inside the cooler. Proper spacing of stored items allows cold air to circulate freely. Blocking vents or stacking products against the evaporator coil reduces efficiency and creates temperature dead zones. Consider upgrading to LED lighting if your cooler still uses traditional fluorescent or incandescent bulbs, which use significantly less energy while producing less heat.
Temperature Monitoring and Humidity Control
Install a reliable thermometer or temperature monitoring system. Many facility managers rely on the cooler's built-in thermostat, but these can drift over time. A second independent thermometer confirms that your setpoint matches actual temperature.
For critical applications, consider a remote monitoring solution like E-Control Systems or Swift Sensors, which provide real-time temperature and humidity tracking with cloud-based alerts.
Walk-In Cooler Troubleshooting: Identifying Common Problems
Not every issue requires a technician. Learning to diagnose basic problems saves time and money.
Temperature Fluctuations and Compressor Issues
If your cooler temperature fluctuates by more than 3-5°F throughout the day, something is wrong. Start by checking the door gasket, a leaking seal is the most common cause. If the gasket is intact, inspect the evaporator coil for frost or debris buildup.
Listen to your compressor. Normal operation produces a steady humming sound. If you hear clicking, grinding, or irregular cycling, the compressor may be failing. An undersized unit that runs continuously without reaching setpoint suggests refrigerant loss or compressor wear. If frost accumulates on the evaporator coil and doesn't melt away during defrost, the defrost heater may have failed.
Refrigerant Leak Detection and Fan Motor Performance
Refrigerant leaks are the most common cause of cooling loss in walk-in systems. Small leaks develop slowly, causing gradual temperature rise over weeks or months. Visual inspection can identify some leaks, look for oily residue around refrigerant line connections, which indicates slow seepage. For suspected leaks, use a refrigerant leak detector like the Leak-Tec 372G-15, which uses bubble testing to pinpoint leak locations.
Fan motor performance affects both cooling and noise levels. If your cooler is running but not cooling adequately, check that the condenser fan is spinning. A frozen or stuck fan blade prevents heat rejection and reduces cooling capacity.
When to DIY vs. When to Call a Professional HVAC Technician
Knowing your limits prevents costly mistakes and ensures safety compliance.
Safe Maintenance Tasks You Can Handle
You can safely perform these tasks without special certification: coil cleaning, drain line flushing, gasket testing, and visual inspections. Lubrication of door hinges, latch mechanisms, and fan motor bearings with food-grade oil is straightforward. Installing independent thermometers and checking temperature readings is valuable. Cleaning leaves and debris from the condenser unit and clearing blocked vents are simple maintenance tasks. If your cooler has replaceable air filters, changing them monthly improves efficiency and is completely safe.
Repairs Requiring EPA 608-Certified Technicians
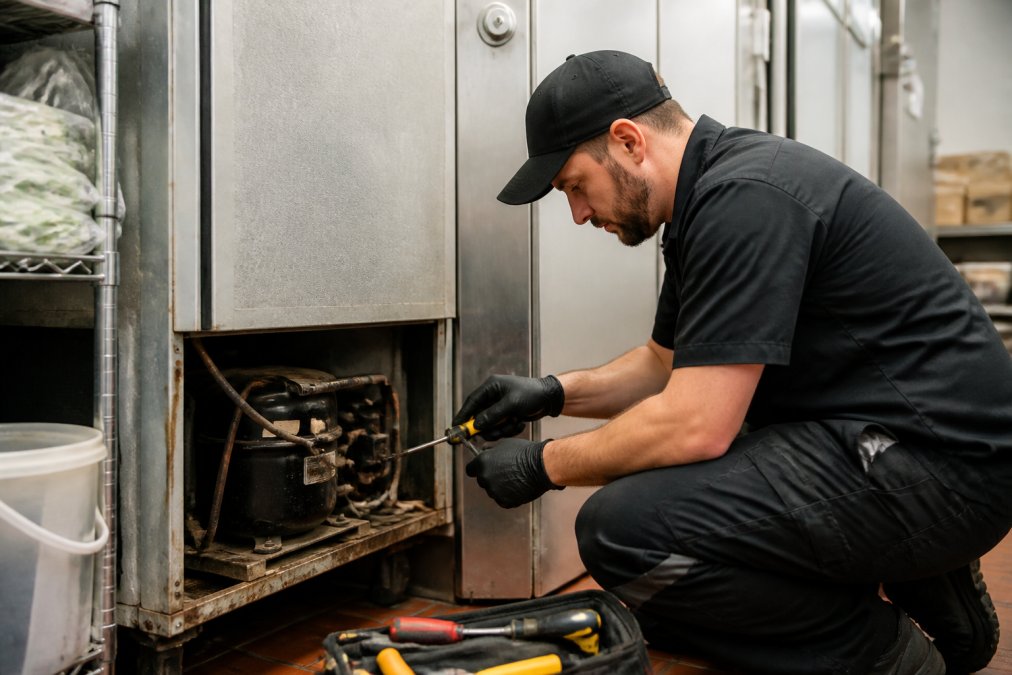
Refrigerant work is legally restricted. Only EPA 608-certified technicians can add or remove refrigerant, repair refrigerant line leaks, replace compressors or condensing units, service sealed-system components, or perform pressure testing or evacuation procedures. Electrical work beyond simple circuit breaker resets also requires a licensed electrician.
Home Tech employs EPA 608-certified technicians who handle complex refrigeration repairs for restaurants and food service operators throughout the Phoenix metro area. We offer same-day emergency service because cooler downtime costs you money. Our technicians arrive with the tools and expertise to diagnose and repair sealed-system problems quickly, and we stand behind every repair with a 100% satisfaction guarantee.
Walk-In Cooler Repair Cost: Understanding Maintenance Investment
Preventative maintenance costs significantly less than emergency repairs. Emergency repairs escalate costs dramatically, a compressor replacement can exceed two thousand dollars plus labor, and a refrigerant leak requiring line repair and recharge runs one thousand to fifteen hundred dollars. Food loss during downtime often exceeds the repair cost itself.
Budget for preventative maintenance as a line item in your operational expenses. Most facility managers find that spending three hundred to five hundred dollars annually on routine maintenance prevents emergency repairs that cost five to ten times that amount.
Walk-in cooler failures are preventable. The best ways to maintain walk-in cooler equipment come down to consistent inspection, regular cleaning, and knowing when to call a professional. If your cooler is currently running without a maintenance schedule, starting one today will extend equipment life and protect your inventory. Home Tech's EPA 608-certified technicians can assess your current system, recommend a maintenance plan tailored to your operation, and handle any repairs that require professional expertise. Call (602) 486-1901 or visit hometechappliancerepair.com to schedule your cooler inspection and get a maintenance plan in place.
External Sources
Research from U.S. Environmental Protection Agency refrigeration efficiency guidelines shows that properly maintained commercial refrigeration systems consume 15-20% less energy than neglected systems.
According to ASHRAE guidelines for commercial refrigeration maintenance, quarterly inspection and cleaning of coils extends compressor life by an average of three to five years.
The Food and Drug Administration Food Safety Modernization Act requirements mandate temperature monitoring and documentation for all refrigerated food storage, making reliable cooler maintenance a legal compliance requirement.
Frequently Asked Questions
How often should I perform walk-in cooler maintenance?
Monthly inspections of door gaskets, coils, and temperature setpoints are essential. Deep cleaning of evaporator coils and condenser fins should occur every 3 months or more frequently in high-use environments. Seasonal maintenance, especially before peak demand periods, prevents unexpected failures. Drain lines need clearing at least monthly to prevent blockages that compromise the defrost cycle and thermal efficiency.
What's included in a walk-in cooler maintenance checklist?
A comprehensive walk-in cooler maintenance checklist includes cleaning evaporator and condenser coils, inspecting door gaskets for air leaks, checking fan motor operation, testing temperature and humidity control, lubricating hinges and latches, clearing drain lines, verifying proper airflow around stored food, and inspecting the compressor for unusual noise. Monthly tasks focus on visual inspection and cleaning; seasonal tasks involve deeper component servicing to ensure operational uptime.
How can I improve walk-in cooler energy efficiency?
Energy efficiency improvements include replacing worn door gaskets to prevent air leaks, installing remote temperature monitoring systems to optimize setpoints, ensuring proper airflow by not blocking evaporator vents with stored goods, cleaning condenser fins regularly to improve heat rejection, and maintaining proper defrost cycle timing. LED lighting upgrades and insulation checks also reduce energy consumption. These measures lower operating costs while extending compressor life and maintaining food safety standards.
What are the most common walk-in cooler problems I should troubleshoot?
Common issues include temperature fluctuations caused by worn gaskets or clogged evaporator coils, refrigerant leaks indicated by reduced cooling capacity, fan motor failures that reduce airflow, and drain line blockages leading to standing water and mold. Compressor cycling problems often stem from dirty condenser coils or faulty thermostats. Many problems are preventable through regular maintenance; however, refrigerant leak detection and compressor diagnostics require EPA 608-certified technicians.
When should I call a professional instead of DIY maintenance?
DIY tasks include cleaning accessible coils, replacing gaskets, clearing drain lines, and lubricating hinges. Call a professional HVAC technician for refrigerant work, compressor diagnostics, fan motor replacement, electrical repairs, and any sealed-system troubleshooting. EPA 608 certification is required for refrigerant handling. If temperature won't stabilize after basic maintenance, or if you suspect a leak, professional service prevents costly food loss and system damage.
How does preventative maintenance affect walk-in cooler repair costs?
Regular preventative maintenance significantly reduces long-term repair costs by extending compressor life, preventing emergency downtime, and catching small issues before they become expensive failures. A worn gasket costs $50+ to replace but leads to thousands in food loss if ignored. Monthly coil cleaning prevents compressor strain and expensive sealed-system repairs. While maintenance requires upfront investment, it avoids catastrophic failures requiring full system replacement, a far costlier outcome for restaurants and food service operations.
What's the difference between walk-in cooler maintenance and walk-in freezer maintenance?
Both require similar core maintenance, coil cleaning, gasket inspection, and temperature monitoring. Freezers operate at lower temperatures (typically -4°F to 0°F vs. 35°F to 40°F for coolers), which means defrost cycles run more frequently and drain lines are more prone to freezing. Freezer coils may accumulate frost faster, requiring more frequent cleaning. Both require the same preventative schedule, but freezers demand closer attention to drain line management and defrost cycle timing to prevent ice buildup and compressor strain.