 how-to guide
How to Troubleshoot Refrigerator Ice Maker: 8 Steps
Table of Contents
- What You'll Need
- Safety First
- Step 1: Verify the Ice Maker Is Turned On
- Step 2: Check Freezer Temperature Settings
- Step 3: Inspect the Water Supply Line for Kinks and Blockages
- Step 4: Examine the Water Filter and Water Pressure
- Step 5: Prime the Water System
- Step 6: Reset the Ice Maker and Control Board
- Refrigerator Ice Maker Not Making Ice: When to Call a Professional
- Frequently Asked Questions
How to Troubleshoot Refrigerator Ice Maker: 8 Steps
Last Updated: August 2, 2026
When your refrigerator ice maker stops working, you're looking at melted drinks and warm beverages. Learning how to troubleshoot ice maker issues can save you hundreds in service calls and resolve problems within hours. Most ice maker problems fall into one of three categories: power and control issues, water supply problems, or mechanical blockages. You can test each category systematically without special tools.
What You'll Need
Gather these basic items before starting: flashlight or headlamp, flathead screwdriver, multimeter (optional, for testing electrical components), bucket or towel, adjustable wrench, and ice maker manual. Most of these items are already in your home.
Safety First
Shut off the water supply to your refrigerator before disconnecting any water lines. The shut-off valve is usually located under your kitchen sink or behind the refrigerator. Turn it clockwise until water stops flowing.
Unplug your refrigerator from the electrical outlet before accessing internal components or the control board. Never force frozen components apart. If ice has accumulated inside the ice maker assembly, thaw it gently using a heat gun on low setting or by letting warm air circulate for 30 minutes.
Step 1: Verify the Ice Maker Is Turned On
The simplest reason an ice maker stops producing ice is that it's been switched off. Most refrigerators have an ice maker power switch located on the front of the ice maker assembly (visible inside the freezer) or accessible through a control panel on the exterior.
Check your ice maker's power switch. If it's in the OFF position, flip it to ON. Wait 24 hours for the system to cycle and begin ice production. The first batch of ice may taste slightly off or contain sediment, this is normal as the system flushes itself.
Step 2: Check Freezer Temperature Settings
Ice makers require freezer temperatures of 0°F or colder to produce ice. Set the freezer to 0°F (or the coldest setting on older models) and leave it unchanged for 4-6 hours, then check if ice production resumes.
Use a standalone freezer thermometer to verify the actual temperature inside the freezer. If the dial shows 0°F but the thermometer reads 15°F or higher, your refrigerator's thermostat or compressor may be failing.
Step 3: Inspect the Water Supply Line for Kinks and Blockages
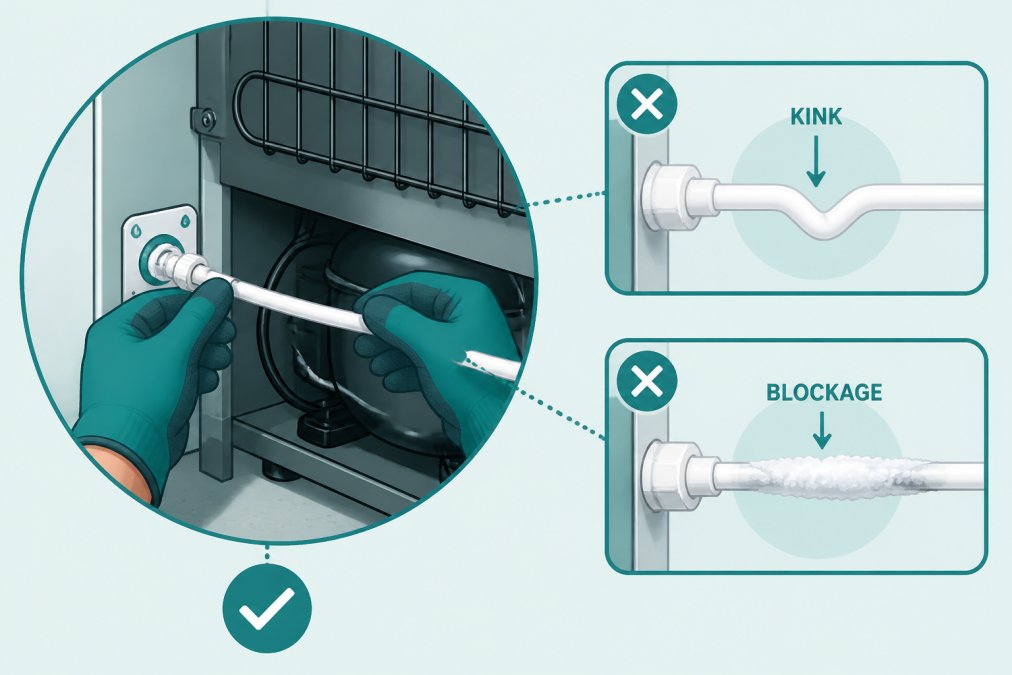
The water supply line connects your refrigerator to the main water supply and delivers water to the ice maker. If this line is kinked, frozen, or clogged, water can't reach the ice mold.
Locate the water supply line behind your refrigerator. It's typically a thin plastic or copper tube running from the wall shut-off valve to the back of the unit. Trace it carefully and look for visible kinks, bends, or damage. Even a small kink can restrict water flow enough to stop ice production. If you find a kink, gently straighten the line by hand. If the line is permanently creased or damaged, you'll need to replace it, an inexpensive part (typically $15-$30).
Checking for Frost Buildup
Frost accumulation inside the water line is common in freezers. Feel the tube from the wall valve toward the refrigerator. A frozen section will be noticeably colder and rigid, typically near the refrigerator's back panel where cold air circulates.
Turn off the water supply at the wall shut-off valve. Disconnect the water line from the refrigerator (have a bucket ready). Hang the line vertically or lay it in a bathtub. Use a heat gun on low setting or pour warm water over the frozen section. Once thawed, reconnect the line and turn the water supply back on. Check for leaks at both connection points.
Step 4: Examine the Water Filter and Water Pressure
Your refrigerator's water filter removes sediment and chlorine from incoming water. A clogged filter restricts water flow to the ice maker, resulting in slow ice production or no ice at all. Most filters should be replaced every 6 months.
Locate your refrigerator's water filter, usually mounted inside the fridge (often in the upper right corner), under the sink, or behind the refrigerator. Check the filter housing for a date label or replacement indicator. If the filter is more than 6 months old, replace it with a new one matching your refrigerator's model number. After replacing the filter, run water through the dispenser for 3-5 minutes to flush air from the line.
If the filter is new, the problem may be low water pressure. Water pressure below 20 PSI prevents the solenoid valve from opening fully. Check your home's water pressure using a pressure gauge (available at hardware stores for $10-$20). Normal household water pressure ranges from 40 to 80 PSI. If your pressure is below 20 PSI, contact your water utility.
Water Quality and Mineral Buildup
Hard water causes mineral deposits inside the ice maker's water inlet valve and mold. If you have hard water (you'll notice white scale on faucets and shower heads), mineral buildup is likely contributing to your ice maker problems. Descaling the water inlet valve requires disconnecting the water line and flushing it with white vinegar or a commercial descaling solution.
Step 5: Prime the Water System
After replacing the water filter, disconnecting the water line, or thawing a frozen line, you need to prime the system, remove air from the water line so water can flow freely to the ice maker.
Locate the ice maker's water inlet valve, usually on the back of the refrigerator or inside the freezer compartment. It's a small solenoid valve with electrical connections. With the water supply turned on, manually activate the solenoid by pressing a small button or lever on the valve (consult your manual for the exact location). Hold the valve open for 5-10 seconds. You should hear water flowing or see water dripping from the outlet. Repeat this 2-3 times until water flows steadily without sputtering.
Alternatively, use your refrigerator's water dispenser to prime the system by pressing the dispenser lever for 30 seconds. After priming, wait 4 hours for the ice maker to cycle and produce its first batch of ice.
Step 6: Reset the Ice Maker and Control Board
If you've checked power, temperature, water supply, and water pressure and the ice maker still isn't working, a reset may restore normal operation.
Most ice makers have a manual reset button located on the ice maker assembly itself, usually on the side or back. Press and hold this button for 10 seconds. You should hear a click or feel the mechanism move. Release the button and wait 24 hours for ice production to resume.
Some refrigerators have a diagnostic mode that tests ice maker components and displays error codes. To access diagnostic mode, press specific button combinations on your control panel (the exact sequence varies by brand, check your manual). Common codes include: E1 or E2 (water inlet valve or water supply problem), E3 or E4 (temperature sensor failure), and E5 or E6 (motor or ejector arm failure).
For a full system reset, unplug your refrigerator for 5 minutes, then plug it back in. This resets the control board to factory defaults. After plugging back in, set your temperature preferences again and wait 24 hours.
Refrigerator Ice Maker Not Making Ice: When to Call a Professional
If you've completed all six troubleshooting steps and your ice maker still isn't producing ice, the problem likely involves a component that requires professional repair: the solenoid valve, the water inlet valve, the ejector arm motor, or the control board.
Home Tech serves the Phoenix metro area with same-day and next-day appointments for ice maker repair. Our EPA 608-certified technicians service all major refrigerator brands, including GE, Whirlpool, LG, Samsung, and Maytag. We repair water inlet valves, solenoid valves, ejector arms, and control boards, and we stand behind every repair with a 100% satisfaction guarantee. Call (602) 486-1901 or visit hometechappliancerepair.com to book your appointment.
DIY Multimeter Testing for Solenoid Valves
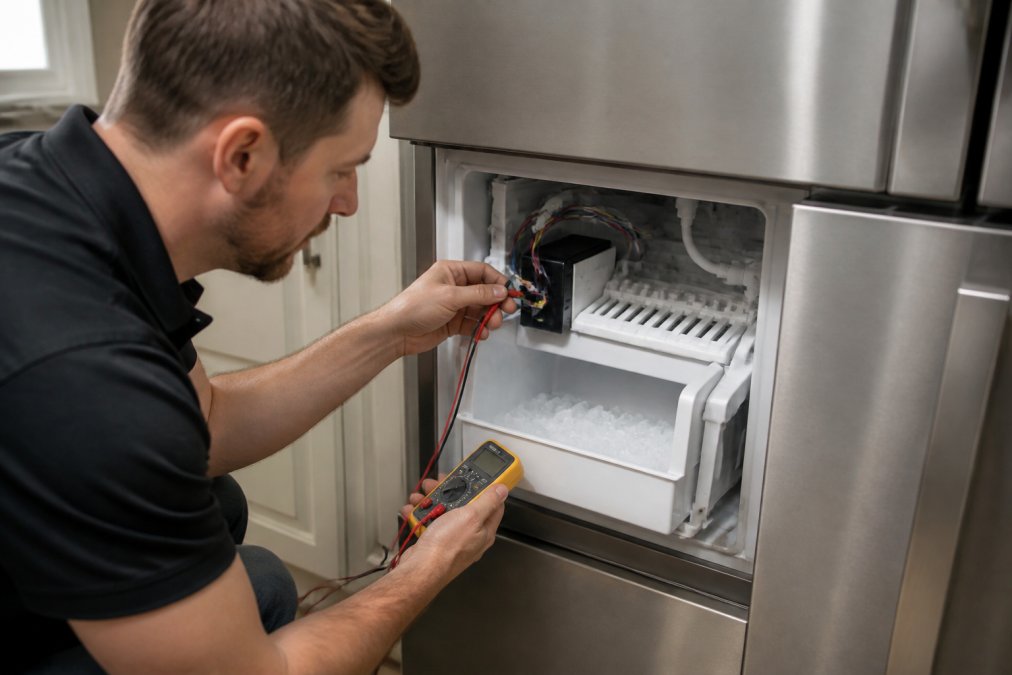
If you're comfortable using electrical tools, you can test the solenoid valve yourself with a multimeter. Unplug the refrigerator. Locate the solenoid valve on the water inlet line and disconnect the wiring harness. Set your multimeter to the resistance setting (Ohms). Touch the multimeter probes to the two solenoid terminals. A working solenoid typically reads between 500 and 2,000 Ohms. If the reading is 0 or infinity, the solenoid is faulty and needs replacement.
Noise-Based Diagnostics
A clicking or humming sound when the ice maker should be producing ice suggests the motor is trying to cycle but the ejector arm is stuck. A continuous buzzing sound without movement indicates the solenoid valve is trying to open but can't, usually because of a water pressure problem or a faulty valve. A grinding or scraping noise suggests the ejector arm is striking ice or plastic components. Silence when the ice maker should be running indicates no power is reaching the ice maker.
Learning how to troubleshoot refrigerator ice maker problems puts you in control of one of the most common appliance failures. Most homeowners can resolve issues in the first five steps without professional help. If you've worked through the entire guide and your ice maker still isn't working, Home Tech can handle the repair. We offer same-day service throughout the Phoenix area and guarantee your satisfaction. Contact us at (602) 486-1901 to schedule your appointment.
| Troubleshooting Step | Time Required | When to Move Forward |
|---|---|---|
| Check power switch | 2 minutes | If ice maker is off, turn on and wait 24 hours |
| Verify freezer temperature | 10 minutes | If temperature is below 0°F, move to Step 3 |
| Inspect water supply line | 15 minutes | If line is kinked or frozen, thaw or replace |
| Check water filter and pressure | 20 minutes | If filter is old, replace it; if pressure is low, contact utility |
| Prime the water system | 10 minutes | After any water line work, always prime |
| Reset ice maker | 5 minutes | If all else fails, try a manual or full system reset |
| Call professional | varies | If no ice after 24 hours following these steps |
Frequently Asked Questions
Why is my ice maker not making ice even after I checked the water supply?
If water is reaching the ice maker but no cubes form, the issue typically lies with the water inlet valve, solenoid, or control board. The water inlet valve controls flow into the ice mold; if it's stuck closed or the solenoid is faulty, water won't fill the mold. The control board sends electrical signals to trigger the freezing cycle. Test the water inlet valve with a multimeter to check continuity, or listen for a clicking sound when the cycle runs. If the ejector arm isn't moving or the defrost cycle is malfunctioning, cubes won't eject properly. Professional testing with diagnostic equipment can pinpoint which component has failed.
How do I reset my ice maker if it's stuck or producing small cubes?
Most ice makers have a reset button (usually red or black) located on the front or side of the unit. Press and hold it for 3-5 seconds until you hear a click or the light blinks. Some models require you to turn off the ice maker switch first, wait 30 seconds, then turn it back on. After resetting, allow 24 hours for the first batch of ice to form; initial cubes are often smaller as the system recalibrates. If the reset doesn't work, check your refrigerator manual for the specific reset procedure for your brand, Samsung, LG, and Whirlpool models vary slightly in their reset methods.
What should I do if my ice maker water line is frozen?
A frozen water line stops water from reaching the ice mold entirely. First, locate the water line behind your refrigerator and check for visible frost or kinks. If frozen, disconnect the line at both ends and apply warm (not boiling) water to thaw it, or use a hair dryer on low heat. For prevention, ensure your freezer temperature isn't below 0°F and check that the water line isn't exposed to drafts. High water pressure can also cause freeze-ups; verify your water pressure is between 20-120 PSI. If the line freezes repeatedly, mineral buildup inside may be restricting flow and causing ice formation, consider replacing the water filter or the line itself.
When should I call a professional instead of troubleshooting myself?
Call a professional if you've completed all basic troubleshooting steps (reset, water filter replacement, temperature check) and the ice maker still doesn't work. Also seek help if you hear unusual grinding or clicking noises, see water leaking inside the freezer, or suspect a faulty solenoid or control board. Testing internal components like the thermistor or wiring harness requires a multimeter and knowledge of your specific refrigerator model. For sealed-system issues or if your refrigerant lines need service, professional EPA 608-certified technicians are required. Same-day or next-day service is often available for food storage emergencies.