 how-to
Why Is My Dryer Making a Loud Squeaking Noise? 2026 Guide
Table of Contents
- Common Causes of a Dryer Squeaking Noise
- Diagnostic Steps: Pinpointing the Noise Source
- Dryer Drum Roller Replacement: A Step-by-Step Guide
- How to Lubricate Dryer Parts Safely
- Dryer Repair Cost Estimate: Is It Worth Fixing?
- Preventative Maintenance Schedule for Your Dryer
- When to Call a Professional for Dryer Repair
- Frequently Asked Questions
Last Updated: September 14, 2026
Common Causes of a Dryer Squeaking Noise
If you're asking why is my dryer making a loud squeaking noise, it almost always traces back to friction between moving parts that should spin freely. The four usual suspects are worn drum rollers, a failing idler pulley, a glazed drive belt, and damaged drum bearings. This guide covers how to identify each one, what a dryer drum roller replacement involves, and when repair stops making financial sense.
Most squeaks are mechanical, not electrical, which is good news. It means the fix is usually a replaceable part rather than a new machine. The U.S. Department of Energy's appliance energy use guidance notes that dryers are among the highest energy consumers in a typical home, so keeping an older unit running efficiently has real value.
Below, we'll show you how to trace the noise to its source. But first, here's what most guides get wrong: they tell you to replace every roller at once without checking whether the squeak is even coming from the drum.
Worn Drum Rollers and Roller Shafts
Drum rollers are the wheels that support the drum as it rotates. When their bearings wear out, the drum grinds against the roller shafts instead of gliding on them, producing a rhythmic squeak that matches the drum's rotation speed.
A common mistake is replacing the rollers but ignoring the shafts. A scored or rusted shaft will chew through a new roller in weeks, so inspect both and replace the shaft if it shows grooving or discoloration.
Flat spots on the roller surface cause a thumping squeak once per revolution. Spin each roller by hand while the dryer is unplugged; a healthy roller turns smoothly and silently.
Failing Idler Pulley and Drive Belt
The idler pulley keeps tension on the drive belt, and its bearing is the most common source of a high-pitched squeal. When that bearing dries out, you get a continuous squeal that starts the moment the drum turns.
The drive belt can also squeak. A glazed, cracked, or shiny belt slips against the motor pulley, creating a chirp. Belt tension matters: too loose and it slips, too tight and it overloads the idler bearing.
Diagnostic Steps: Pinpointing the Noise Source
Pinpointing the noise takes about 15 minutes with the dryer unplugged and the cabinet open. Work through these steps in order, since each eliminates a category of failure before you spend money on parts.
- Unplug the dryer and pull it away from the wall for access.
- Remove the front panel or top panel per your model's service manual.
- Spin the drum by hand. Listen for grinding or a rhythmic squeak at the drum support.
- Inspect the drive belt for glazing, cracks, or fraying.
- Check the idler pulley for play, roughness, or a dry bearing sound.
- Examine each drum roller and shaft for flat spots, rust, or scoring.
- Look for lint buildup around the rollers and blower housing.
Lint buildup is an underrated culprit. It packs into bearing surfaces, attracts moisture, and accelerates wear on every rotating part. Cleaning it out is free and often quiets a marginal squeak on its own.
Match the Sound to the Failure
Most guides tell you to replace parts until the noise stops. A faster approach is to match the rhythm and pitch of the squeak to the mechanism producing it, the pattern experienced technicians use to narrow the source before touching a wrench.
| Sound pattern | When it happens | Most likely source |
|---|---|---|
| Rhythmic squeak, once per drum revolution | Steady during the cycle | Flat-spotted drum roller or scored roller shaft |
| Continuous high-pitched squeal | Starts the moment the drum turns | Idler pulley bearing running dry |
| Chirp that pulses with belt speed | Under load, worse with heavy loads | Glazed or slipping drive belt |
| Low grinding that rises with drum speed | Worsens as the cycle continues | Drum bearing or seized roller |
| Squeak only at startup, fades in seconds | First few seconds of the cycle | Belt or idler settling into tension |
| Squeak plus weak airflow or long dry times | Throughout the cycle | Blower wheel or vent restriction, not the drum |
If you're wondering why is my dryer making a loud squeaking noise that repeats once per drum revolution, that rhythm signals a roller problem, since the drum contacts each roller once per turn. A continuous squeal that never breaks rhythm points to the idler pulley, which spins constantly whenever the belt moves. If pitch rises and falls with drum speed, the source is on the rotating assembly; if it stays constant, suspect the blower or a vent restriction.
Gas vs. Electric: What Changes
The drum support system, rollers, shafts, belt, and idler pulley, is mechanically similar on gas and electric dryers, so most squeaks trace to the same parts on both. What differs is what else lives inside the cabinet and what you should not touch.
- Electric dryers use a heating element and a thermal fuse. A loose element coil can rattle, but that is a buzz, not a squeak, and it is a different repair.
- Gas dryers add a burner assembly, gas valve, and igniter. A squeak near the burner is unusual and should be treated as a safety concern rather than a DIY job. Any work near the gas line, burner, or igniter belongs to a qualified technician.
- Both types share the blower wheel, which can collect lint and produce a scraping or squealing sound that mimics a bearing failure. Spin the blower wheel by hand with the belt off to rule it out.
Startup Squeak vs. Continuous Noise
A squeak that appears only at startup and fades within seconds usually points to the drive belt or idler pulley settling into tension. A continuous noise points to a worn drum bearing or a seized roller.
Metal-on-metal grinding that worsens as the drum speeds up is the most serious pattern. It suggests drum bearing failure, and running the machine in that state can damage the drum itself.
Dryer Drum Roller Replacement: A Step-by-Step Guide
Dryer drum roller replacement is straightforward on most models but requires full disassembly of the drum support system. Budget roughly an hour for a first attempt, and photograph each step as you go.
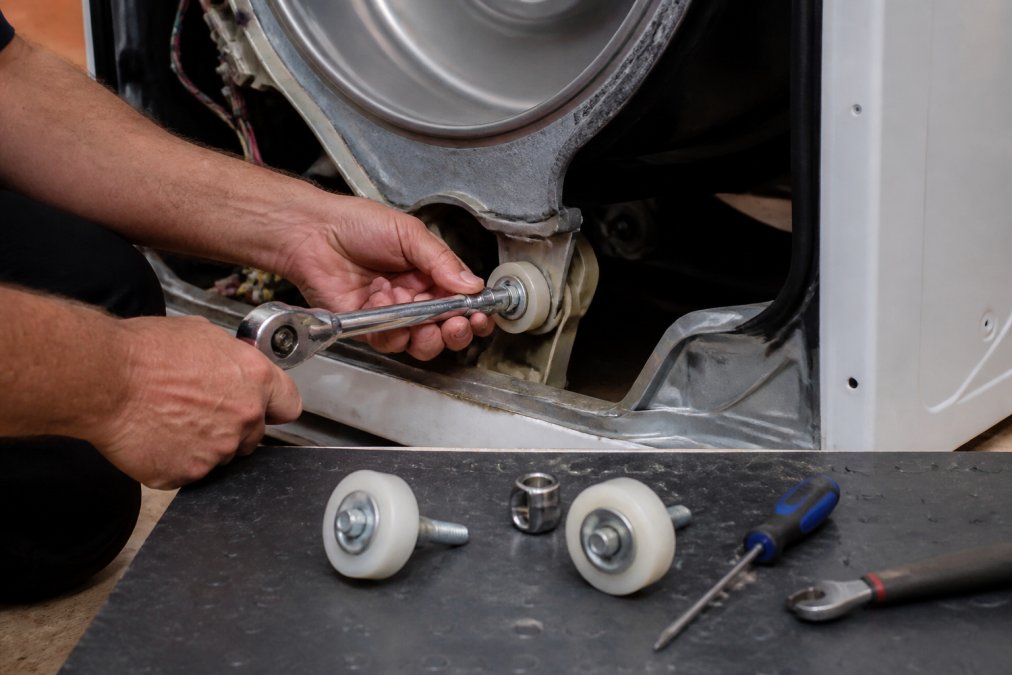
What you'll need: a nut driver set, socket set, replacement roller kit, replacement roller shafts if scored, and a shop vacuum for lint removal.
- Disconnect power and remove the dryer's front panel.
- Release the drive belt from the idler pulley and motor pulley.
- Lift the drum out and set it aside on a padded surface.
- Remove the old rollers from their shafts at the front and rear drum supports.
- Inspect and replace the roller shafts if they show any wear.
- Vacuum out lint from the roller wells and blower housing.
- Install the new rollers, applying a small amount of high-temperature lubricant where the manufacturer specifies.
- Reassemble in reverse order, reseating the belt around the motor pulley and idler.
- Spin the drum by hand before restoring power to confirm smooth rotation.
Expected result: the drum should spin freely with no rhythmic squeak and no side-to-side play.
How to Lubricate Dryer Parts Safely
Lubricating dryer parts safely means using only high-temperature, manufacturer-approved lubricant, sparingly. Household oils and greases break down under dryer heat, turn gummy, and make the squeak worse within weeks.
- Use high-temperature grease rated for appliance bearings, not WD-40 or general-purpose oil.
- Apply to the roller shaft and bearing surface only, never to the drive belt or pulleys.
- Wipe away excess so it can't fling onto the belt and cause slipping.
- Never lubricate sealed bearings. If a bearing is sealed, it's meant to be replaced, not greased.
A common mistake is spraying lubricant into the idler pulley bearing. That buys a quiet week and a louder squeal afterward. If the idler bearing is dry or rough, replace the pulley.
Dryer Repair Cost Estimate: Is It Worth Fixing?
A dryer repair cost estimate depends on the part and labor involved, not a flat rate. Rollers, belts, and idler pulleys are inexpensive, and the repair is usually worth doing on a machine under ten years old. Drum bearing or motor work changes the math.
Use this framework to decide:
| Symptom | Likely Part | Repair vs. Replace |
|---|---|---|
| Rhythmic squeak, drum speed | Drum rollers and shafts | Repair |
| Continuous squeal from startup | Idler pulley bearing | Repair |
| Chirping, slipping belt | Drive belt | Repair |
| Metal-on-metal grinding | Drum bearings | Compare against replacement |
| Squeak plus poor drying | Blower or vent blockage | Repair and clean vent |
The rule of thumb: if the repair cost approaches half the price of a comparable new dryer, and the machine is past its expected service life, replacement deserves serious consideration. For most roller, belt, and idler repairs, fixing is the cost-effective choice.
Preventative Maintenance Schedule for Your Dryer
A preventative maintenance schedule is the best way to avoid a repeat squeak. Most dryer noise complaints trace back to lint, worn lubrication, and ignored early symptoms. Here's a schedule that works.
| Task | Frequency | Why It Matters |
|---|---|---|
| Clean the lint filter | Every load | Airflow and fire safety |
| Inspect the vent duct | Monthly | Prevents overheating and lint buildup |
| Vacuum roller wells and blower | Every 6 months | Removes abrasive lint from bearings |
| Check belt and idler pulley | Annually | Catches wear before failure |
| Level the dryer | Annually | Prevents uneven drum load and noise |
| Lubricate per manufacturer spec | As directed | Keeps bearings quiet |
An unlevel dryer is easy to overlook. If the machine rocks, the drum rides unevenly on its rollers and one side wears faster. A spirit level and a wrench fix that in five minutes.
When to Call a Professional for Dryer Repair
Most squeaks traced to rollers, belts, or the idler pulley are within reach of a patient DIYer with basic hand tools. Calling a professional usually comes down to three things: safety, access, and whether the diagnosis has stalled.
Call a Professional If Any of These Apply
- You smell gas, or the dryer is a gas model and the noise is near the burner. Any work on or near the gas line, gas valve, burner assembly, or igniter should be handled by a qualified technician. This is not a judgment call.
- You see scorching, melted wiring, or a burning smell. Unplug the dryer and stop. Electrical faults are not a squeak repair.
- The noise persists after you've inspected the belt, rollers, shafts, and idler pulley. A squeak that survives a full teardown and part inspection often points to the drum bearing, motor bearing, or blower, jobs that require deeper disassembly and, on some models, specialty tools.
- You hear metal-on-metal grinding that worsens with drum speed. This is the pattern most likely to damage the drum if ignored. A technician can confirm whether the drum itself is salvageable.
- Disassembly requires steps you're not comfortable with. Front-loading and stacked units, in particular, have panel and drum-removal sequences that vary by model and are easy to get wrong.
- The dryer is still under a manufacturer warranty. Opening the cabinet yourself can void coverage on some models. Check the warranty terms before you start.
What a Technician Actually Does
A good technician diagnoses the noise source rather than replacing parts on a guess: spinning the drum and idler by hand with the belt off, checking each roller and shaft for flat spots and scoring, inspecting the blower wheel for lint, and confirming the drum bearing is sound before quoting a repair. If the diagnosis points to a low-cost part, the repair is usually straightforward; if it points to the drum bearing or motor, the technician should walk you through the repair-versus-replace math before you commit.
The Safety Question Most Guides Skip
A squeak itself is rarely dangerous. What makes it worth attention is what it can become. A seized roller or failing drum bearing can score the drum, turning a low-cost repair into a major one (repairclinic.com). Lint packed around hot components is a fire risk independent of the noise (usfa.fema.gov). And on gas models, work near the burner or gas line carries risks no squeak repair justifies taking on yourself.
If you're unsure whether a noise is mechanical or something more serious, unplug the dryer and get a diagnosis before running another load. Most repairs traced to rollers, belts, and idler pulleys are inexpensive and restore years of service. The ones that aren't are worth having a professional confirm.
Frequently Asked Questions
Is it safe to use a dryer that is squeaking?
A squeaking dryer is generally safe to run for a short time, but you should avoid using it until you identify the cause. The squeaking noise usually points to a worn idler pulley, drum roller, or drive belt. If ignored, these worn components can fail completely, potentially causing further damage to the drum or motor. For safety, unplug the dryer before inspecting it, and if you smell burning or see smoke, stop using it immediately and call a professional.
Can I use WD-40 to fix my squeaky dryer?
WD-40 is not recommended for lubricating dryer parts. It is a solvent, not a long-term lubricant, and it can attract lint and dust, making the problem worse. Instead, use a high-temperature silicone lubricant or a specialty dryer lubricant. Apply it sparingly to the idler pulley and drum roller shafts. If the squeak persists, the parts may be worn and need replacement rather than lubrication.
How do I know if my dryer drum rollers are bad?
Common signs of bad drum rollers include a rhythmic squeak or thumping sound that changes with the drum's rotation, visible flat spots or wear on the roller, and the drum feeling loose or wobbly when you spin it by hand. You may also notice metal-on-metal grinding. To confirm, unplug the dryer, remove the drum, and inspect each roller for smoothness and damage. Replacing worn rollers is a straightforward DIY repair if you have basic tools.
Does a squeaky dryer mean it is about to break?
Not necessarily, but it is a warning sign. A squeaky dryer often means a component like the idler pulley or drum roller is wearing out. If addressed early, a simple repair can prevent a complete breakdown. Ignoring the noise can lead to a broken drive belt, damaged drum bearings, or a seized motor. A dryer repair cost estimate for a minor fix is usually far less than replacing the appliance, so it is worth investigating promptly.
A squeaking dryer is rarely a mystery once you know where to look, but it is a warning. Left alone, a worn roller or dry idler bearing turns a cheap repair into an expensive one. If you'd rather skip the disassembly and get a definitive diagnosis, Home Tech offers same-day appointments, experienced technicians who service all major brands, and a 100% satisfaction guarantee on every repair. Book an appointment with Home Tech and get your dryer running quietly again.


