how-to
How to Prevent Lint Buildup in Commercial Dryers
Last Updated: November 6, 2026
Quick Summary
Prevent lint buildup by cleaning the lint screen after every load, wiping the screen housing daily, and washing the screen weekly in warm soapy water. Also empty secondary lint collectors, clean ductwork and exterior terminations, and avoid overloading dryers to reduce fiber shedding.
- Pull the lint screen after every load and check it for tears.
- Wash the lint screen weekly in warm soapy water and dry it fully.
- Empty secondary lint collectors weekly and check them on the same schedule as the main screen.
- Load dryers to about two-thirds full so clothes tumble freely.
- Clean the duct run, booster fan, and exterior termination monthly or quarterly.
Table of Contents
- Why Commercial Dryers Collect So Much Lint
- Commercial Dryer Lint Filter Cleaning After Every Load
- How an Industrial Dryer Lint Collector Changes the Job
- Commercial Dryer Vent Cleaning: Ductwork, Booster Fans, and Exterior Terminations
- Load Handling and Washing Habits That Cut Lint at the Source
- Troubleshooting Restricted Airflow and Excess Lint
- Your Commercial Dryer Maintenance Checklist
- Book a Commercial Dryer Inspection Before Lint Becomes a Repair
- Frequently Asked Questions
Why Commercial Dryers Collect So Much Lint
Commercial dryers move a lot of fabric, and every load sheds fibers. A busy laundromat or hotel laundry can run dozens of loads a day, so lint buildup happens fast. Lint buildup is a common cause of dryer problems: the machine often isn't broken, it's buried in its own debris.
Commercial dryers often run hotter and longer than home units, and that heat can make fibers brittle. Brittle fibers break off and become lint.
Where Lint Hides Beyond the Trap
The lint screen catches the big stuff. The rest goes elsewhere:
- The lint screen housing, behind and below the screen
- The blower wheel, where fibers wrap around the fins
- The vent duct, where moist air carries fine lint out
- The exterior termination, where the flap can clog shut
- Around the machine base and back panel, where dust settles
Most people clean the trap and stop. That's where trouble starts.
Commercial Dryer Lint Filter Cleaning After Every Load
Commercial dryer lint filter cleaning is an important habit in any laundry room. A clogged filter cuts airflow, and poor airflow is a common source of dryer problems.
Make it a rule: every load, every machine.
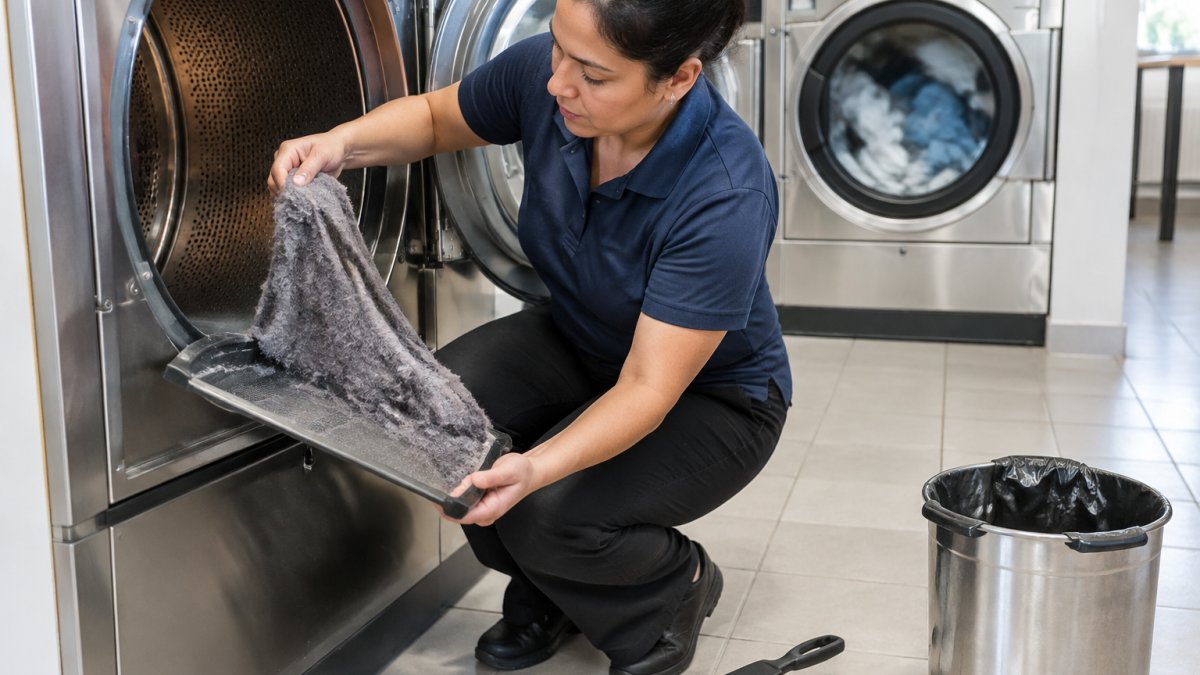
Daily and Weekly Filter Routine
Split the work into daily and weekly tasks so nothing gets missed:
- After every load: Pull the screen, peel off the lint sheet, and check for tears
- Daily: Wipe the screen housing with a dry cloth
- Weekly: Wash the screen in warm soapy water, then let it dry fully
- Weekly: Check the lint collector and blower area for packed fibers
A screen rinsed in water removes the invisible film that a dry brush leaves behind. That film is a hidden airflow killer.
How an Industrial Dryer Lint Collector Changes the Job
An industrial dryer lint collector is a secondary capture device that traps fine lint before it reaches the duct. Some units sit inside the machine. Others mount on the wall or near the exhaust.
These collectors matter because standard screens only catch coarse lint. Fine fibers slip past and coat the duct over time.
Watch out: a secondary collector that never gets emptied becomes a blockage itself. Check it on the same schedule as the main screen.
Commercial Dryer Vent Cleaning: Ductwork, Booster Fans, and Exterior Terminations
Commercial dryer vent cleaning covers three zones: the duct run inside the building, any booster fan, and the exterior termination. All three need attention.
Lint buildup collects on duct walls, especially at elbows and long horizontal runs. Booster fans push air through long runs, but their blades collect fibers and lose efficiency. The exterior flap can jam open or shut with packed lint.
The U.S. Fire Administration's guidance on dryer fire safety points to lint and blocked vents as leading causes of dryer fires. Cleaning is not cosmetic. It's fire prevention.
Load Handling and Washing Habits That Cut Lint at the Source
Lint starts in the wash, not the dryer. Overloading is the biggest culprit. A packed drum rubs fabric against fabric, and that friction sheds fibers.
Try these habits:
- Load to about two-thirds full so clothes tumble freely
- Sort by fabric type, keeping heavy towels away from light knits
- Shake items out before moving them to the dryer
- Clean the washer's lint trap if your machine has one
- Turn pockets inside out to remove loose debris
New towels and fleece shed heavily for their first few washes. Dry those separately to keep lint off everything else.
Troubleshooting Restricted Airflow and Excess Lint
Restricted airflow and excess lint rarely have a single cause. Use the symptom-to-cause table below to narrow the problem before you call for service. Each row pairs a common observation with the likely causes, ordered from easiest to check to most involved.
| Symptom | Likely causes (check in this order) |
|---|---|
| Loads take longer than normal to dry | Clogged lint screen; packed screen housing; blocked exterior flap; crushed or disconnected duct; failing blower |
| Dryer feels hot on top or at the door | Restricted exhaust; blocked secondary collector; booster fan not running; lint packed around the blower |
| Exterior flap barely moves or stays shut | Blocked termination; long horizontal duct run with buildup; disconnected duct inside the wall |
| Lint appears around the door seal or on top of the machine | Torn or misseated lint screen; overloading; excessive fabric shedding from new towels or fleece |
| Clothes still damp at end of cycle | Overloading; restricted airflow; moisture sensor coated with lint film; heating element fault |
| Dryer trips breaker or overheats | Restricted exhaust causing high-limit trips; blower failure; lint packed against the motor |
| Lint builds up faster than usual on one machine | Fabric mix changed; screen not being cleaned every load; secondary collector not emptied; duct beginning to clog |
Working Through the Diagnosis
Start with the cheapest, fastest checks. Pull the lint screen and hold it up to a light, if you cannot see through it, wash it and dry it fully before running another load. Wipe the housing and vacuum the corners where lint packs. Empty the secondary collector and confirm the exterior flap swings freely when the dryer runs.
If those steps do not restore airflow, the problem is inside the duct or at the blower. Feel the exhaust at the termination while the dryer runs: weak or uneven flow points to a blockage or a booster fan that has stopped. A crushed flex duct behind the machine is a common culprit in tight installations, and it is easy to miss because the machine looks fine from the front.
Watch out: if the dryer has tripped its high-limit thermostat or the breaker more than once, do not reset and keep running it. Repeated trips mean the exhaust is restricted, and continuing to operate can damage the heating element or start a fire in the duct.
When to Call a Technician
Call for service when airflow stays weak after the screen, housing, collector, and termination are clean; when the blower wheel is wrapped with fibers; when the duct run is long, horizontal, or hidden inside a wall; or when the machine trips a safety limit. If your dryer keeps tripping, overheating, or leaving clothes damp after a full cycle, the vent or blower is likely restricted. You can book reliable washer and dryer repair or schedule same-day service in Scottsdale and Tempe. For Cave Creek readers, request fast dryer repair, and in Glendale you can get appliance troubleshooting.
Your Commercial Dryer Maintenance Checklist
A checklist only works if staff can follow it safely and prove it was done. The schedule below covers every lint-collection point on a commercial dryer, from the screen to the exterior termination, with the shutdown step that comes first.
| Component | Task | Frequency | Who | Shutdown required |
|---|---|---|---|---|
| Lint screen | Remove lint sheet, inspect for tears | After every load | Attendant | No |
| Screen housing | Wipe with dry cloth, vacuum corners | Daily | Attendant | No |
| Lint screen | Wash in warm soapy water, dry fully | Weekly | Attendant | No |
| Secondary lint collector | Empty and wipe interior | Weekly | Attendant | Yes, lockout |
| Blower wheel and housing | Vacuum fibers, check for wrap | Monthly | Technician | Yes, lockout |
| Duct run and elbows | Inspect for buildup, check connections | Monthly | Technician | Yes, lockout |
| Booster fan | Clean blades, confirm operation | Quarterly | Technician | Yes, lockout |
| Exterior termination | Clear flap, remove packed lint | Monthly | Attendant or technician | Yes, lockout |
| Full duct cleaning | Professional rotary brush and vacuum | Per load volume | Vent professional | Yes, lockout |
| Airflow verification | Measure exhaust velocity at termination | After every cleaning | Technician | Yes, lockout |
Safe Shutdown and Access Before Any Cleaning
Before anyone reaches behind a panel or into a duct, the machine must be de-energized. Follow the manufacturer's lockout/tagout procedure: switch off the breaker, apply a lock and tag, and confirm the drum and blower will not start. Gas-fired dryers also need the gas supply valve closed. Never rely on the door switch alone, it does not cut power to the blower or heating circuit.
Use only approved tools: a soft brush, a vacuum with a HEPA or fine-particulate filter, and non-abrasive cloths. Metal scrapers and compressed air can damage the blower wheel or push lint deeper into the duct. If a panel is sealed, riveted, or requires removing a gas train, stop and call a qualified technician.
Watch out: lint is highly combustible, and a vacuum that is not rated for fine particulates can overheat or ignite the collected fibers. Empty the vacuum canister outside the building after every cleaning session.
Recordkeeping That Survives an Inspection
Keep a log for each machine showing date, task performed, initials, and any anomaly found, a torn screen, a hot blower housing, a flap that would not open. Paper clipboards work, but a shared spreadsheet or maintenance app makes it easier to spot a machine that clogs faster than its neighbors.
Book a Commercial Dryer Inspection Before Lint Becomes a Repair
Lint problems are generally easier to prevent than to fix. A clogged vent can overheat a heating element or motor. Routine inspection can help catch these issues early.
Home Tech repairs commercial laundromat washers and dryers, including coin and card-operated machines, with same-day emergency response as our standard. Our technicians are licensed, insured, and EPA 608 certified. We also handle commercial HVAC and packaged rooftop units. If you run a commercial laundry, you can reach a contractor for commercial service.
Don't wait for a dryer to fail mid-shift. Call (602) 486-1901 or visit hometechappliancerepair.com to book your appointment.
Frequently Asked Questions
How often should you clean a commercial dryer lint filter?
Clean the lint screen after every load. A clogged filter blocks airflow, so moist air stays in the drum and drying time climbs. Assign the task to a named staff member per shift and log it, because a filter that only gets checked once a day will be packed by mid-morning. Deep-clean the screen weekly with warm soapy water to remove fabric softener film that a dry brush cannot lift.
Can a clogged lint screen make a commercial dryer overheat?
Yes. Restricted airflow traps hot air inside the drum and exhaust path, and the high-limit thermostat or thermal fuse can trip, shutting the dryer down mid-cycle. Repeated overheating shortens heater element life and raises fire risk when lint accumulates near the burner or heating element. If a dryer keeps shutting off, check the lint filter, the duct run, and the exterior termination before assuming the heating element has failed.
Do commercial dryers have lint traps and collectors?
Most commercial dryers have a lint screen inside the door or on the top panel, similar to residential units. High-volume operations often add an external lint collector or lint interceptor in the exhaust duct, which traps lint the screen misses before it reaches the ductwork. Those collectors need their own cleaning schedule, usually weekly to monthly depending on load volume, and a clogged collector will mimic a blocked vent.
How do you clean lint from a commercial dryer vent?
Shut off and unplug the dryer, then disconnect the duct at the machine and at the wall. Use a vent brush kit on a flexible rod to scrub the full run, and vacuum out the loosened lint with a shop vac. Check the exterior termination for a stuck damper or crushed hood, and confirm the duct is smooth metal rather than vinyl.