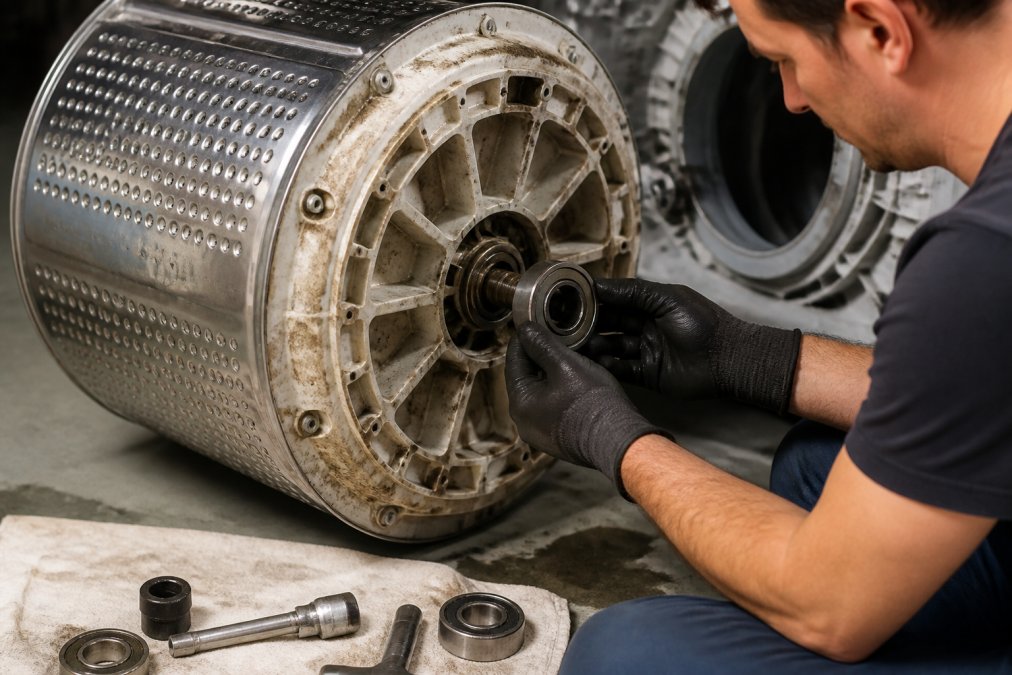
 how-to
Washer Drum Bearing Replacement: A Step-by-Step Guide
Table of Contents
- What Is a Washer Drum Bearing and Why It Matters
- Signs of Bad Washer Bearings You Shouldn't Ignore
- Causes of Washer Bearing Failure
- Repair vs. Replace: Is Drum Bearing Replacement Worth It?
- Tools and Parts Needed for Drum Bearing Replacement
- How to Replace Washing Machine Bearings: Step-by-Step
- Washing Machine Bearing Replacement Cost and Options
- Choosing the Right Bearing Repair Kit for Your Machine
- Frequently Asked Questions
Last Updated: August 16, 2026
What Is a Washer Drum Bearing and Why It Matters
A washer drum bearing is a component that allows the drum assembly to spin smoothly during the wash and spin cycles. Located between the inner tub and outer tub in front load washers, the bearing supports the drum's rotation while handling the weight and vibration of wet laundry. When this bearing fails, the entire washing machine becomes unreliable, and a drum bearing replacement becomes necessary to restore function.
Understanding what a drum bearing replacement involves matters because the decision to repair or replace your machine often hinges on this single component. The bearing wears out over time due to friction, water exposure, and the mechanical stress of thousands of wash cycles. When it fails, symptoms are unmistakable: grinding noises, excessive vibration, and sometimes water leakage. Knowing the basics helps you decide whether repair or replacement makes more financial sense.
Signs of Bad Washer Bearings You Shouldn't Ignore
Unusual noises during the spin cycle, grinding, squealing, or jet engine-like sounds, indicate bearing deterioration. This noise comes from the drum rubbing against the outer tub when the bearing can no longer support it properly.
Excessive vibration during the spin cycle, especially worse than normal, suggests bearing failure. Water leakage from underneath the machine often accompanies bearing problems as the tub seal becomes compromised. A wobbling drum, where you can feel lateral movement by hand, indicates the bearing has lost its ability to center the drum. Finally, if your washer stops spinning or spins inconsistently, the bearing may have seized.
Causes of Washer Bearing Failure
Water exposure is the primary culprit. Bearings aren't sealed against water intrusion as effectively as they should be. Over time, water seeps past the tub seal and corrodes the bearing's metal surfaces, reducing its ability to spin freely.
The sheer mechanical load also takes its toll. A typical wash cycle involves thousands of pounds of force as the drum spins wet laundry. Front load washers, which spin faster than top loaders, place even greater stress on bearings. Sediment and mineral buildup inside the tub can damage bearings indirectly, acting like sandpaper and accelerating wear.
Improper maintenance accelerates failure. Washers that aren't cleaned regularly allow mold and mineral deposits to build up. Overloading the machine forces the bearing to handle more weight and vibration than designed. Using excessive detergent creates foam that seeps into bearing components. Most washer bearings are engineered to last 7-10 years under normal conditions.
Repair vs. Replace: Is Drum Bearing Replacement Worth It?
If your washer is under 5 years old and otherwise functioning well, a drum bearing replacement almost always makes financial sense. You're addressing a single component failure on a machine with many years of useful life remaining.
For washers between 5-8 years old, a bearing replacement might cost $300-$600 in labor and parts. If your washer has been reliable otherwise, the repair is reasonable. However, if other components show signs of wear, additional repairs will likely follow within 1-2 years.
Washers older than 8-10 years present the strongest case for replacement. At this age, bearing failure is often just the first domino to fall. Investing in a major repair on an appliance nearing the end of its design life rarely pays off. Consider also the machine's repair history. If this is the first significant repair, lean toward fixing it. If the washer has needed multiple repairs in the past two years, replacement is the smarter move.
Water efficiency matters too. Older washers use significantly more water than modern models. Replacing an aging machine with a water-efficient front loader might save enough on utility bills to offset some replacement cost over time.
Tools and Parts Needed for Drum Bearing Replacement
You'll need a bearing puller, socket set, screwdrivers, adjustable wrench, pliers, and a flashlight. Safety equipment is non-negotiable: heavy-duty work gloves protect your hands from sharp metal edges, and safety glasses protect your eyes from debris.
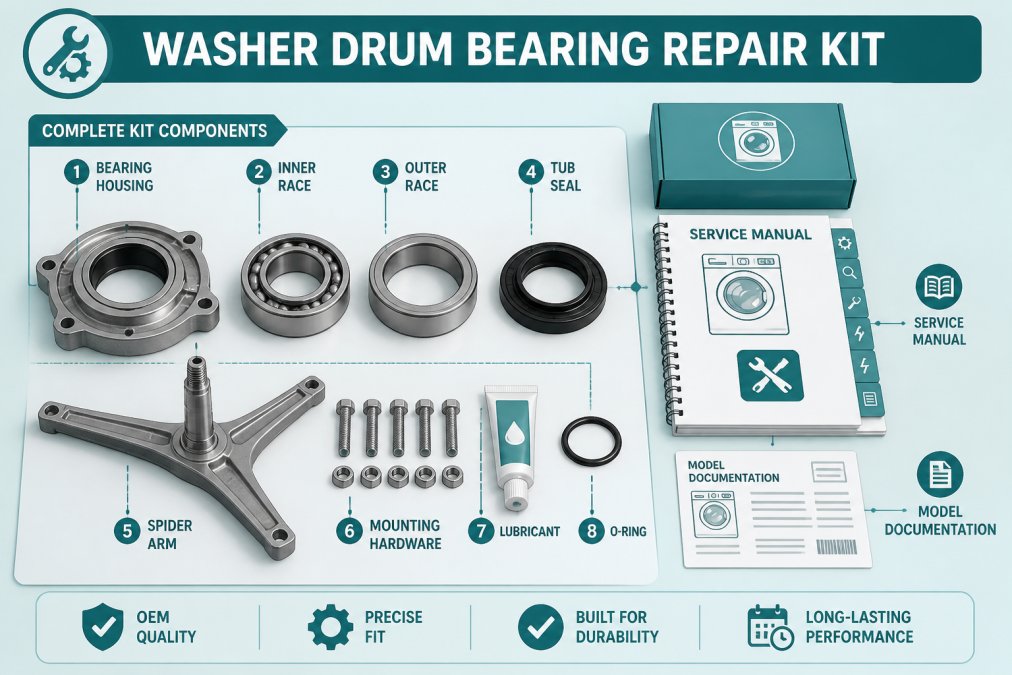
The bearing kit itself is critical. An OEM (original equipment manufacturer) replacement bearing kit for your specific washer model is essential, not a generic bearing, but the exact part designed for your machine. The kit typically includes the bearing housing, inner race, outer race, and tub seal.
You'll also need a new tub seal. Even if the old seal seems intact, replacing it while you have the drum assembly apart prevents future leaks. Depending on your machine, you might need a bearing press or specialized installation tool to seat the new bearing properly. Before starting, obtain the service manual for your specific washer model.
How to Replace Washing Machine Bearings: Step-by-Step
Step 1: Disconnect Power and Water Supply
Disconnect the machine from electrical power by unplugging it from the wall outlet. If it's hardwired, flip the breaker controlling that outlet. Shut off the water supply valves behind the washer by turning them clockwise. Open the washer's door and pull the drain hose out of its connection point, placing it in a bucket to drain remaining water. Let the machine sit for 15-20 minutes to allow electrical charge in capacitors to discharge safely.
Step 2: Access the Inner Tub and Drum Assembly
Accessing the bearing requires removing the front panel or, on some models, the entire outer tub. Check your service manual to determine which approach applies to your machine. For most front load washers, you'll remove the front panel by unbolting it from the frame, typically 4-6 bolts along the bottom and sides. Next, locate the drum assembly and, depending on your model, you may need to remove the outer tub completely by unbolting it from the frame and carefully maneuvering it out of the cabinet.
Step 3: Remove the Old Bearing Kit
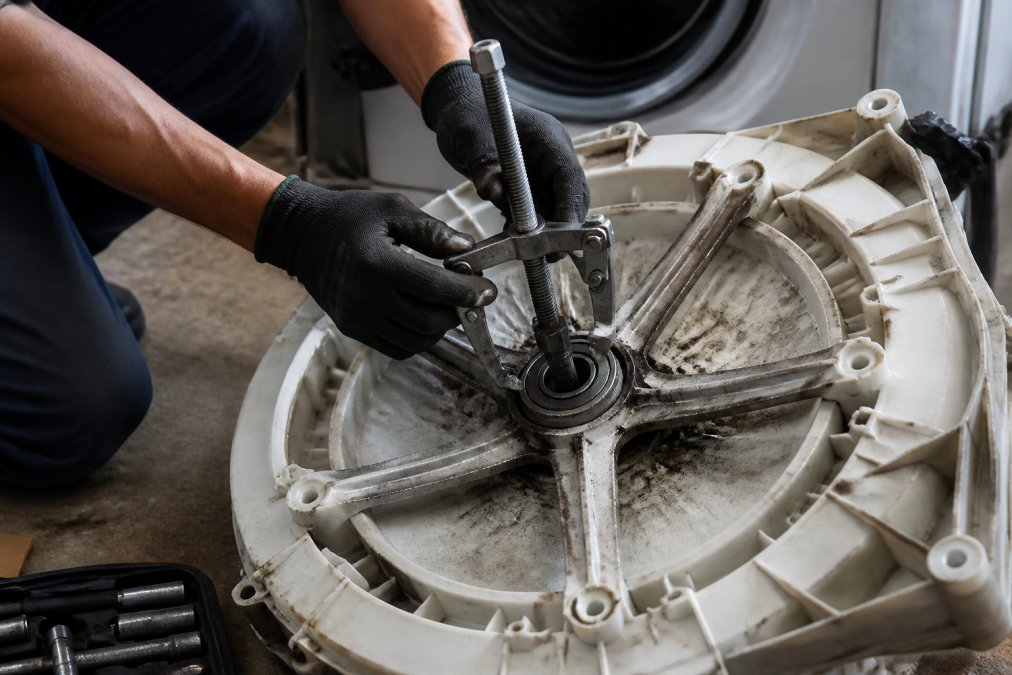
With the drum assembly accessible, locate the bearing housing at the center of the outer tub. Use your bearing puller to grip the outer race. Tighten the tool's center screw, which applies outward pressure and pulls the bearing from its seat. This requires steady, firm pressure. If the bearing is severely corroded or seized, you may need to use a hacksaw to carefully cut grooves into the bearing's outer surface.
Once the bearing is out, remove the tub seal by pulling it out by hand or using a flathead screwdriver to gently pry it loose. Discard the old seal.
Step 4: Install the New Bearing Kit
Clean the bearing housing thoroughly before installing the new bearing. Use a dry cloth to remove debris, rust, and old lubricant. Examine the new bearing kit components and verify they match your washer's model specifications.
Install the new tub seal first by pressing it into place around the bearing housing opening. The seal should sit flush with the housing surface. Next, install the bearing. If your kit includes a bearing press or installation tool, use it. Otherwise, carefully press the bearing into the housing by hand, ensuring it sits evenly. Once the bearing is seated, check that it rotates freely by hand.
Step 5: Reassemble and Test
Carefully reassemble the drum assembly in reverse order. Reinstall the outer tub if you removed it, bolting it back to the frame. Reinstall the front panel, securing it with the bolts you removed earlier. Reconnect the water supply hoses and check both connections for leaks. Plug the washer back into the electrical outlet and run a test cycle without clothes first, listening for unusual noises and watching for water leaks. If everything sounds normal, run a second test cycle with a small load of clothes.
Washing Machine Bearing Replacement Cost and Options
A bearing kit for most common washer models ranges from $80-$200. If you're tackling this repair yourself, your total parts cost is typically $150-$300. Professional installation labor typically costs $200-$400, with total professional repair cost usually falling between $350-$600.
Some homeowners choose to replace the entire washer rather than repair it. A new front load washer costs $600-$1,200 for mid-range models. The choice between repair and replacement depends on your machine's age and your budget. Extended warranty plans sometimes cover bearing failure, check your washer's warranty documentation.
Choosing the Right Bearing Repair Kit for Your Machine
Start by identifying your washer's exact model number, found on a sticker inside the door frame or on the back of the machine. Search for bearing kits using this model number on appliance parts websites. Avoid generic "universal" bearing kits, they rarely fit properly.
Verify the kit contents before purchasing. The kit should include the bearing housing, inner and outer races, the tub seal, and ideally the spider arm. Compare OEM kits to aftermarket alternatives. OEM kits are guaranteed to fit and function correctly but cost more. Aftermarket kits from reputable suppliers are less expensive and often work well, but quality varies. Check the bearing kit's warranty, reputable manufacturers offer 1-2 year warranties covering manufacturing defects.
Washing machine bearing failure is fixable, but the repair demands patience and the right tools. Whether you tackle this yourself or call a professional depends on your comfort level with appliance repair and the age of your machine. If your washer is relatively young and this is its first major repair, a drum bearing replacement makes financial sense. If your machine is aging and showing other signs of wear, replacement might be the smarter long-term investment. Addressing the problem quickly prevents secondary damage, a failing bearing left unchecked can damage the outer tub, motor, and other components.
For homeowners in the Phoenix area facing this decision, Home Tech's technicians can assess your specific situation and recommend the best path forward. Whether you need professional bearing replacement or guidance on whether to repair or replace your machine, call (602) 486-1901 or visit hometechappliancerepair.com to schedule a same-day appointment. Our EPA 608-certified team handles all major washer brands and can have you back to doing laundry quickly, with no hidden fees and a 100% satisfaction guarantee on every repair.
Frequently Asked Questions
What are the symptoms of a bad washing machine drum bearing?
A failing drum bearing typically produces a grinding noise or jet engine sound during the spin cycle, often accompanied by vibration that shakes the entire machine. You may also notice water leakage from the bottom of the washer, a burning smell, or the drum feeling loose or misaligned. These symptoms indicate the bearing or tub seal is failing and needs prompt attention to prevent further damage to the drum assembly.
Is it worth replacing the drum bearings on a washing machine?
Drum bearing replacement is usually worth the cost if your washer is less than 8-10 years old and the repair cost is under 50% of a new machine's price. Newer front load washers with sealed bearing systems often justify repair because the drum spindle and drive shaft are otherwise functional. However, if your machine is older, has other failing components, or the bearing kit cost approaches replacement pricing, buying new may be more economical.
Can I replace washing machine bearings myself?
DIY drum bearing replacement is possible if you have mechanical skills and the right tools, including a bearing puller, hacksaw, and specialized sockets. However, the job requires accessing the inner tub, removing the outer tub, and pressing the new bearing into place, all of which demand precision. Most homeowners benefit from professional service to avoid damaging the drum assembly or tub seal during installation.
How long does it take to replace washing machine drum bearings?
Professional drum bearing replacement typically takes 2-4 hours depending on the washer model and bearing accessibility. Front load washers with sealed bearing systems generally take longer because technicians must remove the outer tub to access the drum spindle and bearing housing. DIY replacement may take 4-6 hours or more if you're unfamiliar with the process or encounter seized components requiring hacksaw work.


