 ultimate-guide
Tankless Water Heater Error Codes: Complete Guide
Table of Contents
- Common Tankless Water Heater Error Code Definitions
- How to Flush a Tankless Water Heater
- Troubleshooting Ignition Failure and Flame Loss
- Tankless Water Heater Reset Button Location and Use
- DIY Tankless Water Heater Repair vs Professional Service
- Preventative Maintenance to Avoid Error Codes
- RV vs Residential Tankless Water Heater Troubleshooting
- Frequently Asked Questions
Last Updated: August 18, 2026
Common Tankless Water Heater Error Code Definitions
Tankless water heater error codes are diagnostic signals your unit sends when something isn't working properly. Understanding what each code means is the first step toward solving the problem yourself or knowing when to call a professional.
E1 and E5 Error Codes
E1 error codes typically indicate an ignition failure or flame loss during operation. Your unit is trying to heat water but can't establish or maintain a flame. This could mean the spark electrode isn't creating a spark, the gas supply is interrupted, or the flame rod isn't detecting the flame properly.
E5 error codes usually signal a water flow sensor problem. The unit detects that water is flowing but the sensor isn't registering it correctly, or water pressure is too low to trigger the heating cycle. This is one of the most common error codes homeowners encounter, especially in areas with hard water or sediment buildup.
Both codes require troubleshooting the specific component they reference. A simple reset often clears these codes temporarily, but if they return immediately, the underlying issue needs repair.
Ignition and Combustion Codes
Ignition failure codes (often E1, E4, or similar designations depending on the brand) mean your unit can't light the burner. Gas supply problems, electrode positioning, or a faulty flame rod are common culprits. Combustion codes indicate incomplete or unsafe burning, which triggers a safety shutdown. Exhaust blockage, improper venting, or a blocked burner can cause this.
These codes are your unit's safety feature at work.
Water Flow and Pressure Codes
Water flow codes (typically E5 or similar) appear when the unit detects insufficient water flow or pressure. Your tankless heater needs a minimum flow rate to activate the heating cycle, usually around 0.5 gallons per minute. Pressure codes can also indicate that the inlet water filter is clogged, reducing flow to the sensor. Low water pressure from your main supply, a partially closed shutoff valve, or a blockage in the water line feeding the heater all trigger these codes.
How to Flush a Tankless Water Heater
Flushing removes mineral deposits and sediment that accumulate inside your tankless water heater over time. Hard water leaves behind calcium and magnesium deposits that reduce efficiency and can trigger error codes. A regular flushing schedule prevents many problems before they start.
Why Flushing Prevents Error Codes
Mineral buildup inside the heat exchanger reduces water flow and heat transfer efficiency. As deposits thicken, flow sensors detect reduced pressure and trigger error codes. Flushing clears these deposits and restores normal operation. Many homeowners find that a yearly flush eliminates recurring error codes without needing component replacement.
Step-by-Step Flushing Process
What You'll Need:
- Two hose connections (typically 3/4-inch)
- A submersible pump (5-10 gallon capacity)
- A bucket or basin
- Food-grade white vinegar (1-2 gallons)
- Adjustable wrench
- Towels or rags
Steps:
-
Turn off the unit. Switch off power at the breaker and turn off the gas supply valve. Allow the unit to cool for at least 30 minutes.
-
Locate the service ports. Most tankless heaters have two service ports, an inlet (cold water) and outlet (hot water) port. Consult your manual if you can't locate them.
-
Connect the pump and hoses. Attach one hose to the inlet port and route it into your bucket. Attach the second hose to the outlet port and route it back into a bucket or sink. Connect the pump to create a closed loop.
-
Fill the pump reservoir with vinegar. Pour white vinegar into the pump's intake bucket. The vinegar will circulate through the heat exchanger, dissolving mineral deposits.
-
Run the pump for 45-60 minutes. Start the pump and let it circulate vinegar through the system. You'll notice the vinegar becoming discolored as it pulls out mineral deposits.
-
Flush with clean water. After the vinegar cycle, disconnect the pump and run fresh water through the system for several minutes to rinse out any remaining vinegar or deposits.
-
Reconnect the water lines. Reattach the main water supply and hot water outlet to the unit.
-
Restore power and gas. Turn the gas supply back on and flip the breaker to restore power. Run hot water at a tap for a few minutes to purge air from the lines.
The entire process typically takes 2-3 hours. Many homeowners schedule a flush annually, or more frequently if they have very hard water.
Troubleshooting Ignition Failure and Flame Loss
Ignition failure means your unit is trying to light but can't establish a flame. This is one of the most common error codes, and many causes are DIY-fixable.
Checking Gas Supply and Pressure
Start by verifying that gas is actually reaching the unit. Check your home's main gas shutoff valve; it should be fully open. Listen near the unit when you turn it on. You should hear a clicking sound as the spark electrode fires. If you hear clicking but smell no gas, the gas valve might not be opening. If you smell gas but hear no clicking, the spark electrode isn't firing.
Spark Electrode and Flame Rod Inspection
The spark electrode creates the spark that ignites the gas. Over time, carbon buildup on the electrode prevents sparks from jumping the gap. You can clean the electrode yourself in many cases.
First, turn off power and gas. Locate the spark electrode, it's usually a small ceramic or metal rod near the burner. Look for black carbon deposits on the tip. If heavily coated, the spark won't jump the gap. Clean the electrode gently with a soft cloth or fine-grit sandpaper.
The flame rod detects the presence of flame. If the electrode sparks and gas ignites but the flame rod doesn't sense it, the unit shuts down and throws an error code. A misaligned flame rod, carbon buildup on the rod, or a faulty flame rod sensor all cause this.
Tankless Water Heater Reset Button Location and Use
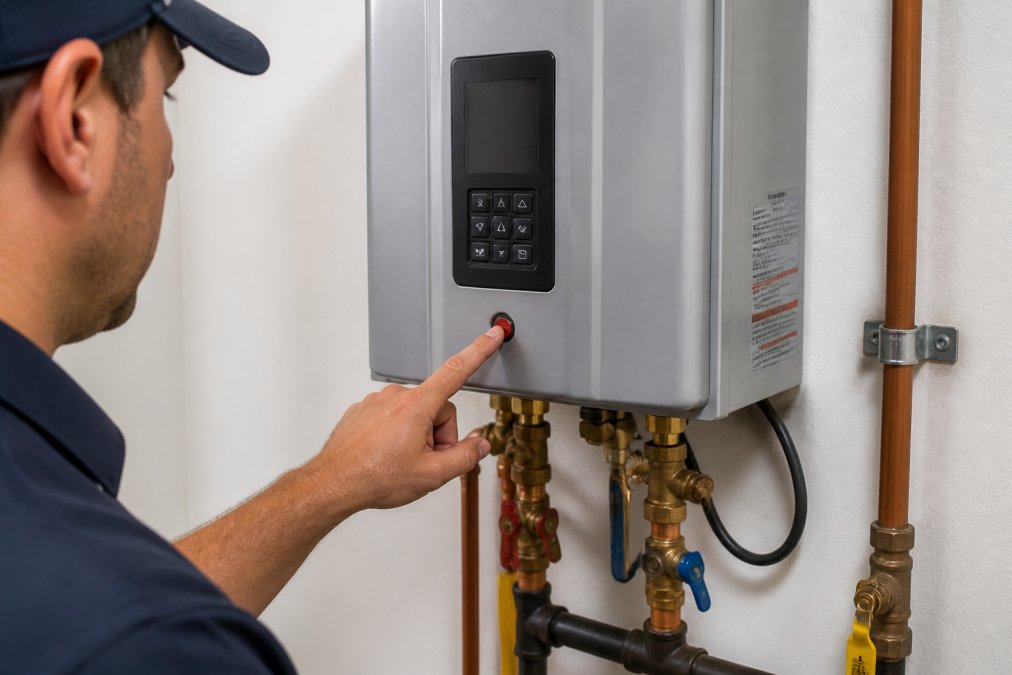
Most tankless water heaters have a reset button that clears error codes and restarts the system. The reset button is typically a small red or black button located on the front or side of the unit.
Finding the Reset Button on Your Model
Consult your unit's manual or the manufacturer's support website to locate the exact reset button position. On Rinnai units, it's often a small red button on the front control panel. On Navien units, it might be labeled "Reset" or "Power." On Takagi models, look for a button near the ignition control board.
Power Cycling and System Lockout Recovery
A reset clears the error code and tells the unit to try starting again. Press and hold the reset button for 3-5 seconds, then release. The unit should beep or flash, indicating the reset was registered.
If the error code returns immediately after reset, the underlying problem hasn't been fixed. System lockout occurs when the unit detects a safety problem and shuts down. After several failed ignition attempts, many units enter lockout mode to prevent gas from accumulating. A reset clears the lockout and allows the unit to try again.
Power cycling, turning the unit completely off and back on, sometimes works when the reset button doesn't. Switch off the breaker, wait 30 seconds, then switch it back on. If the unit enters lockout repeatedly, professional service is necessary.
DIY Tankless Water Heater Repair vs Professional Service
Some tankless water heater problems are safe and straightforward to fix yourself. Others require specialized tools, training, or certifications.
What You Can Safely Do Yourself
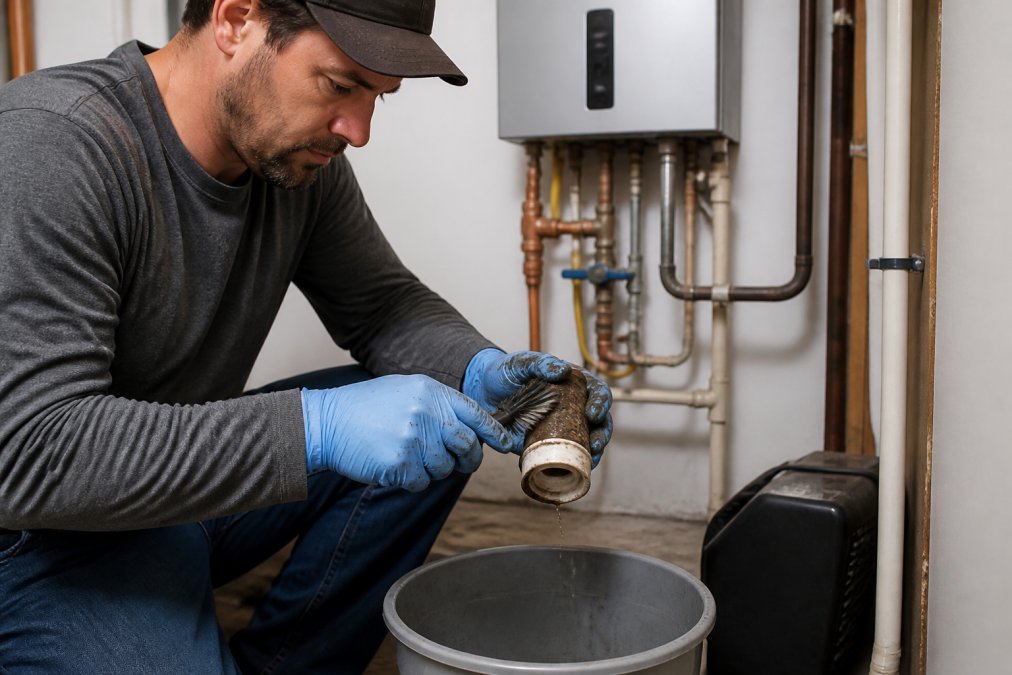
Cleaning the inlet water filter is a straightforward DIY task. Turn off the water supply, locate the filter cartridge (usually near the water inlet), and unscrew it. Rinse the filter under running water to remove sediment and mineral deposits. Screw it back in and restore water supply.
Cleaning the spark electrode and checking flame rod position are also manageable for most homeowners. A full system flush is within reach for homeowners comfortable with basic plumbing. Checking water pressure, gas supply line connections, and verifying that shutoff valves are fully open are all safe diagnostic steps. Resetting the unit and power cycling are completely safe and often resolve error codes without any repair needed.
When to Call a Licensed Technician
Gas valve replacement, control board repair, and any work involving the burner assembly require professional service. These components interact with gas and electrical systems in ways that can be dangerous if mishandled. If you smell gas but can't locate a leak, call a technician immediately. Venting system problems, blockages, improper slope, or damaged vent pipes need professional assessment. Any repair involving the heat exchanger, water inlet assembly, or internal plumbing connections should be handled by a professional.
If you've completed basic troubleshooting steps and the error code persists, professional diagnosis is the next logical step. Home Tech's EPA 608-certified technicians handle all tankless water heater repairs, from routine maintenance to complex component replacement. Same-day service is available for emergency situations, and the 100% satisfaction guarantee means the repair is done right.
Preventative Maintenance to Avoid Error Codes
Regular maintenance catches small problems before they become error codes. A simple schedule keeps your tankless water heater running efficiently and extends its lifespan.
Inlet Water Filter Cleaning and Descaling Schedules
The inlet water filter should be cleaned every 6 months in areas with moderate water hardness, and every 3 months if you have very hard water. A full system flush using vinegar should be performed annually in most climates. In areas with extremely hard water, flush every 6 months. If you notice reduced hot water flow, inconsistent temperature, or error codes appearing more frequently, increase your maintenance schedule.
Component Lifespan and Replacement Timing
Spark electrodes typically last 3-5 years before carbon buildup makes cleaning ineffective. Flame rods generally last 5-7 years. Control boards and gas valves last 7-10 years on average. The heat exchanger is the most expensive component and ideally lasts the life of the unit, 15-20 years or more. Regular flushing is the best way to extend heat exchanger life. Most tankless water heaters are designed to last 15-20 years with proper maintenance.
RV vs Residential Tankless Water Heater Troubleshooting
RV tankless water heaters operate on the same basic principles as residential units but face different challenges. The confined space, frequent movement, and variable water and gas supplies create unique troubleshooting scenarios.
Residential units are permanently installed with stable water pressure and gas supply. RV units are compact, often experience vibration from travel, and must handle variable water pressure when connected to different campground hookups. Error codes in RV units often stem from low water pressure at the connection point. Gas supply is also variable. RV propane systems can freeze in cold weather, reducing gas pressure. An RV unit throwing ignition codes in winter might simply need the propane tank warmed or the system to thaw.
Water hardness varies by location. An RV unit might need flushing more frequently when traveling through areas with hard water, then less frequently in softer-water regions.
Tankless water heater error codes are your unit's way of communicating problems before they become emergencies. Most codes point to specific issues, ignition failure, low water flow, or mineral buildup, that have straightforward solutions.
Start with basic troubleshooting: reset the unit, clean the inlet filter, check that shutoff valves are fully open, and verify gas supply is reaching the unit. Many error codes clear after these simple steps.
Regular flushing and filter cleaning prevent the majority of error codes from appearing in the first place. When error codes persist after basic troubleshooting, or if you're uncomfortable working with gas or electrical components, professional service is the right choice. Home Tech's experienced technicians diagnose and repair all tankless water heater problems, with same-day availability and a 100% satisfaction guarantee. Call (602) 486-1901 or visit hometechappliancerepair.com to schedule service.
Frequently Asked Questions
What is the most common tankless water heater error code?
E1 and E5 codes are the most frequent, typically indicating ignition failure or water flow sensor issues. E1 usually means the unit cannot ignite the burner, often caused by gas supply problems, a faulty spark electrode, or a blocked vent pipe. E5 signals a water flow sensor malfunction, preventing the heater from firing. Both require checking gas pressure, cleaning the inlet filter, and ensuring proper ventilation before calling a technician.
How do I reset my tankless water heater after an error code appears?
Most models have a reset button on the control board or near the power supply. Turn off the unit at the breaker, wait 30 seconds, then press the reset button for 3-5 seconds. Power the unit back on and check if the error clears. If the code returns immediately, the underlying problem (clogged filter, gas issue, or sensor fault) still exists. A power cycle alone won't fix a real malfunction, so persistent codes require professional diagnosis.
Can I fix a tankless water heater error code myself?
Simple fixes like cleaning the inlet water filter, checking for blocked vent pipes, and power cycling are safe DIY tasks. You can also inspect the exterior for obvious damage or debris. However, anything involving gas pressure testing, control board diagnostics, spark electrode replacement, or sealed-system work requires a licensed technician. Improper gas work or electrical repairs create safety hazards and void warranties. When in doubt, call a professional.
How often should I flush my tankless water heater to prevent error codes?
In areas with hard water, flush every 6-12 months. Mineral buildup inside the heat exchanger triggers low flow codes and combustion issues. In softer water regions, annual flushing is usually sufficient. Use a descaling solution designed for tankless units and follow the manufacturer's instructions carefully. Regular flushing prevents scale-related error codes, extends component lifespan, and maintains efficiency. If you're unsure about your water hardness, a professional inspection can guide your maintenance schedule.
When should I call a professional for tankless water heater repairs?
Contact a licensed technician immediately if you see error codes that don't clear after a reset, smell gas, hear unusual noises, or notice no hot water despite the unit powering on. Also call if you need gas pressure testing, heat exchanger inspection, control board replacement, or any work involving sealed systems and refrigerants. Professionals have diagnostic tools to pinpoint root causes quickly and can safely handle components homeowners shouldn't touch.
What does an E1 error code mean on a tankless water heater?
E1 indicates ignition failure, meaning the spark electrode cannot light the burner. Common causes include a weak or dirty spark electrode, low gas pressure, a blocked vent pipe restricting air intake, or a faulty gas valve. Check that the gas supply is on, the inlet filter is clean, and the vent isn't blocked by debris or ice. If these steps don't work, the spark electrode or control board may need replacement by a certified technician.
How do I identify which tankless water heater brand I have if I need to troubleshoot?
Check the nameplate or label on the unit itself, usually mounted on the front cover or side panel. It lists the manufacturer, model number, and serial number. Take a photo of this information before calling for service. Knowing your brand helps technicians pull up the exact error code chart and diagnostic procedures for your model. Major brands include Rinnai, Tankless, EcoSmart, Navien, and Takagi, each with different code meanings.