 how-to
Signs of a Faulty Dryer Heating Element
Table of Contents
- Signs of a Faulty Dryer Heating Element
- Dryer Not Heating: What Else Causes It
- How to Test a Dryer Heating Element Safely
- Dryer Heating Element Lifespan and Replacement Timing
- Cost to Replace a Dryer Heating Element
- Preventing Repeat Heating Element Failure
- When to Call a Professional
- Frequently Asked Questions
Last Updated: October 9, 2026
Signs of a Faulty Dryer Heating Element
A dryer that tumbles but never warms is the classic signature of a failed heating element, and it is one of the most common appliance failures we see. This guide from Home Tech covers the signs of a faulty dryer heating element, how to test one safely, and when the problem is something else entirely.
Here is the part most guides skip: the element is often the victim, not the cause.
The U.S. Fire Administration's residential dryer fire data makes the stakes clear: lint-clogged dryers are a leading cause of home fires, which is why airflow problems deserve attention even when the machine still runs.
Below, we break down the symptoms in the order you will notice them, walk through a safe multimeter test, and explain how to tell a bad element from a bad thermostat, fuse, or vent.
Symptoms You Will Notice First
The earliest sign is usually a cycle that runs long. Clothes come out warm but damp, so you run them again. Then a second time. That pattern points to weak heat rather than no heat.
Watch for these signals:
- Clothes are cold and damp after a full cycle
- The drum tumbles normally but the air inside stays cool
- Drying now takes two or three cycles instead of one
That last one matters. A burning odor can mean lint is sitting against a hot surface. Stop using the machine and check the vent before anything else.
Dryer Not Heating: What Else Causes It
A dryer not heating does not automatically mean a bad element. Several parts share the job of making and delivering heat, and any one of them can fail first.
The common culprits:
- Thermal fuse. A one-time safety device. Once it blows, the dryer runs cold until it is replaced.
- Thermostat. Cycles heat on and off. A failed one can leave the dryer stuck cold or running too hot.
- Circuit breaker. A partially tripped breaker can cut power to the heating circuit while the drum still turns.
This is where differential diagnosis pays off. Replacing an element when the real fault is a blown thermal fuse wastes money and leaves you with the same cold dryer.
Electric vs. Gas: Different Symptoms
Electric and gas dryers fail differently, and the difference speeds up diagnosis.
- Electric dryers rely on a heating element, a thermal fuse, and a high-limit thermostat. No heat usually traces to one of those three.
- Gas dryers use an igniter and gas valve. Listen for the click of the igniter at the start of the cycle. If you hear clicking but no flame, the problem is in the ignition system, not an element.
If you have a gas dryer and smell gas at any point, stop and call a professional. That is not a DIY repair.
How to Test a Dryer Heating Element Safely
Testing a dryer heating element safely starts with one rule: unplug the dryer or shut off the breaker before you touch anything. The element and its wiring carry enough current to hurt you.
Total Time: 45-60 minutes Difficulty: Intermediate
What You'll Need
- A multimeter
- A nut driver or screwdriver set
- Work gloves
- A clean, well-lit work surface
Step 1: Cut the Power [Time: 5 minutes]
Unplug the dryer from the wall. If it is hardwired, switch off the breaker at the panel. Confirm the drum light is off before you continue.
Expected Result: The dryer is completely dead with no lights or movement.
Step 2: Access the Element [Time: 15 minutes]
On most models, the element sits behind the rear panel. Remove the screws holding the panel, then set them in a cup so you do not lose them. Some models place the element under the drum, which takes longer to reach.
Expected Result: The heating element housing is visible and you can see the coil inside.
Step 3: Inspect for Visible Damage [Time: 5 minutes]
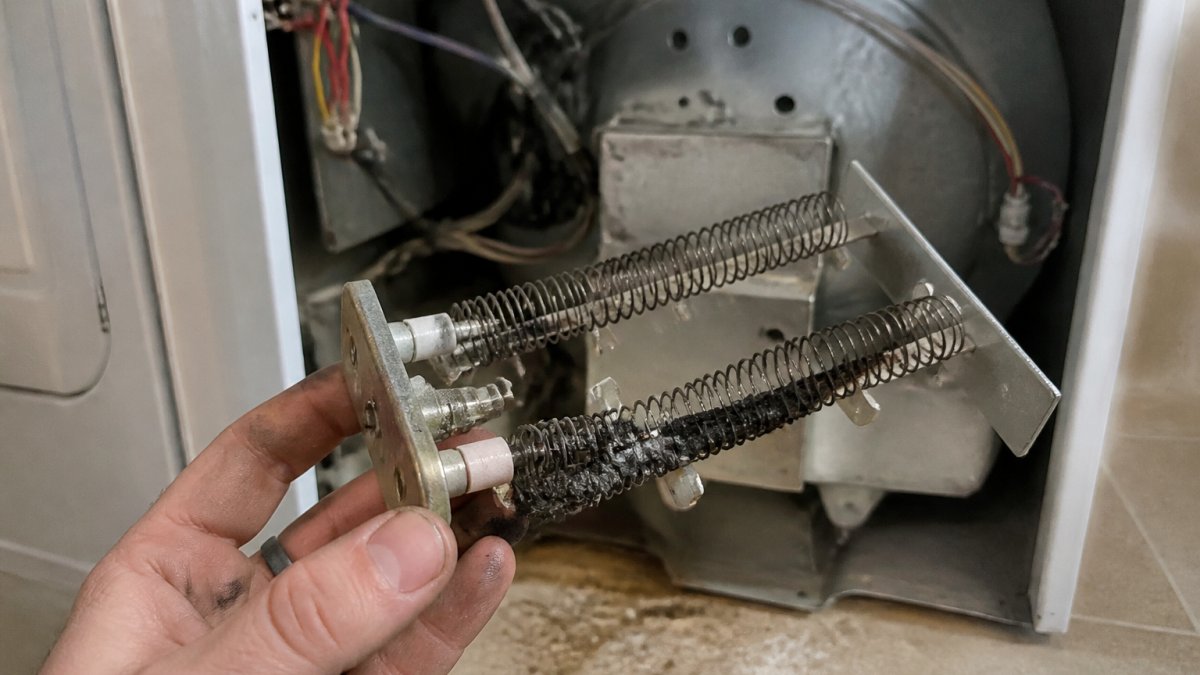
Look closely at the coil. A burned-out element often shows a clear break, a sagging coil, or black scorch marks. Sometimes the damage is obvious enough that you can skip the meter entirely.
Step 4: Disconnect the Element [Time: 5 minutes]
Take a photo of the wiring before you pull anything loose. Then remove the wires from the element terminals.
Step 5: Test Continuity [Time: 10 minutes]
This is the step that confirms the diagnosis. See the next section for the exact procedure.
Using a Multimeter for a Continuity Test
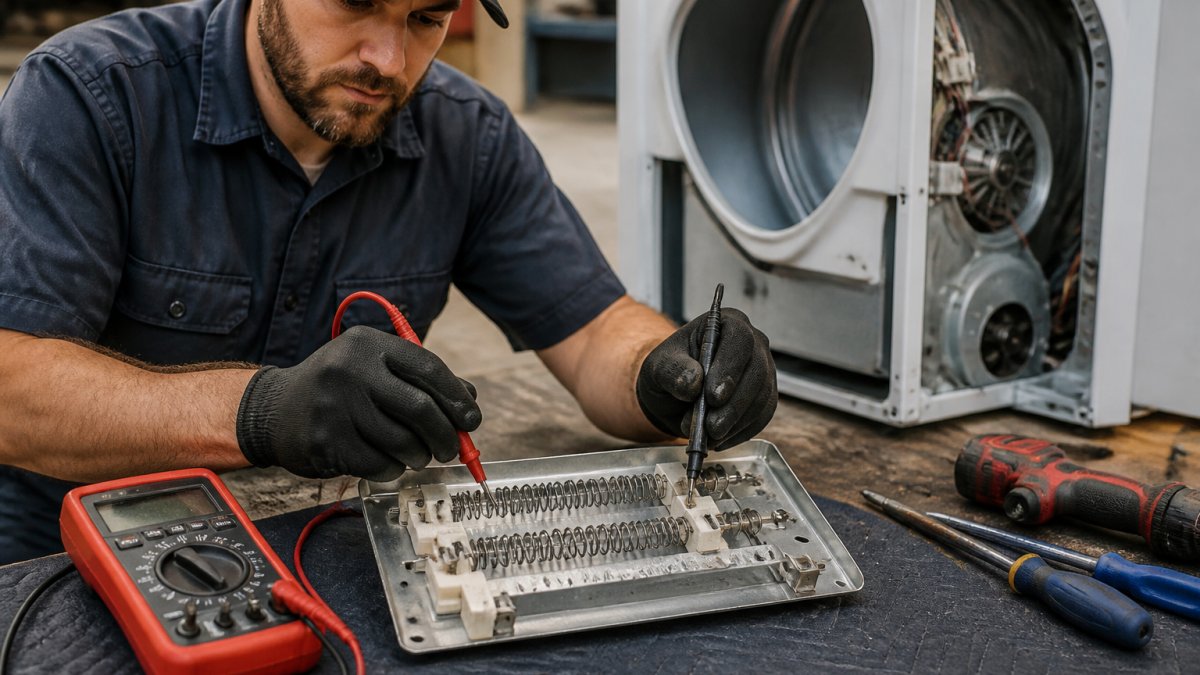
A continuity test tells you whether electricity can still flow through the element. Set your multimeter to the lowest resistance setting, usually marked with the ohm symbol.
Here is how to test a dryer heating element with a multimeter:
- Touch the two probes together. The meter should read near zero. This confirms the meter works.
- Place one probe on each terminal of the element.
- Read the display. A working element shows a low resistance reading, meaning current can pass through.
- A reading of OL, or infinite resistance, means the coil is broken. The element is dead and needs replacement.
Dryer Heating Element Lifespan and Replacement Timing
Most dryer heating elements last roughly 8 to 12 years under normal use.
What actually kills a heating element early:
- Restricted exhaust airflow. When lint or a crushed duct blocks the vent, heat cannot escape. The element runs hotter than its design limit, and the coil eventually breaks or burns through. This is the single most common cause of premature failure.
- A clogged lint screen or missing lint screen. Running without the screen lets lint travel into the cabinet and coat the element and its housing.
- A failing high-limit thermostat. This safety device is supposed to cut power when the element overheats. If it sticks closed, the element keeps heating past its limit.
- Overloaded drum. Packing the dryer traps heat and forces longer cycles, which wears the element faster.
How to confirm the element is the fault before you replace it:
A continuity test is the only reliable way to know. A working element shows low resistance across its terminals.
When replacement is the right call:
- The continuity test reads OL with no visible cause
- You can see a break, sag, or burn mark in the coil
- The dryer has run cold for several cycles after airflow was cleared
- The element has already been replaced once in the last few years
That last point is a warning sign. Repeat failures almost always trace back to an underlying airflow problem, not bad luck.
Preventing repeat failure:
- Clean the lint screen before every load
- Clear the exhaust vent and duct at least once a year
- Check the outside vent flap to make sure it opens freely
- Avoid packing the drum
Cost to Replace a Dryer Heating Element
Most guides dodge this question. Here is the honest breakdown of what a heating element repair actually costs, how long it takes, and when the money is better spent on a new machine.
Typical cost ranges (parts and labor, U.S. market):
- DIY part only: $20-$60 for a replacement element on most major brands. Universal-fit elements sit at the low end; OEM elements for premium or older models sit at the high end.
- Professional repair, element only: $150-$300 total, including the service call, the part, and labor.
- Professional repair with related parts: $200-$400 when a thermal fuse, high-limit thermostat, or both are replaced at the same time. These parts are inexpensive on their own (often $10-$30 each) but add labor if the technician has to open the cabinet again.
- Vent cleaning added on: $100-$200 if the technician also clears the exhaust duct, which is often the real fix.
Repair time:
- Rear-panel access: 30-60 minutes for a technician.
- Under-drum access: 60-90 minutes, because the drum and belt have to come out.
- Gas ignition repairs: similar labor window, but parts (igniter, gas valve coils) run $20-$80.
Repair or replace?
A few other factors tip the decision:
- Part availability. Older or discontinued models may need a universal element, which can work fine but may not fit as cleanly.
- Repeat failures. If this is the second or third element in a few years, the airflow problem was never fixed. Spending on another element without clearing the vent is throwing money at a symptom.
- Other aging parts. A dryer near the end of its life often has a worn belt, noisy drum rollers, or a failing motor. If several of those are on the horizon, replacement makes more sense.
For a current quote on your model, visit hometechappliancerepair.com or call (602) 486-1901.
Preventing Repeat Heating Element Failure
Preventing a repeat failure comes down to airflow. A dryer that cannot push hot air out will overheat and burn through elements again and again.
Build these habits:
- Clean the lint screen before every load
- Clear the exhaust vent and duct at least once a year
- Check the outside vent flap to make sure it opens freely
- Avoid packing the drum, since overloaded dryers trap heat
When to Call a Professional
Call a professional when the diagnosis points past the element, when you have a gas dryer, or when you are not comfortable working around live wiring.
At Home Tech, our technicians handle heating element and thermostat replacement on electric dryers and diagnose gas ignition faults safely.
Robert A. from Scottsdale put it simply: "I was impressed by how careful these guys were when they arrived to fix my refrigerator." That same care applies to every dryer call.
Frequently Asked Questions
What is the average lifespan of a dryer heating element?
Most dryer heating elements last between 8 and 12 years, depending on use. A household running 4 to 5 loads per week will typically see the element fail toward the later end of that range. Commercial machines in laundromats often burn out faster because of constant cycling. If your dryer is over a decade old and the element fails, weigh the repair against the cost of a new unit before committing.
Is it worth fixing a heating element in a dryer?
In most cases, yes. Replacing a heating element is one of the more affordable dryer repairs, especially when the rest of the machine works well. If the dryer is under 10 years old and the drum, motor, and controls are in good shape, a repair usually costs far less than a new dryer. If the unit is older and shows other problems, replacement may make more sense.
Can you run a dryer with a bad heating element?
You can run it, but clothes will come out damp or cold because the drum tumbles without heat. Running a dryer with a broken element will not fix the problem and wastes electricity. It can also mask other issues, like restricted airflow, that may worsen over time. Once you confirm the element is faulty, repair it before running more loads.
How much does it cost to replace a dryer heating element?
Pricing depends on the dryer model, the part, and whether a technician handles the job. Because costs vary by brand and machine type, contact Home Tech directly for a quote.
A cold dryer is frustrating, but the fix is usually straightforward once you know what you are looking at. The trouble starts when a failed element gets swapped without checking the vent, the fuse, or the thermostat, and the machine breaks down again weeks later. Home Tech diagnoses the real cause first, then repairs it with same-day service, no hidden fees, and a 100% satisfaction guarantee. Get started with Home Tech and get your laundry back on schedule.


