 how-to
Signs of a Faulty Refrigerator Water Inlet Valve
Table of Contents
- What a Water Inlet Valve Does
- Common Signs of a Faulty Water Inlet Valve
- How to Diagnose a Faulty Water Inlet Valve
- How to Test a Refrigerator Water Inlet Valve with a Multimeter
- When Your Refrigerator Water Dispenser Is Not Working
- Refrigerator Water Inlet Valve Replacement Cost and Process
- When to Call a Professional
- Frequently Asked Questions
Last Updated: September 1, 2026
What a Water Inlet Valve Does
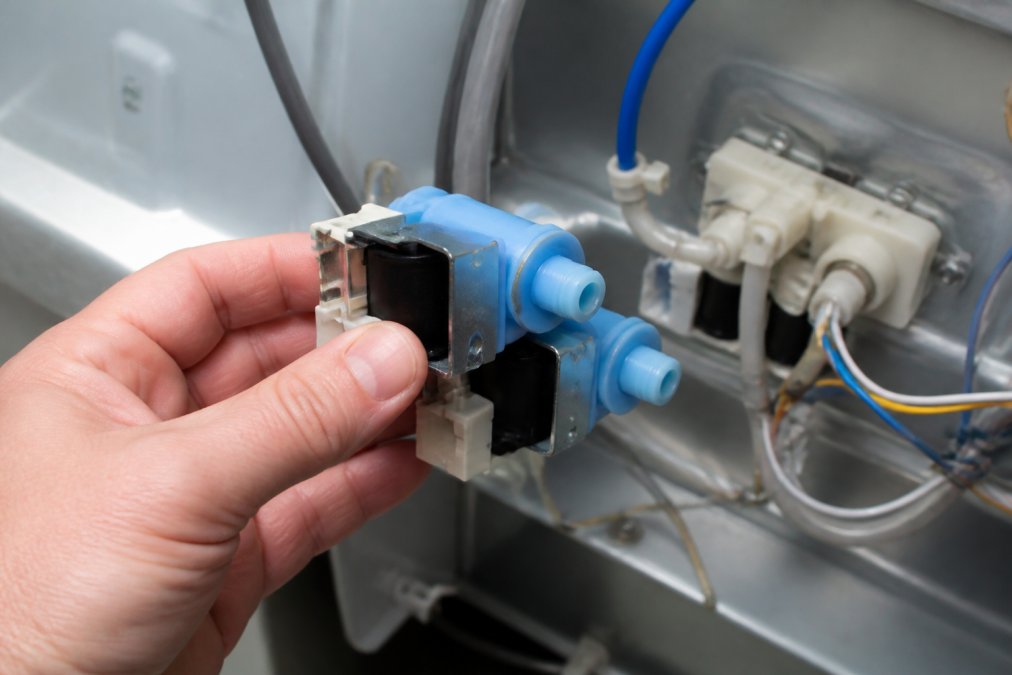
A water inlet valve is the solenoid-controlled component that regulates water flow into your refrigerator's ice maker and dispenser system. When you press the dispenser lever or the ice maker cycles, an electrical signal activates the solenoid valve, opening a port that allows water from your home's supply line to enter the appliance. The valve then closes automatically once the correct amount of water has been delivered.
This mechanism is critical to refrigerator function. Without a working water inlet valve, your ice maker stops producing ice and your water dispenser becomes useless. At Home Tech, we've diagnosed thousands of refrigerator failures, and a faulty water inlet valve ranks among the most common culprits behind "no ice" and "no water" complaints. The valve sits behind the refrigerator, typically near the water supply line connection, a small brass or plastic component no larger than a thumb drive, but its failure creates immediate, visible problems.
Common Signs of a Faulty Water Inlet Valve
A failing water inlet valve produces distinct, unmistakable symptoms. When the valve fails, your refrigerator stops delivering water or ice entirely, or it delivers them in ways that signal trouble ahead.
Ice maker stops producing ice
The ice maker relies entirely on the water inlet valve to function. When the valve fails, no water reaches the ice maker's fill tube and the ice bin stays empty even after days of operation. You might notice fewer ice cubes first, then sporadic production, then nothing. Some valves stick partially open, delivering water so slowly that ice production drops to a trickle.
A faulty water inlet valve is the leading cause of ice maker failure. Before you assume the ice maker itself is broken, check the valve first, it's cheaper to replace and more likely to be the actual problem.
Water dispenser stops working or flows slowly
The dispenser and ice maker share the same water inlet valve. When the valve fails, the dispenser is affected immediately. You'll press the lever and nothing happens, or water trickles out so slowly that filling a glass takes 30 seconds or more. Slow flow is often the first warning sign that the solenoid inside the valve is weakening.
A slow or dead dispenser is a red flag. Don't assume it's a clogged filter, check the valve first, especially if the filter was recently replaced.
Leaking water pooling under the refrigerator
Water pooling under your refrigerator points to a supply-line issue. A faulty water inlet valve can develop internal or external leaks. If you see water under the refrigerator, pull the unit away from the wall and inspect the back for wet spots around the inlet valve connection and the water line.
Leaks demand immediate attention. Pooling water can damage your flooring and create mold risk. A leaking water inlet valve needs replacement before the problem spreads.
Sputtering or weak water pressure
When you use the dispenser, the water should flow steadily. A faulty valve produces sputtering, water comes out in bursts, then stops, then starts again, or consistently weak flow. Sputtering usually means the solenoid inside the valve is failing. Weak pressure suggests a partially blocked or sticking valve that restricts flow. Both symptoms worsen over time.
How to Diagnose a Faulty Water Inlet Valve
Before you assume the valve is bad, run through these diagnostic steps. Many "faulty valve" problems are actually clogged filters, kinked water lines, or water pressure issues at the source.
Check the water supply line connection
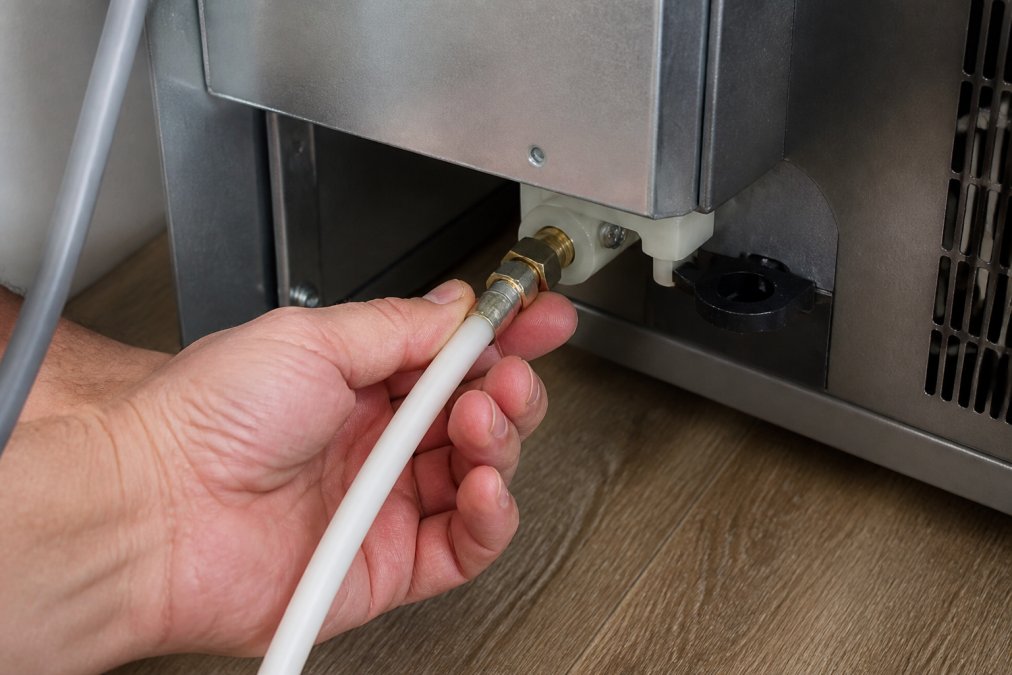
Start at the back of the refrigerator and locate the water supply line, typically a plastic tube or copper line connected to the inlet valve with a compression nut. Make sure the connection is tight. Use a wrench to gently tighten the compression nut clockwise about a quarter turn, don't over-tighten.
Inspect the water line itself for kinks, cracks, or pinches. A kinked line restricts water flow and mimics a faulty valve. If the line is kinked, carefully straighten it. Also check that the water line isn't frozen. In cold climates or if the refrigerator sits against an exterior wall, the line can freeze solid. Feel along the line for hard spots and thaw by pouring warm water over the frozen section or using a hair dryer on low heat.
Inspect the inlet tube for blockages
The inlet tube carries water from the valve to the ice maker. Over time, mineral deposits and sediment can clog this tube, restricting water flow. Remove the inlet tube from the valve by loosening the compression nut and hold it up to a light source. You should see clear light on the other end. If you see white, chalky buildup or brown sediment, the tube is clogged.
To clean a clogged tube, soak it in white vinegar for 2-4 hours. After soaking, use a thin brush or pipe cleaner to scrub the inside and rinse thoroughly with clean water before reattaching. If the tube is cracked or the compression nut won't tighten securely, replace the tube.
Test water pressure at the source
A faulty water inlet valve may not be faulty at all, your home's water pressure might be too low. The valve requires minimum pressure to open and close properly. Locate the shut-off valve on your home's main water supply line and test pressure with a water pressure gauge, available at any hardware store. Normal household water pressure ranges from 40 to 60 pounds per square inch (psi) (the EPA). If your pressure is below 40 psi, the water inlet valve won't function reliably, even if the valve itself is fine.
How to Test a Refrigerator Water Inlet Valve with a Multimeter
If the water supply line is clear, the tube is clean, and pressure is normal, the valve itself is likely faulty. A multimeter lets you test the solenoid inside the valve to confirm failure.
Safety precautions before testing
Before you touch anything electrical, turn off power to the refrigerator. Unplug the unit or flip the breaker that controls it. Wait 5 minutes to ensure the capacitors inside have fully discharged. Wear safety goggles to protect your eyes from any debris or water spray.
If you're uncomfortable working with electricity, stop here and call a professional. Home Tech's EPA 608-certified technicians can test and replace the valve safely, and we're available for same-day service in the greater Phoenix area.
Testing the solenoid with continuity mode
The solenoid is an electromagnet coil inside the valve. When the refrigerator sends an electrical signal, the solenoid energizes and pulls open a plunger that lets water flow. A failed solenoid won't energize, so the valve stays closed.
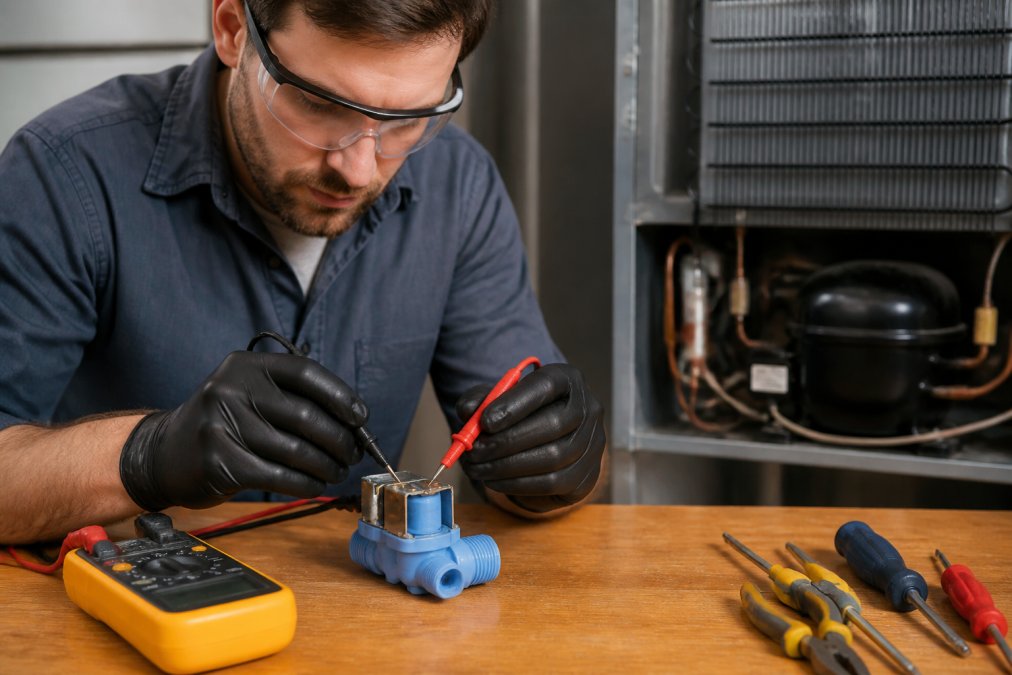
Set your multimeter to continuity mode (usually marked with a sound-wave symbol). Locate the solenoid terminals on the valve body and touch one multimeter probe to each terminal. If the meter beeps or shows a reading, continuity exists and the solenoid is likely fine. If the meter is silent and shows no reading, continuity is broken and the solenoid has failed. A failed solenoid means the valve must be replaced.
Measuring resistance in ohms
Resistance measurement gives you a more precise picture of solenoid health. A working solenoid should show resistance between 500 and 2,000 ohms, depending on the valve model (peer-reviewed research). Set your multimeter to the ohms setting (Ω symbol) and touch the probes to the solenoid terminals. If the reading is near zero or infinity (often shown as "OL"), the solenoid is dead. If the reading falls within the expected range for your valve model, the solenoid is functional.
When Your Refrigerator Water Dispenser Is Not Working
A dead dispenser points to the water inlet valve, but two other issues can mimic valve failure: mineral deposits in the filter and electrical connection problems.
Mineral deposits and clogged filters
Hard water deposits mineral buildup inside the water filter and the dispenser lines. Most refrigerators have a water filter cartridge behind a panel on the front or inside the fridge. The filter should be replaced every 6 months under normal use (nsf.org). Turn off the water supply, remove the old filter and inspect it. A clogged filter looks brown or tan with visible sediment. Install a new filter cartridge, turn the water back on, and test the dispenser. If it works, the valve was fine. If it still doesn't work, the valve is likely faulty.
Electrical connection issues
The valve requires an electrical signal to open. If the connection between the refrigerator's control board and the valve is loose or corroded, the signal won't reach the solenoid. Unplug the refrigerator and locate the wire harness connected to the valve. Gently pull the connector apart and inspect the terminals for corrosion, which looks like green or white crusty buildup. Clean corroded terminals with a small brush or fine-grit sandpaper and push the connector firmly back together until you hear a click. Plug the refrigerator back in and test the dispenser.
Refrigerator Water Inlet Valve Replacement Cost and Process
Once you've confirmed the valve is faulty, replacement is your only option. The valve itself is inexpensive, but labor varies depending on whether you handle it yourself or hire a professional.
What affects replacement pricing
Valve cost depends on your refrigerator model. Most valves run between $35 and $75 for the part alone. Professional labor typically ranges from $150 to $300, depending on how accessible the valve is. Some refrigerators require removing panels or the water line, which adds time. If the valve is easy to reach, the job takes 30-45 minutes.
At Home Tech, we charge a service call fee for diagnosis, but that fee is waived if you approve the repair. We handle all major brands, GE, Whirlpool, LG, Samsung, Bosch, Frigidaire, and more, and we stock common valve parts for same-day replacement. Call (602) 486-1901 to book an appointment.
DIY replacement versus professional service
If you're handy and comfortable working behind appliances, DIY replacement is possible. The process is straightforward: shut off the water, disconnect the old valve, and install the new one. However, DIY carries risks. If you overtighten the compression nut, you can crack the valve or the water line. If you don't properly purge air from the line after installation, you'll get sputtering water flow.
Professional service eliminates these risks. A technician has the right tools, knows your specific refrigerator model, and guarantees the work. For most homeowners, professional service is worth the cost.
Post-replacement air purging and testing
After installing a new valve, air trapped in the water line causes sputtering and weak flow. To purge, turn on the water supply and open the dispenser lever. Let water run for 30-60 seconds. You'll see sputtering at first, that's air escaping. Continue running water until the flow is steady and clear, usually 2-3 minutes.
For the ice maker, run a full cycle and discard the first batch of ice. After one cycle, the system is fully purged. Test both the dispenser and ice maker to confirm normal operation.
When to Call a Professional
Some situations demand professional help. Call a professional if:
- You're not confident testing the valve with a multimeter
- Water is pooling under the refrigerator (leak risk)
- The valve is difficult to access on your specific model
- You've attempted DIY repair and the problem persists
- Your refrigerator is still under warranty (DIY repair may void it)
- You need the repair done quickly and correctly the first time
Home Tech has been serving the greater Phoenix area for over 10 years. Our EPA 608-certified technicians handle refrigerator repairs for all major brands, including complex sealed-system work on Samsung Bespoke and LG models. We offer same-day and next-day appointments, no hidden fees, and a 100% satisfaction guarantee. Call (602) 486-1901 or visit hometechappliancerepair.com to book.
A faulty water inlet valve is one of the most common refrigerator problems, but it's also one of the easiest to fix. Whether you test the valve yourself or call a professional, addressing the issue quickly prevents further damage and gets your ice maker and dispenser working again. Home Tech's experienced technicians can diagnose and replace a faulty water inlet valve in a single visit, restoring your refrigerator to full function. Call us today for same-day service in the Phoenix metro area.
| Symptom | Likely Cause | Next Step |
|---|---|---|
| Ice maker stops producing ice | Faulty water inlet valve | Test valve with multimeter; replace if failed |
| Water dispenser stops or slows | Faulty valve or clogged filter | Replace filter first; test valve if filter doesn't fix it |
| Water pooling under refrigerator | Leaking valve or loose connection | Tighten compression nut; replace valve if leak persists |
| Sputtering or weak pressure | Partially blocked valve or low home pressure | Test home water pressure; replace valve if pressure is normal |
Frequently Asked Questions
How can I tell if my refrigerator water inlet valve is bad?
A faulty water inlet valve shows clear signs: your ice maker stops producing ice, the water dispenser flows slowly or not at all, water pools under the refrigerator, or you hear sputtering from the dispenser. The most reliable way to confirm is testing the solenoid with a multimeter to check for continuity and resistance in ohms. If the solenoid shows no continuity or resistance outside the normal range, the valve needs replacement.
What causes a water inlet valve to fail?
Water inlet valves fail due to mineral deposits from hard water clogging the valve opening, electrical failure in the solenoid coil, or debris in the water supply line. Over time, the solenoid's electrical connection deteriorates, and mineral buildup restricts water flow. Water hammer, sudden pressure spikes in the water line, can also damage the valve's internal components, causing it to malfunction or leak.
How much does it cost to replace a refrigerator water inlet valve?
Replacement pricing depends on your refrigerator model, whether it's a standard valve or a brand-specific unit (like Samsung Bespoke models), and whether you choose DIY or professional installation. Parts vary in cost, and labor charges differ by complexity. For an accurate quote tailored to your specific refrigerator and situation, contact a licensed technician or visit the service provider's website for current pricing.
Can I test my water inlet valve myself with a multimeter?
Yes, you can test the solenoid with a multimeter using continuity mode to check for electrical flow, or resistance mode to measure ohms. First, turn off power to the refrigerator and unplug it for safety. Locate the solenoid terminals, set your multimeter to continuity or resistance, and touch the probes to the terminals. A healthy solenoid shows continuity; no reading or very high resistance indicates failure. If you're uncomfortable working with electrical components, a professional technician can perform this test safely.


