 how-to
Samsung Ice Maker Not Making Ice But Water Works: 2026 Fix
Table of Contents
- Why Your Samsung Ice Maker Stopped Making Ice (While Water Still Works)
- Samsung Refrigerator Ice Maker Reset Button Location and Power Cycle
- Frozen Ice Maker Water Line Symptoms to Check First
- How to Defrost a Samsung Ice Maker Safely
- Diagnosing the Water Inlet Valve, Door Switch, and Temperature Sensor
- Samsung Ice Maker Error Codes and What They Mean
- Preventative Maintenance and DIY vs. Professional Repair
- Conclusion
- Frequently Asked Questions
Last Updated: October 4, 2026
Why Your Samsung Ice Maker Stopped Making Ice (While Water Still Works)
If your Samsung ice maker is not making ice but water works fine, the problem sits in the ice-making path, not the water supply.
At Home Tech, we see this across the Phoenix metro almost every week: homeowners pour a glass of water, hear the dispenser hum, and assume the fridge is fine while the ice bin sits empty for days.
Below, we'll diagnose each one in order, from the cheapest fix to the ones that need a multimeter.
What the Water Dispenser Working Tells You
A working water dispenser confirms three things: water reaches the fridge, the main supply line is not blocked, and the dispenser valve opens on command. It does not confirm the ice maker's own water inlet valve, fill tube, or temperature sensor are working, those are separate parts on a separate circuit.
That rules out the biggest, messiest repair before you start: you are not chasing a frozen supply line behind the wall, but a fault inside the ice maker assembly itself.
Samsung Refrigerator Ice Maker Reset Button Location and Power Cycle
Start with a full power cycle, a locked control board or stuck cycle often clears on its own, before you touch any tools.
Here is the reset sequence we use on service calls:
- Unplug the refrigerator or flip its dedicated breaker off.
- Wait a full 5 minutes. This lets the control board discharge.
- Plug it back in and listen for the ice maker to run its startup cycle.
- Give it 24 hours before you judge the result.
Where the Reset Button Sits by Model
Some Samsung models have a physical test button; others rely on the power cycle alone. On many French-door models it sits on the front of the ice maker housing under the bin; on others it is a small recessed button on the side. If you cannot find one, the power cycle is your reset.
Frozen Ice Maker Water Line Symptoms to Check First
A frozen fill tube is the most common cause we find and the easiest to fix.
Watch for these signs:
- Ice forms in the bin, then stops completely for days
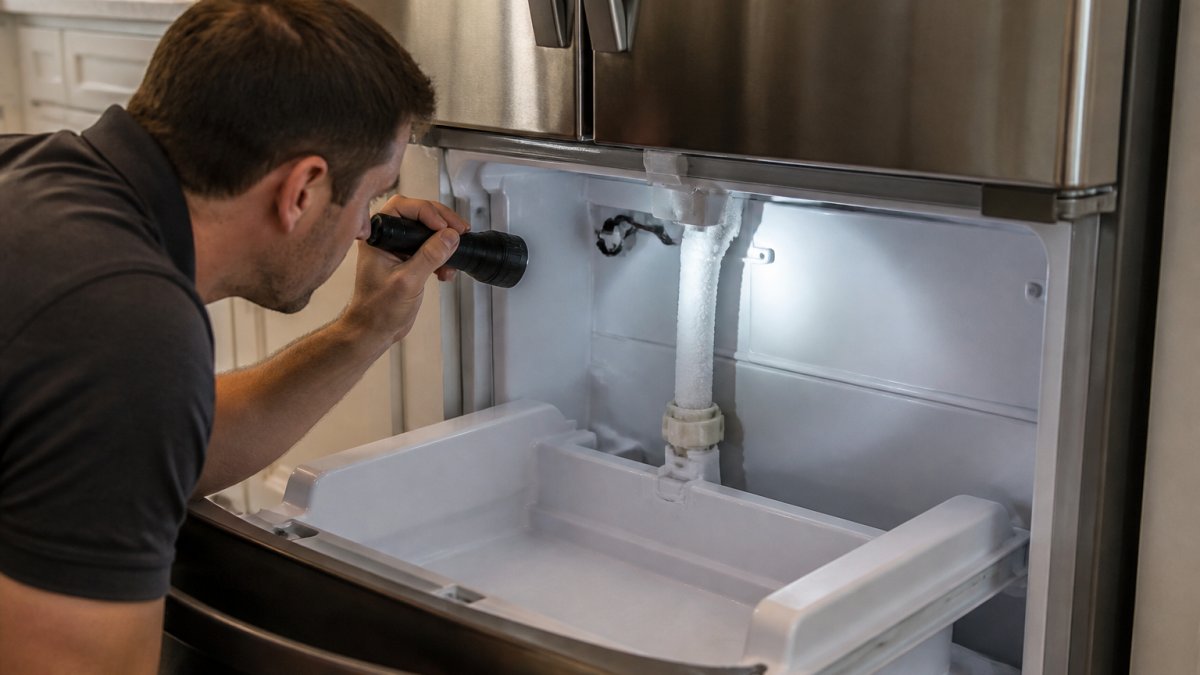
- The fill tube behind the ice maker looks white or frosted
- You hear the ice maker cycle but no water enters
To clear it, unplug the fridge and let the freezer warm for a few hours with the door open; a hair dryer on low, held well back from plastic, speeds this up.
How to Defrost a Samsung Ice Maker Safely
A full defrost clears frost that blocks the fill tube and insulates the ice mold, the fix when the ice maker ices over repeatedly.
Follow these steps:
- Empty the ice bin and set it aside.
- Unplug the refrigerator.
- Leave both doors open for 4 to 6 hours, or until all frost melts.
- Wipe down the ice maker housing and the fill tube.
- Plug the fridge back in and let it run 24 hours.
If frost returns within a week or two, the cause is usually air infiltration: a worn door gasket lets warm, moist air in, and that moisture freezes on the coldest surface, the ice maker. Check the gasket by closing the door on a dollar bill; if it pulls out easily, the seal is weak.
Diagnosing the Water Inlet Valve, Door Switch, and Temperature Sensor
Once a reset and full defrost have failed, the fault is in a part. Three parts cause most of these failures: the water inlet valve, the door switch, and the temperature sensor (thermistor). Here are the test procedures for each, plus a decision tree.
Step 1: The Water Inlet Valve
The inlet valve is a dual-solenoid assembly: one coil feeds the dispenser, the other the ice maker. That is why water can work perfectly while the ice maker gets nothing, the dispenser coil is fine and the ice-maker coil is dead.
How to test it:
- Unplug the refrigerator and shut off the water supply at the saddle valve or the wall valve.
- Pull the fridge out and remove the lower rear access panel (usually 1/4-inch hex screws).
- Locate the valve where the supply line enters. It has two or three solenoid coils with wire harnesses.
- Disconnect the harness from the ice-maker coil. Set your multimeter to the lowest ohms scale (200Ω).
- Touch the probes to the two terminals on that coil.
What the reading means:
- Most Samsung inlet valve coils read in the range of roughly 200 to 400 ohms. A reading in that band means the coil is likely good.
- A reading of OL or 1 (open loop) means the coil is burned out. Replace the valve assembly.
- A reading of 0 ohms means a shorted coil. Replace the valve assembly.
If the coil tests good, check for 120V AC at the harness connector during a fill cycle. No voltage means the control board is not commanding the valve, that points to the board, not the valve.
Step 2: The Door Switch (and the Door Alarm Trick)
The door switch tells the control board the freezer door is closed.
Fast test without tools: Most Samsung French-door models have a door alarm that beeps when a door is left open.
Where the switch lives: On most French-door models it is a small plunger or magnetic reed switch on the freezer door frame, near the hinge side.
Meter test: With the fridge unplugged, set the meter to continuity. Press the plunger.
Step 3: The Temperature Sensor (Thermistor)
The thermistor tells the board when the mold is cold enough to release ice. A drifting sensor stalls the harvest cycle, the mold gets cold, ice forms, but the board never gets the "release now" signal, so the ejector never runs.
How to test it:
- Unplug the fridge and remove the ice maker assembly (usually two or three screws plus one harness connector).
- Locate the thermistor clipped to the ice mold or pressed into a well on the mold.
- Disconnect it and set the meter to the 20k-ohm scale.
- At room temperature (roughly 70°F), most Samsung ice-maker thermistors read about 10k to 13k ohms.
- Cup the thermistor in your hand to warm it. Resistance should drop steadily as it warms. If it stays flat or jumps erratically, replace it.
A thermistor is inexpensive and easy to swap. If you have replaced the inlet valve and the door switch tests good, rule out the thermistor before suspecting the control board.
The Decision Tree
Work top to bottom. Stop when you get a hit.
- Does the dispenser water work? Yes → water supply is fine, move on. No → this is a supply problem, not an ice-maker problem.
- Did a 5-minute power cycle and a 24-hour wait change anything? Yes → done. No → continue.
- Is the fill tube frosted or is there heavy frost on the mold? Yes → defrost and check the door gasket. No → continue.
- Does the door alarm stop when you press the door switch? No → replace the door switch. Yes → continue.
- Does the inlet valve ice-maker coil read 200-400 ohms? No → replace the valve. Yes → continue.
- Does the thermistor read ~10k-13k ohms at room temp and drop when warmed? No → replace the thermistor. Yes → the fault is likely the control board or a wiring harness. This is the point to call a pro.
Samsung Ice Maker Error Codes and What They Mean
Error codes are the fastest shortcut to the failing system, if you know how to read them. Here are the codes and blinking-light patterns Samsung refrigerators show when the ice maker quits, plus what each points to. Code sets vary by model family, so confirm against your model's label inside the fridge.
Where the Codes Show Up
Samsung refrigerators display faults in three places, depending on your model:
- The main temperature display on the door or the top of the fridge, shows a two-character code like 22E, 24E, 25E, or 39E.
- Blinking indicator lights on the ice maker itself, a repeating blink pattern (for example, 3 blinks, pause, 3 blinks) that corresponds to a fault group.
- The Ice Max / Ice Off indicator on the dispenser panel, a slow blink often means the ice maker is in a paused or fault state rather than simply off.
Write the code down before you reset anything. A power cycle clears the code, and once it is gone you have lost your best clue.
The Codes You Are Most Likely to See
22E, Ice maker sensor fault. The board is not getting a valid reading from the ice-maker thermistor.
24E, Ice maker function fault. The board commanded a harvest cycle and did not see it complete.
39E, Ice maker fan / ice-room fault. The ice-room circulation fan is not running.
Blinking ice-maker light, 3-blink pattern. On many models this indicates the ice maker is in a self-diagnostic or fault-hold state.
How to Force a Diagnostic Cycle
Many Samsung ice makers have a test button on the front of the housing under the bin. Press and hold it for about 3 seconds to run a forced harvest sequence, fill, freeze, eject. Watch each stage.
- Fills but never ejects → thermistor or mold heater fault.
- Never fills → inlet valve or fill-tube fault.
- Ejects but no water entered → valve coil or supply issue.
This single test tells you which half of the ice-making path is broken in under 10 minutes.
What the Codes Do NOT Tell You
A code points to a circuit, not a part. 25E can be a $3 connector or a $300 board; 24E can be a jam cleared by defrost or a failed motor. Always test the cheapest component first, connector, sensor, valve, board, which saves most homeowners the cost of a board they never needed.
Samsung product support and owner's manuals by model number
Preventative Maintenance and DIY vs. Professional Repair
A short maintenance routine prevents most repeat failures. Monthly, empty and dry the ice bin and check the fill tube for frost.
The DIY versus professional call comes down to the part. Resets, defrosts, and gasket checks are safe to do yourself.
At Home Tech, we are a family-owned, Google Guaranteed company with over 10 years serving the Phoenix metro, including Chandler, Gilbert, Tempe, Scottsdale, and Glendale.
Conclusion
A Samsung ice maker that stops making ice while the water dispenser still works is frustrating but rarely a mystery. Work through it in order: reset, defrost, check the gasket, then test the parts.
When the fault is a valve, a sensor, or the control board, that is the point to call a pro. Home Tech offers same-day and next-day appointments, no hidden fees, and a 100% satisfaction guarantee.
Frequently Asked Questions
Where is the reset button on a Samsung ice maker?
On most Samsung French-door refrigerators, the reset button sits on the front edge of the ice maker head unit, near the test button, and you press and hold it for about 3 seconds until the unit beeps. On models without a physical button, the reset is performed through the control panel or by unplugging the refrigerator for 5 minutes. Check your model's user guide, since Bespoke and Family Hub units place the reset differently.
Why is my ice maker not making ice but water works?
The water dispenser and the ice maker share a supply line but not the same valve, so working water only confirms the line is pressurized. The ice maker itself can still fail from a frozen fill tube, a stuck ejector arm, a faulty water inlet valve solenoid, a bad door switch, or a temperature sensor reading above the set point. Work through the reset, defrost, and valve checks in order before assuming the whole unit is dead.
Can a frozen water line cause my Samsung ice maker to stop working?
Yes, and it is one of the most common causes. If the fill tube behind the ice maker freezes, water never reaches the ice mold, so no ice forms even though the dispenser still pours water fine. Symptoms include a dry ice tray, frost at the back of the freezer, and no water sound during the harvest cycle. A full defrost of the ice maker compartment usually clears it.
How do I know if my Samsung ice maker is defective or just needs a repair?
Run a forced cycle using the test button. If the ejector arm turns, the mold fills, and ice still does not drop, the fault is likely in the harvest cycle or the temperature sensor. If nothing moves at all and the control board shows an error code, the ice maker assembly may need replacement. A technician can test voltage and continuity with a multimeter to confirm before you pay for parts.


