 how-to
How to Replace Refrigerator Evaporator Fan Motor
Table of Contents
- Refrigerator Evaporator Fan Motor Symptoms You Shouldn't Ignore
- Tools Needed for Refrigerator Repair and Motor Replacement
- How to Test Refrigerator Fan Motor With Multimeter
- Safety Precautions and Power Disconnection
- Step-by-Step Evaporator Fan Motor Replacement
- Handling Frozen Evaporator Coils During Replacement
- Post-Repair Maintenance and Troubleshooting
- When to Call a Professional
- Frequently Asked Questions
Last Updated: August 15, 2026
Refrigerator Evaporator Fan Motor Symptoms You Shouldn't Ignore
Your freezer should maintain steady, cold air circulation. When that stops, the evaporator fan motor, which pushes cold air from the evaporator coils throughout your refrigerator, often fails. The most obvious sign is temperature fluctuations: your freezer reads 0°F but ice cream stays soft. A working refrigerator produces a quiet, continuous hum; silence from the freezer section means the fan motor isn't running.
Ice buildup is another red flag. Excessive frost on the evaporator coils indicates the defrost cycle isn't clearing them properly, often because the fan motor has stopped working. Catching these symptoms early prevents food loss and keeps repair costs manageable.
Tools Needed for Refrigerator Repair and Motor Replacement
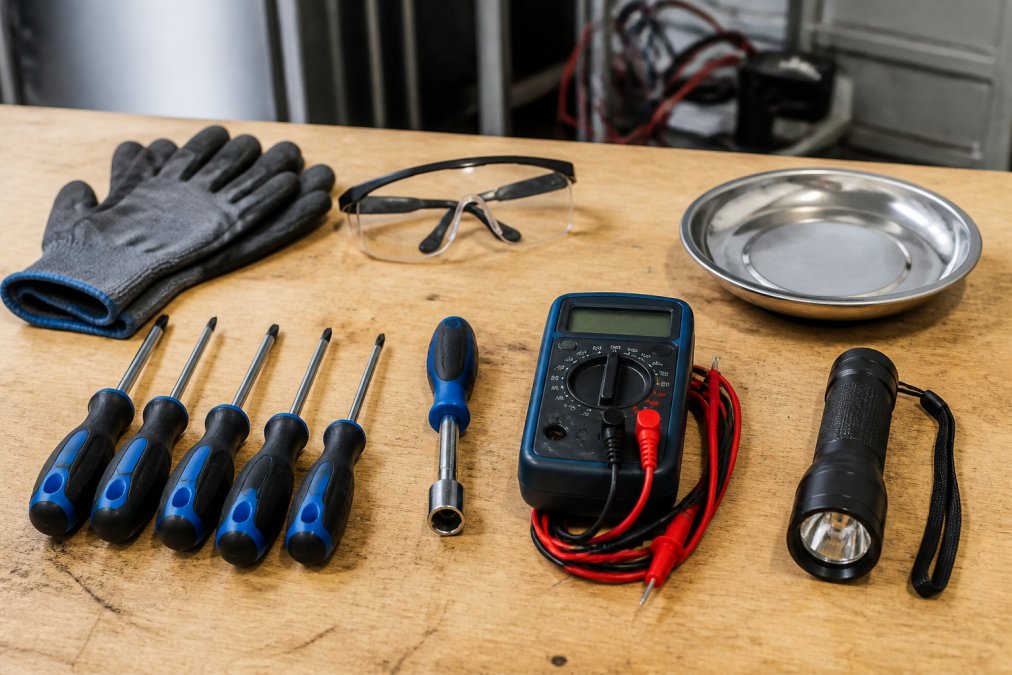
You'll need a screwdriver set with both Phillips and flathead options, a nut driver set (typically 5/16" and 1/4"), and a multimeter to test the motor before replacing it. A basic digital multimeter costs under $20. Safety equipment includes goggles, work gloves (nitrile or leather), and a flashlight for working in dark freezer compartments. A small magnetic tray organizes screws and fasteners.
Before ordering a replacement motor, note your refrigerator's model number from the serial plate. Motor part numbers vary by manufacturer; a GE motor won't fit a Samsung unit.
How to Test Refrigerator Fan Motor With Multimeter
Testing the evaporator fan motor with a multimeter tells you whether the motor is electrically dead or mechanically stuck. First, unplug the refrigerator from the power outlet. Set your multimeter to the resistance (ohms) setting. Locate the motor's terminal block and disconnect the wires carefully. Touch the multimeter probes to the two main motor terminals. A working motor shows 10-30 ohms of resistance. Zero resistance or infinite resistance indicates the motor is electrically dead.
Test the motor's thermal overload switch next. If the switch reads open (infinite resistance), the motor overheated and the protector tripped, a sign of mechanical binding or a frozen evaporator coil. Frozen evaporator coils are the most common cause of fan motor failure. When defrost cycles don't run properly, ice accumulates on the coils, causing the motor to overheat. Replacing the motor without fixing the defrost system means the new motor will fail the same way.
Check the power supply reaching the motor. Set your multimeter to DC voltage, plug the refrigerator back in, and measure voltage between the two main terminals while the compressor is running. You should see 12V or 24V depending on the refrigerator model. No voltage means the control board isn't sending power.
Safety Precautions and Power Disconnection
Refrigerators contain high-voltage electrical systems and sealed refrigeration circuits. Unplug the refrigerator from the wall outlet before touching any internal electrical components. Allow the refrigerator to warm up for 15-20 minutes after unplugging to thaw any ice on the evaporator coils.
Wear safety goggles and work gloves throughout the repair. Do not attempt to open refrigerant lines or disconnect any sealed-system components; refrigerant exposure is hazardous and requires EPA 608 certification. Avoid touching the compressor or copper tubing, which run hot during operation. When disconnecting the wiring harness, note the wire colors and terminal positions, and take a photo for reference. Reversed wires can cause electrical shorts or damage the new motor's windings.
Step-by-Step Evaporator Fan Motor Replacement
The replacement process takes 45 minutes to 2 hours depending on your refrigerator model.
Removing Freezer Shelves and Interior Panels
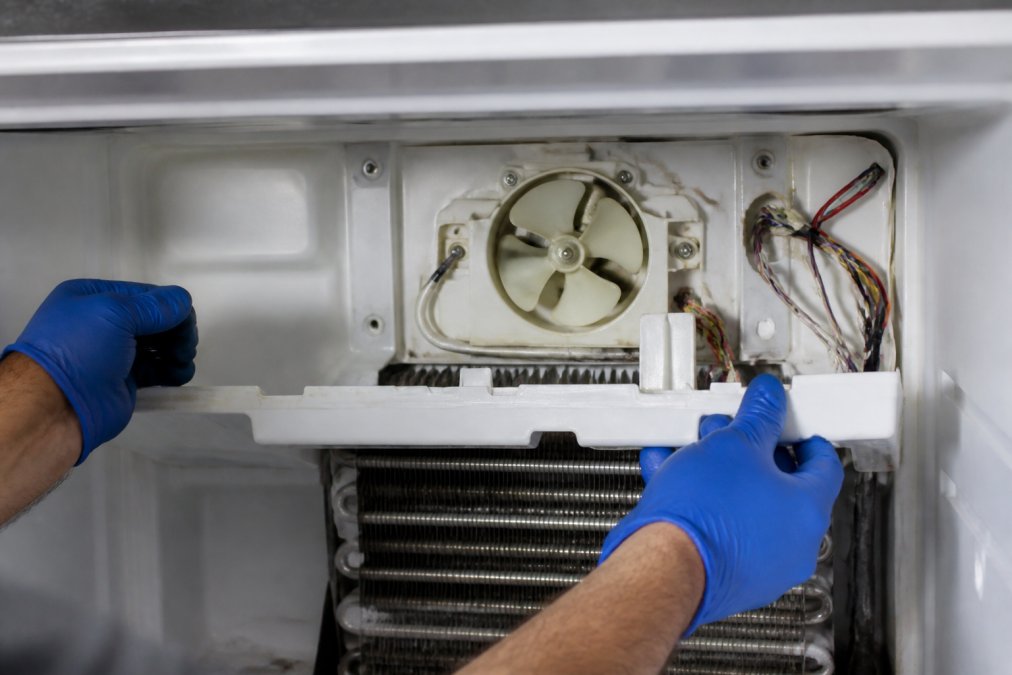
Remove all food from the freezer compartment and the freezer shelves by lifting them slightly and sliding them forward off their support rails. Locate the evaporator cover panel at the back or top of the freezer compartment. Remove the mounting screws (typically three to five Phillips-head fasteners) and slide the panel out. Some refrigerators have a second interior panel covering the motor housing directly; remove it the same way.
Inspect the evaporator coils as you work. Excessive ice buildup indicates the defrost cycle isn't functioning. Frost should be minimal on properly functioning coils.
Locating and Accessing the Evaporator Fan Motor
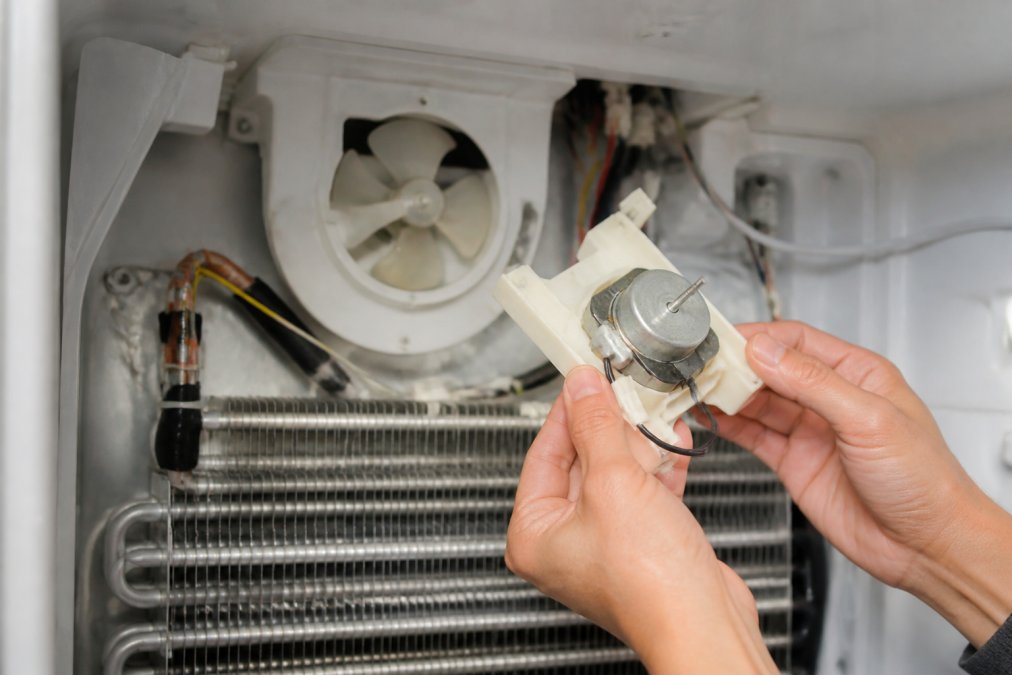
The evaporator fan motor sits adjacent to the evaporator coils, usually mounted on a bracket or housing assembly. The motor is cylindrical with a fan blade attached to its shaft. Before removing any fasteners, take a detailed photo of the motor's current position and the wiring harness routing.
Disconnecting the Wiring Harness
The electrical connector usually has a small latch or clip holding it in place. Gently press the latch while pulling the connector away from the motor's terminal block. Don't yank the connector; jerking can break the plastic housing or bend the metal terminals inside. Inspect the terminals for corrosion or damage and clean if necessary before installing the new motor.
Removing the Evaporator Cover and Fan Blade
The fan blade attaches to the motor shaft with a single bolt or clip. Locate this fastener and remove it carefully. The blade may be stuck due to ice or dust accumulation; apply gentle pressure with a rubber mallet if needed. Once the blade separates, set it aside and inspect it for cracks or warping.
Remove the motor mounting bolts or screws using your nut driver or screwdriver. There are usually two to four fasteners. Carefully slide the motor out of its housing.
Installing the New Motor and Reassembling
Before installing the new motor, verify it matches the part number of the old one. Position the new motor in the mounting bracket, aligning the shaft with the fan blade opening. Insert the mounting bolts and tighten them snugly. Attach the fan blade to the motor shaft, ensuring it sits centered in the evaporator cover opening and spins freely without touching the housing.
Connect the wiring harness to the new motor's terminal block, matching the wire colors to your photo reference. Red typically goes to the positive terminal, black to ground, and yellow or white to a control signal. Ensure the connector clicks or latches fully into place.
Reinstall the interior panels and freezer shelves in reverse order. Plug the refrigerator back in and listen for the compressor to start. You should hear the evaporator fan motor running within 5-10 minutes.
Handling Frozen Evaporator Coils During Replacement
Frozen evaporator coils are the leading cause of evaporator fan motor failure. Ice buildup restricts airflow, causing the motor to overheat and the thermal switch to trip. Replacing the motor without addressing frozen coils guarantees the same failure will occur within weeks.
When you remove the evaporator cover, assess the ice thickness. Light frost (less than 1/4 inch) is normal. Heavy ice buildup (more than 1/2 inch) or visible icicles indicate a defrost system failure. If heavy ice is present, allow the refrigerator to thaw for 24-48 hours with the door open and a pan beneath to catch water. Never chip ice from the coils with a screwdriver; you'll puncture the refrigerant tubes.
After thawing, inspect the defrost heater element, usually a thin metal tube or wire running along the evaporator coils. Check for visible cracks or damage. If the heater is broken, it must be replaced alongside the motor. Test the defrost timer for a clicking sound when it advances. The defrost thermostat is another common failure point; a stuck or broken thermostat prevents the defrost cycle from running.
Post-Repair Maintenance and Troubleshooting
After installing the new motor, monitor your refrigerator's temperature and airflow for the first week. The freezer should maintain 0°F or lower; the refrigerator section should stay between 35-38°F. Listen for unusual noises. A new motor should run quietly; grinding, squealing, or rattling sounds indicate mechanical problems.
Check airflow from the vents. Place your hand near the freezer vents and feel for steady, cold air. Weak airflow despite a running motor suggests ice has reaccumulated on the coils or the motor isn't spinning at full speed.
Clean the defrost drain line monthly. This small tube at the bottom of the refrigerator allows defrost water to drain into the pan beneath the unit. A clogged drain causes water to back up inside the refrigerator, potentially freezing on the evaporator coils. Inspect the evaporator coils quarterly for heavy ice buildup, which indicates a defrost system problem. Replace the refrigerator's air filter if it has one every 6-12 months.
When to Call a Professional
Some refrigerator repairs exceed DIY capability. If the evaporator fan motor runs but the refrigerator still doesn't cool, the problem isn't the motor; it's likely the compressor, refrigerant system, or control board. Sealed-system work requires EPA 608 certification. If you suspect a refrigerant leak, do not attempt repairs.
If your refrigerator is still under warranty, DIY repair voids the warranty. Contact the manufacturer or an authorized service center instead. Complex refrigerator models, particularly Samsung Bespoke units or LG compressor systems, have proprietary control boards and diagnostic systems that require professional service.
Home Tech's EPA 608-certified technicians handle all refrigerator repairs, including sealed-system work on Samsung Bespoke and LG units. If your DIY attempt reveals a larger problem, or if you're uncertain about any step, we're available for same-day or next-day service. Call (602) 486-1901 or visit hometechappliancerepair.com to schedule.
Replacing a refrigerator evaporator fan motor is manageable for homeowners comfortable with basic tools and electrical systems. The process takes patience and attention to detail, but avoiding unnecessary food loss makes the effort worthwhile. However, if the motor replacement reveals a defrost system failure or if you encounter sealed-system work, professional help prevents expensive mistakes.
Frequently Asked Questions
How do I know if my refrigerator evaporator fan motor is bad?
A failing evaporator fan motor typically produces audible clicking, grinding, or squealing sounds coming from the freezer compartment. You may also notice temperature fluctuations, with the freezer staying cold while the refrigerator section warms up, or frost buildup in unusual spots. The air circulation stops working properly, preventing cold air from reaching the fridge. Some units fail silently, test continuity with a multimeter to confirm before ordering a replacement part.
What tools do I need to replace a refrigerator evaporator fan motor?
You'll need a screwdriver set (Phillips and flathead), a nut driver for mounting screws, a multimeter for diagnostic testing, safety goggles, and a flashlight to see inside the freezer compartment. Have a container ready to hold small fasteners and the wiring harness connector. A socket set may be useful depending on your refrigerator model. Wear work gloves to protect your hands from sharp edges on the housing assembly.
Can I test the refrigerator fan motor myself before replacing it?
Yes. After disconnecting power, use a multimeter set to the continuity test mode. Touch the probes to the motor terminals on the terminal block. A good motor shows continuity (the meter beeps or shows zero resistance). No beep or infinite resistance means the motor is defective. You can also manually spin the fan blade to check for mechanical resistance. This diagnostic step saves money by confirming the motor is actually the problem before ordering a replacement.
Is replacing the evaporator fan motor myself worth the effort?
It depends on your comfort level with electrical work and mechanical disassembly. The job typically takes 1-2 hours for experienced DIYers. You'll save on service call fees, but improper reassembly can damage the wiring harness or electrical connector, leading to costly repairs. If you're uncertain about safely disconnecting power or handling the defrost cycle components, a professional repair prevents mistakes and includes a warranty on the replacement part.


