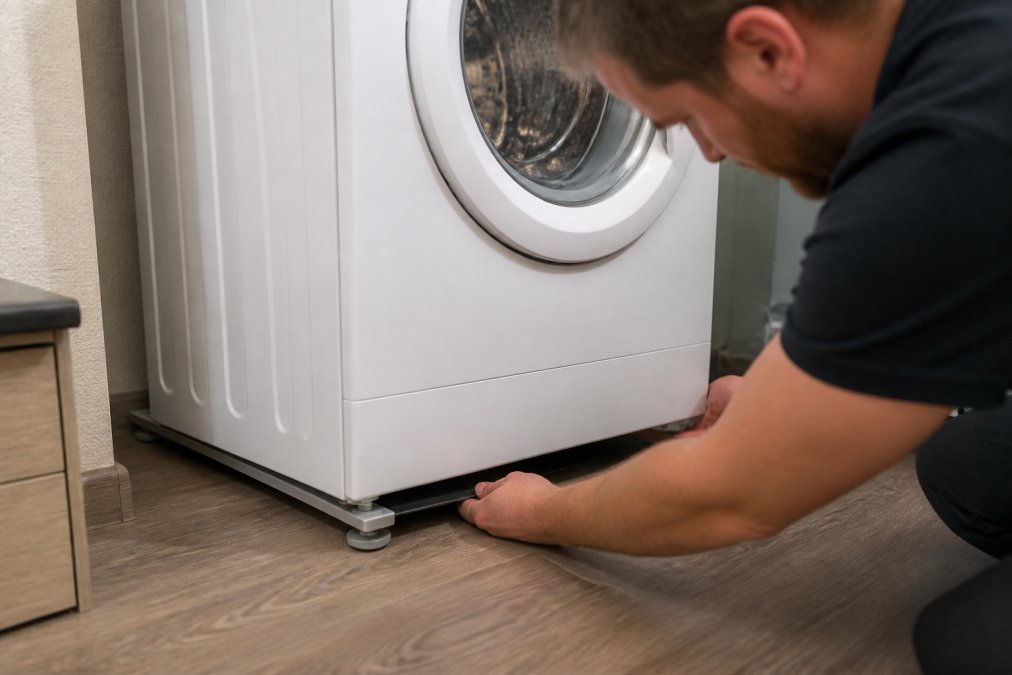
 how-to
How to Fix a Washing Machine That Is Off Balance
Table of Contents
- Why Your Washer Goes Off Balance in the First Place
- What You'll Need Before You Start
- Step 1: Redistribute the Load and Check Weight Capacity
- Step 2: Washing Machine Leveling Feet Adjustment
- Step 3: How to Use a Bubble Level on a Washer
- Step 4: Signs of Worn Suspension Rods and Shock Absorbers
- Step 5: Run a Test Spin Cycle and Reset Your Model
- How Floor Surface and Stability Affect Vibration
- Frequently Asked Questions
Last Updated: September 10, 2026
Why Your Washer Goes Off Balance in the First Place
An off balance washing machine is almost never a mystery. When weight inside the tub isn't distributed evenly, centrifugal force turns a small imbalance into violent shaking at high spin speeds (explainthatstuff.com).
This guide covers the exact steps technicians use on service calls across the Phoenix metro. Most off balance problems trace back to one of four causes: an uneven load, leveling feet that have drifted, worn suspension rods or shock absorbers, or a floor that flexes under the machine. Fix them in that order and you'll solve most cases without a single part replacement.
Most guides tell you to jump straight to the leveling feet. In practice, load distribution causes more off balance complaints than anything mechanical, so start there.
What You'll Need Before You Start
Gather these before you touch the machine:
- A spirit level (a bubble level is fine; a 2-foot level is better)
- An adjustable wrench or a pair of locking pliers
- Work gloves
- A flashlight for inspecting the underside
- A towel or two for any residual water
Total Time: 30-45 minutes Difficulty: Beginner to intermediate
Unplug the washer before any inspection (osha.gov). If you're working on a gas dryer stacked above the washer, shut off the gas supply first.
Step 1: Redistribute the Load and Check Weight Capacity
Open the lid or door and look at how the clothes sit. Bulky items like comforters, bath mats, and beach towels absorb water unevenly and clump against one side of the drum, often the entire problem.
Pull everything out. Then reload it deliberately:
- Add items one at a time around the drum, not in a pile.
- Keep the total load under the machine's rated weight capacity, usually listed inside the door or in the manual.
- Leave roughly a hand's width of space at the top of the tub so clothes can tumble freely.
An overloaded drum can't self-balance, no matter how good the suspension is (energy.gov).
Mixing Heavy and Light Items Correctly
Never wash one heavy item alone, a single soaked blanket will always migrate to one side during the spin cycle. Pair heavy items with two or three lighter pieces of similar fabric. For a large comforter, add a few towels and run a bulky or bedding cycle if your model has one; that cycle uses a slower, gentler spin sequence designed to keep heavy loads from throwing the drum.
Step 2: Washing Machine Leveling Feet Adjustment
If the load is fine and the shaking continues, the machine itself is probably sitting unevenly. Washing machine leveling feet adjustment is the fix, and it's the step most homeowners skip because it looks intimidating. It isn't.
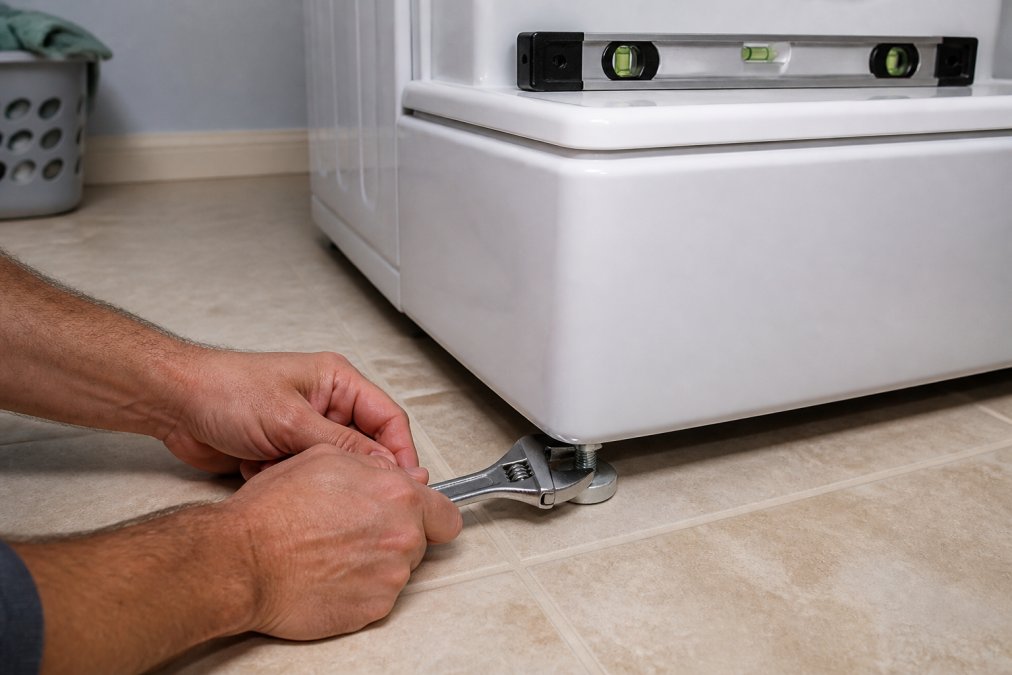
Here's the process:
- Slide the washer out far enough to reach all four feet, usually about 6 inches.
- Loosen the lock nut on each foot by turning it counterclockwise with your wrench.
- Turn each foot clockwise to raise that corner, counterclockwise to lower it.
- Adjust until all four feet sit firmly on the floor with no rocking.
- Re-tighten each lock nut against the base of the machine.
Press down on opposite corners of the top panel as you go. If the machine rocks at all, keep adjusting.
Tightening Lock Nuts to Hold Your Adjustment
The lock nut keeps your adjustment from drifting during the spin cycle. A common mistake is tightening the nut before the foot is positioned correctly, which forces the foot to move. Set the height first, hold the foot in place, then snug the nut against the frame. Hand-tight plus a quarter turn is enough; over-tightening can strip the threads on older machines.
Step 3: How to Use a Bubble Level on a Washer
Knowing how to use a bubble level on a washer takes about two minutes. Place the level on the top panel, front to back, check the bubble, then rotate 90 degrees and check side to side.
The bubble should sit centered between the marks on both axes. If it drifts toward one corner, that foot is too low. Raise it a half turn at a time and re-check. Repeat on the other axis.
Step 4: Signs of Worn Suspension Rods and Shock Absorbers
When the machine is level and the load is balanced but it still bangs during the spin cycle, the suspension is the next suspect. Signs of worn suspension rods: a drum that sags toward one corner, loud thumping at high spin speeds, or a tub that bounces for several seconds after the cycle ends.
Top-load washers use suspension rods that hang the tub assembly from the cabinet frame. Front-loaders use shock absorbers mounted at the base of the drum. Both wear out with age, and both are replaceable.
The Bounce Test: How to Tell If a Suspension Rod Is Bad
Most guides tell you to "check the suspension" without telling you how. Here is the test technicians actually run, and it takes under a minute.
- Unplug the washer and empty the drum completely.
- Open the lid (top-load) or the door (front-load) so you can reach the tub.
- Press straight down on the center of the tub with both hands, then release.
- Watch how the tub returns. A healthy suspension pushes the tub back to center in one smooth motion with little or no bounce. A worn rod or shock lets the tub bounce two or three times, drift off center, or stay depressed.
- Repeat the press on each of the four corners. If one corner feels noticeably softer than the others, that rod or shock is the weak link.
A common pattern reported: on top-loaders, the corner nearest the door hinge wears first because that is where the heaviest part of the tub assembly rests when the lid is open. If one corner fails the bounce test, the other three are usually close behind.
Visual Cues That a Rod or Shock Is Failing
You do not need to remove the parts to spot a bad one. With the cabinet open, look for:
- Grease streaks or dark residue running down the body of a shock absorber. The seal has failed and the damping oil is escaping.
- A shiny, polished band on a suspension rod where the spring has been rubbing metal-on-metal.
- A stretched or compressed spring on one rod compared to the other three. Lay a straightedge across the tops of the rods; they should sit at the same height.
- Cracks or a mushroomed top on the plastic rod head, which is where top-load rods commonly fail.
- Rust-colored dust around the rod mount, a sign the spring has been grinding.
If you see any of these, replace the parts. Cleaning them will not restore damping.
Replace in Matched Sets, Not Individually
Replace suspension rods and shocks in matched sets, not individually. A single new rod against three worn ones will pull the drum off center, and the machine will throw an out-of-balance error again within a few cycles. Kits are sold as a set of four for top-loaders and a pair for front-loaders for exactly this reason.
When to Inspect the Drive Belt and Tub Assembly
While the cabinet is open, check the drive belt for glazing, cracks, or slack. A slipping belt won't cause imbalance directly, but it can make the drum shudder at the start of a spin cycle. Also check the tub assembly: hair ties, coins, and small garments can wedge between the inner and outer tub and throw off drum alignment. If the drum wobbles when you rotate it by hand, the bearing or tub itself may be the issue, a job for a technician.
Step 5: Run a Test Spin Cycle and Reset Your Model
Reassemble everything, plug the machine back in, and run an empty spin cycle on the highest speed setting. Watch the drum through the first 30 seconds. A properly balanced machine will hum, not walk.
If the shaking persists, run a calibration or reset sequence. Most modern washers have one, and the procedure varies by brand. On many LG and Samsung front-loaders, hold a specific button combination for three to five seconds to enter calibration mode, then press start and let the machine run its diagnostic spin. Whirlpool and Maytag top-loaders often reset by unplugging for one minute. Check your manual for the exact sequence, because a general reset won't trigger the drum calibration routine.
How Floor Surface and Stability Affect Vibration
A perfectly level washer on a springy floor will still shake. Floor stability matters as much as the machine itself, and it is the factor most guides skip entirely. Here is how each common laundry-room surface behaves under a spin cycle.
How Each Flooring Type Behaves Under a Spin Cycle
| Floor type | Stability | What happens | What to do |
|---|---|---|---|
| Concrete slab | Highest | Almost no deflection; vibration stays in the machine | Level the feet and you are done |
| Ceramic or porcelain tile over a solid subfloor | High | Stable, but grout lines can hide a low spot | Check level in two directions; shim only under the feet, never under the cabinet |
| Vinyl or luxury vinyl plank | Moderate | Stable if the subfloor is flat; flexes if it is not | Confirm the subfloor is flat with a 4-foot level before trusting the surface |
| Hardwood or engineered wood over a joist system | Low | Joists deflect under the dynamic load and amplify vibration | Add anti-vibration pads and consider bracing from below |
| Carpet or carpet tile | Lowest | Feet sink unevenly and the machine never truly levels | Do not install a washer directly on carpet; use a rigid pad or a plywood platform |
The Deflection Test for Wood Subfloors
Before you blame the machine, test the floor. Fill a glass with water and set it a few feet from the washer. Run an empty spin cycle on high. If the water ripples hard or the glass walks, the floor is flexing and no amount of foot adjustment will fix the shake.
A second test: stand where the washer sits and bounce your weight. A floor that feels springy under a person will flex far more under a spinning drum plus a full load of wet laundry, which can weigh well over 100 pounds.
Fixing a Springy Floor
If the deflection test fails, you have three options, in order of cost and effort:
- Anti-vibration pads under each foot. These damp the transfer of energy into the floor and are the cheapest first step. They help most on tile and vinyl, least on a genuinely bouncy wood floor.
- Reinforce the subfloor from below. If you have access from a basement or crawl space, sistering a joist or adding a cross-brace under the washer footprint stiffens the floor. This is the only fix that addresses the root cause on a wood-framed floor.
- Move the machine. A ground-floor concrete slab is the most stable surface you can put a washer on. If a second-floor laundry room is the problem and you have a ground-floor option, that is the permanent fix.
Why Second-Floor Laundry Rooms Are the Worst Case
Wood subfloors flex under the dynamic load of a spin cycle, and that flex amplifies vibration. Second-floor laundry rooms are the worst offenders because the joists span a longer distance and carry the load of the room above. Concrete floors, common in slab-on-grade homes, are the most stable surface for a washer.
Tile and vinyl are fine as long as the surface is flat. Carpet is not; the feet sink unevenly and the machine never truly levels. If the floor is flat and stable but the machine still walks, revisit the load and the suspension before spending money on floor work.
Frequently Asked Questions
Why is my washing machine shaking violently in spin cycle?
Violent shaking during the spin cycle usually points to an unbalanced load, worn suspension rods, or a washer that is not level. Start by pausing the cycle and redistributing the clothes evenly around the drum. If the shaking continues on an empty drum, check the leveling feet and inspect the suspension rods for wear. A drum that bangs against the cabinet likely needs new shock absorbers or rods.
How do I know if my washing machine is level?
Place a spirit level on the top edge of the washer, front to back and side to side. If the bubble sits outside the center lines, the machine is not level. You can also push down on opposite corners; if the washer rocks, one or more leveling feet need adjustment. Tighten the lock nuts once the feet are set so the adjustment holds through spin cycles.
Can an unbalanced washing machine damage the floor?
Yes. A washer that shakes or walks across the floor can scuff tile, crack grout, and loosen hardwood planks over time. The constant vibration also stresses the tub assembly, drive belt, and suspension rods, which leads to more expensive repairs. Fixing the imbalance early protects both your floor and the machine itself.
How much does it cost to fix a washer that is off balance?
The cost depends on what is causing the imbalance. A simple leveling feet adjustment or load redistribution costs nothing if you do it yourself. Replacing worn suspension rods or shock absorbers involves parts and labor, and pricing varies by model and brand. Contact Home Tech at (602) 486-1901 for a quote specific to your washer.
Persistent shaking after you've leveled the machine and replaced worn suspension parts usually points to a bearing, tub, or control board issue that's hard to diagnose without pulling the unit apart. Home Tech's technicians carry the diagnostic tools and common parts to identify the real cause on the first visit, backed by a 100% satisfaction guarantee and a team that cleans up after itself. Book an appointment with Home Tech and get your laundry room quiet again.


