 how-to
Why Is My Fridge Leaking Water From the Bottom
Table of Contents
- Why Your Fridge Is Leaking Water From the Bottom
- Refrigerator Defrost Drain Clogged Symptoms
- How to Fix a Leaking Refrigerator Water Line
- Other Common Causes of Bottom Leaks
- When to Call Appliance Repair for Fridge Leak
- Troubleshooting Steps You Can Take Now
- Frequently Asked Questions
Last Updated: September 29, 2026
Why Your Fridge Is Leaking Water From the Bottom
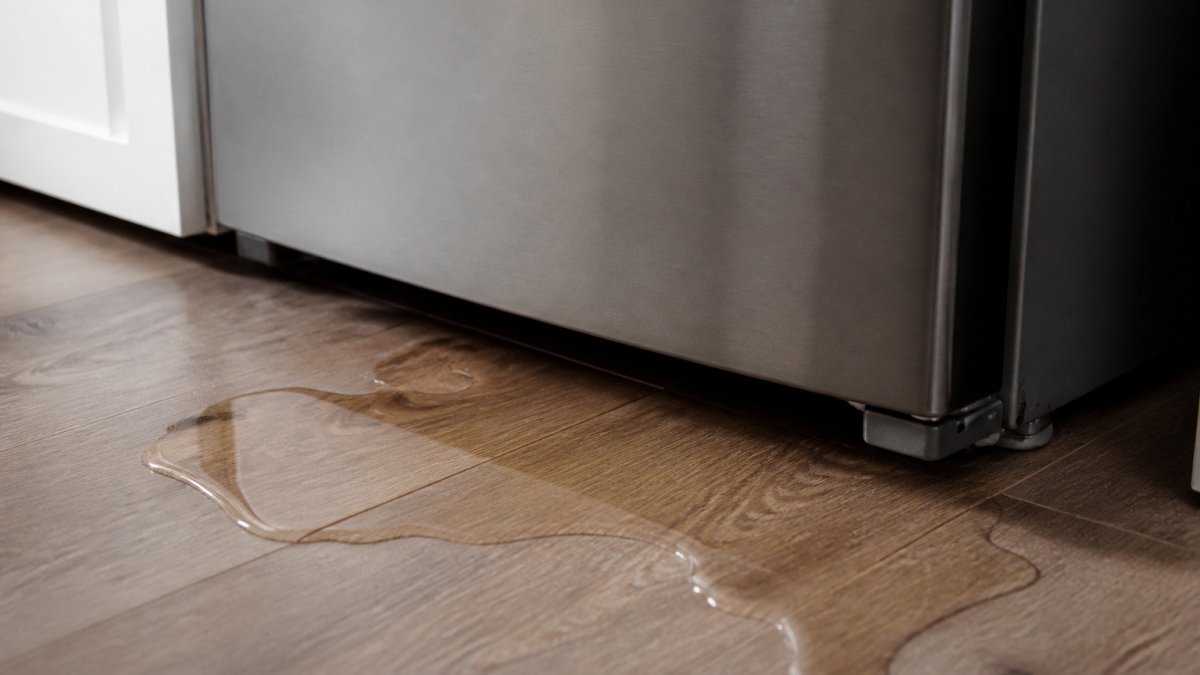
A fridge leaking water from underneath is one of the most common appliance problems homeowners face. The good news: most causes are fixable without a service call. The bad news: ignoring it can damage your floor and create mold growth.
Refrigerator Defrost Drain Clogged Symptoms
The defrost drain is the most common leak culprit. This small opening collects condensation and drains it away. When debris blocks it, water backs up and pools on the floor.
How to Spot a Clogged Drain
A clogged defrost drain shows specific warning signs:
- Water pools directly under the fridge
- The leak appears worst after the fridge runs its defrost cycle (typically every 6-8 hours)
- You notice water inside the fridge, especially on lower shelves or in the crisper drawer
- The drainage channel (the small groove running along the bottom interior) looks wet or has visible debris
- A musty smell comes from the back of the fridge
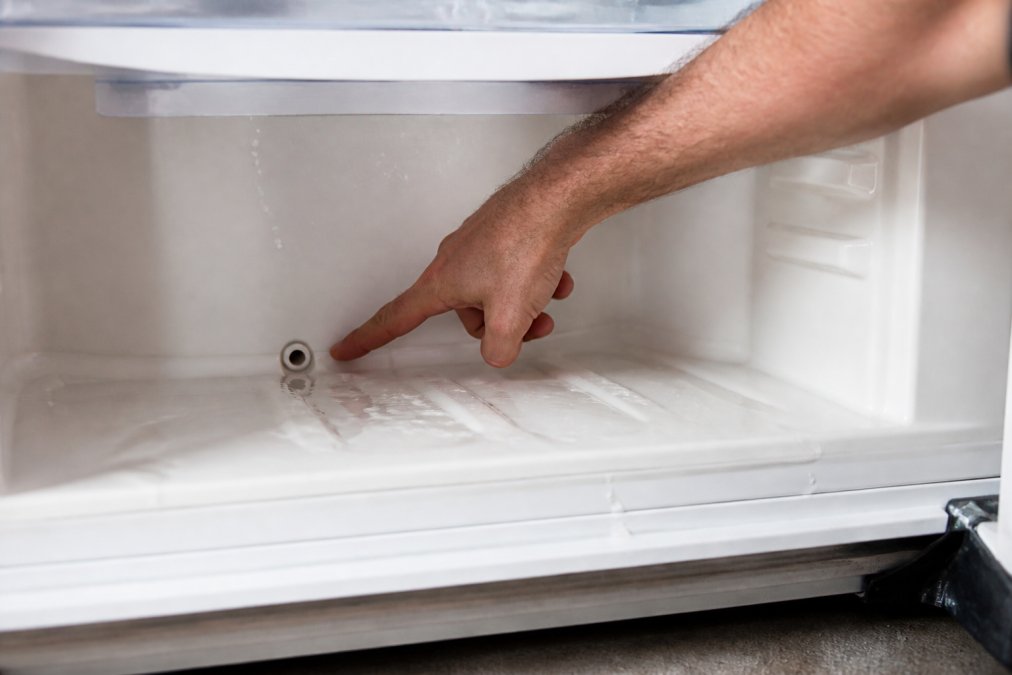
The defrost drain opening sits at the back-bottom of your refrigerator interior. Look for a small hole roughly the size of a pencil eraser. Ice or water dripping from it indicates the problem.
Why Debris Accumulates in the Drain
Food particles, ice crystals, and mold build up inside the drain tube over time. The curved tube has low spots where debris settles, eventually blocking the opening.
How to Fix a Leaking Refrigerator Water Line
If your fridge has an ice maker or water dispenser, the problem might be in the water supply line, filter, or inlet valve.
Inspect the Water Supply Line
The water supply line runs from your home's water source to the back of the fridge and can crack, kink, or develop pinhole leaks.
Here's what to check:
- Unplug the fridge before you start
- Pull the fridge away from the wall (you may need help)
- Locate the plastic or copper tubing running from the wall to the back of the fridge
- Look for visible cracks, splits, or wet spots
- Check the connection points at both ends, these are common leak sites
- Feel the line with your hand; wet spots indicate active leaks
Check the Water Filter
A cracked water filter leaks water inside or behind the fridge. The filter cartridge sits in a housing, usually in the upper-right corner or underneath.
To inspect it:
- Locate your filter cartridge
- Look for water dripping from the housing or cracks in the cartridge
- Check for water pooling around the filter area
- Note the installation date (filters need replacement every 6 months)
Examine the Inlet Valve
The inlet valve controls water flow to the ice maker and dispenser. When it fails, water leaks from the valve itself or from the connection points.
Other Common Causes of Bottom Leaks
Not every leak comes from the defrost drain or water line. Several other mechanical failures cause water to pool under your fridge.
Cracked Drain Pan
The drain pan sits under the fridge and catches condensation. A cracked pan lets water escape.
Damaged Door Seal or Gasket
A worn door seal lets warm air in, increasing condensation and overwhelming the drainage system.
Signs of a failing gasket:
- The door doesn't close fully
- You feel air escaping when the door is shut
- The rubber seal is cracked, torn, or hardened
- Condensation builds up inside the fridge more than usual
- Water collects on the bottom shelf or in the crisper drawer
Replacing the gasket improves efficiency and reduces condensation-related leaks.
Ice Maker Malfunctions
A faulty ice maker can leak water through a cracked fill tube, stuck float switch, or failed solenoid valve.
Watch for these signs:
- Water drips from the ice maker housing
- Ice cubes are smaller than usual or misshapen
- Water pools in the freezer compartment
- The ice maker cycles constantly but produces little ice
- You hear clicking sounds from the ice maker area
Blocked Drainage Channel or Condensation Buildup
The drainage channel is the small groove along the bottom interior that directs condensation toward the defrost drain. If blocked by debris or ice, water backs up.
When to Call Appliance Repair for Fridge Leak
Some leaks you can fix yourself. Others require professional tools, parts, and expertise. Knowing the difference saves you money and frustration.
DIY Repair vs. Professional Service
You can handle these repairs yourself:
- Clearing a clogged defrost drain (15-30 minutes, no parts needed)
- Replacing a water filter (5 minutes, filter costs $20-50)
- Replacing a cracked drain pan (20 minutes, pan costs $30-80)
- Tightening a loose connection on the water line (5 minutes, no cost)
- Replacing a door gasket (30 minutes, gasket costs $50-150)
You should call a professional for:
- Replacing a water supply line (requires disconnecting, routing, and testing)
- Replacing an inlet valve (requires water line disconnection and electrical work)
- Replacing an ice maker assembly (complex water and electrical connections)
- Sealed-system repairs (compressor, refrigerant, evaporator coils)
- Diagnosing electrical failures in the defrost cycle
Home Tech handles all these repairs. Our EPA 608-certified technicians service all major brands including GE, Whirlpool, LG, Samsung, Bosch, and Maytag. We've repaired thousands of leaking refrigerators across the Phoenix area, and we offer same-day appointments with no hidden fees.
Safety Precautions Before You Start
Before you touch anything inside or behind your fridge, follow these steps:
- Always unplug the fridge before inspecting or working on it
- Wear work gloves to protect your hands from sharp edges
- Let the fridge sit for 30 minutes after unplugging if you're working on the defrost system (some condensation will have melted and drained)
- Place towels under the fridge to catch water
- Take photos of connections before you disconnect anything
- Never use a sharp object to clear a drain, you'll damage the tube
- Don't force any plastic fittings; they crack easily
Troubleshooting Steps You Can Take Now
Most refrigerator leaks stop with one of these three steps. Start here before calling for service.
Step 1: Locate and Clear the Defrost Drain
The defrost drain is your first stop. If it's clogged, clearing it solves most leaks.
Here's how:
- Unplug the fridge
- Find the small drain hole at the back-bottom of the interior (it's usually near the crisper drawer)
- Look inside with a flashlight, you may see ice or debris blocking it
- Use a turkey baster or syringe filled with warm water to flush the drain
- Squeeze water into the opening gently; don't force it
- Water should flow out the back of the fridge and down into the drain pan
- Repeat 3-4 times until water flows freely
- Plug the fridge back in and monitor for leaks over 24 hours
Step 2: Flush the Drain Tube
The drain tube runs from the interior drain opening to the drain pan underneath the fridge. Debris can clog it partway down.
To flush it:
- Unplug the fridge and pull it away from the wall
- Locate the drain tube at the back-bottom (usually a plastic tube running down)
- Look for a small cap or plug at the end of the tube
- Remove the cap if there is one
- Use a turkey baster to flush warm water through the tube from the top
- Water should come out the bottom end into the drain pan
- If water doesn't flow, the tube is blocked, you may need to disconnect and clear it manually
- Reattach the tube and plug the fridge back in
Step 3: Check the Drain Pan for Cracks
If the drain is clear but water still pools under the fridge, the drain pan itself may be cracked.
To inspect it:
- Unplug the fridge
- Pull the fridge away from the wall
- Look under the fridge for the drain pan (a plastic tray, usually white or black)
- Slide it out carefully (it may be full of water)
- Empty any water into a bucket
- Look for cracks, holes, or splits in the pan
- If you find damage, order a replacement pan for your fridge model
- Install the new pan and push the fridge back into place
Frequently Asked Questions
Where is the defrost drain on my refrigerator?
The defrost drain is typically located at the back of the refrigerator, either inside the fridge compartment near the bottom or underneath the appliance. On many models, you'll find a small hole or tube at the rear interior wall or behind the crisper drawers. Check your refrigerator's manual for the exact location, it varies by brand and model. If you're unsure, a professional technician can show you exactly where it is and help you clear any obstructions.
Can a clogged defrost drain cause water to leak on the floor?
Yes, a clogged defrost drain is one of the most common reasons for water pooling at the bottom of your fridge or leaking onto your kitchen floor. When the drain becomes blocked by food particles, ice, or debris, water that should drain away backs up and collects in the drain pan or leaks out. If the drain pan itself is cracked or the water overflows, you'll see puddles forming. Clearing the clog, or having a professional clear it, usually stops the leak.
How do I know if my fridge leak is serious?
A small amount of condensation is normal, but active water pooling or continuous dripping indicates a problem. If water is leaking onto your kitchen floor regularly, the issue needs attention soon to prevent water damage and mold. Leaks from the water supply line or a cracked inlet valve are more urgent than a simple clogged drain. If the leak persists after you've cleared the defrost drain, or if you notice refrigerant smell or hear unusual compressor sounds, contact a professional repair technician immediately.
What's the difference between DIY drain cleaning and calling a professional?
Clearing a clogged defrost drain yourself involves locating the drain hole, flushing it with warm water, and removing visible debris, a task many homeowners can handle safely. However, if the leak is caused by a damaged water inlet valve, cracked drain pan, or compromised water supply line, you'll need professional service. Technicians have specialized tools to diagnose the exact cause, replace faulty components, and ensure the repair is done safely. They can also identify secondary issues you might miss, preventing future leaks and food spoilage.


