 how-to
Why Your Dryer Heating Element Keeps Burning Out
Table of Contents
- Why Dryer Heating Elements Fail Repeatedly
- Clogged Dryer Vent Overheating Symptoms and Airflow Problems
- Dryer Heating Element Testing With Multimeter
- Dryer Thermal Fuse Keeps Blowing: Causes and Solutions
- Dryer Heating Element Wire Melted: Electrical and Connection Issues
- Diagnosing Root Cause vs. Treating Symptoms
- When to Repair vs. Replace Your Dryer
- Frequently Asked Questions
Last Updated: October 18, 2026
Why Dryer Heating Elements Fail Repeatedly
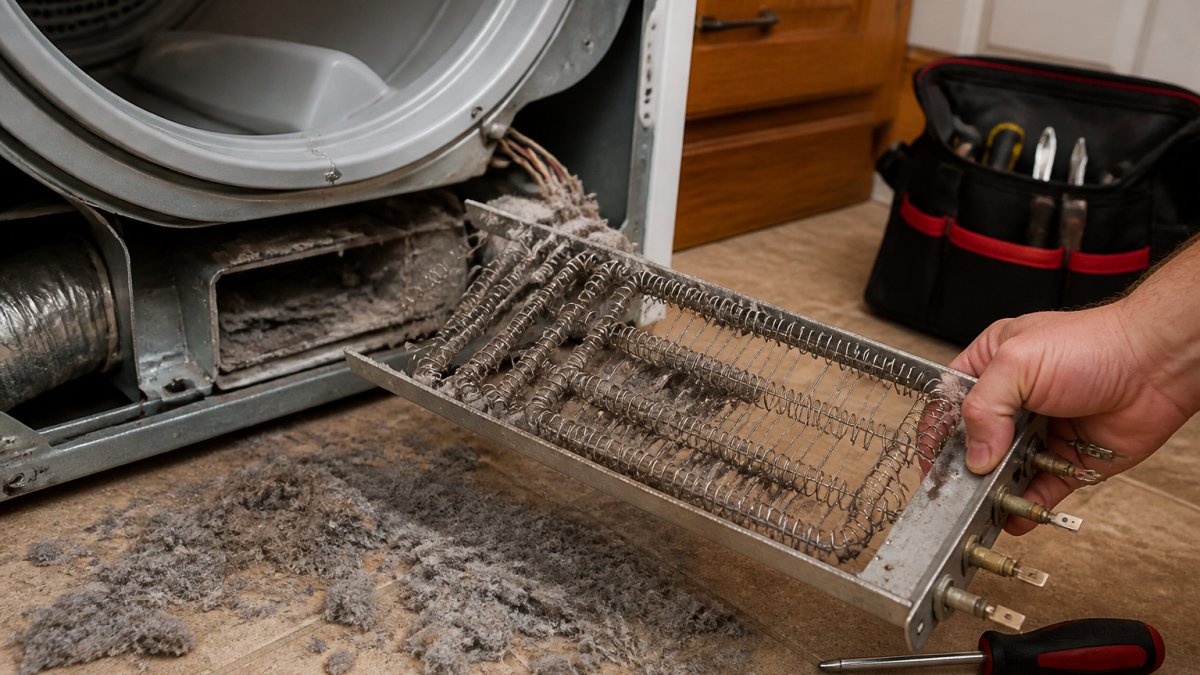
A dryer heating element keeps burning out when something forces the coil to stay on longer or run hotter than normal.
Most homeowners replace the element, run a few loads, and watch it fail again within weeks, treating the symptom, not the cause.
You can diagnose this without a technician, but replacing the element without fixing the root cause just keeps costing you parts and labor.
Clogged Dryer Vent Overheating Symptoms and Airflow Problems
Restricted airflow is the #1 reason heating elements burn out repeatedly.
Lint builds up inside the vent duct over time, narrowing the opening. Airflow slows, drying takes longer, and the element runs longer and hotter to compensate, that's when the coil starts to fail.
Signs your vent is blocked:
- Clothes take 2-3 cycles to dry (instead of 1)
- The dryer gets extremely hot to the touch on the outside
- You smell burning lint or a hot plastic smell
Check your vent duct first. Go outside to where the dryer vents and put your hand near the opening while the dryer runs.
Dryer Heating Element Testing With Multimeter
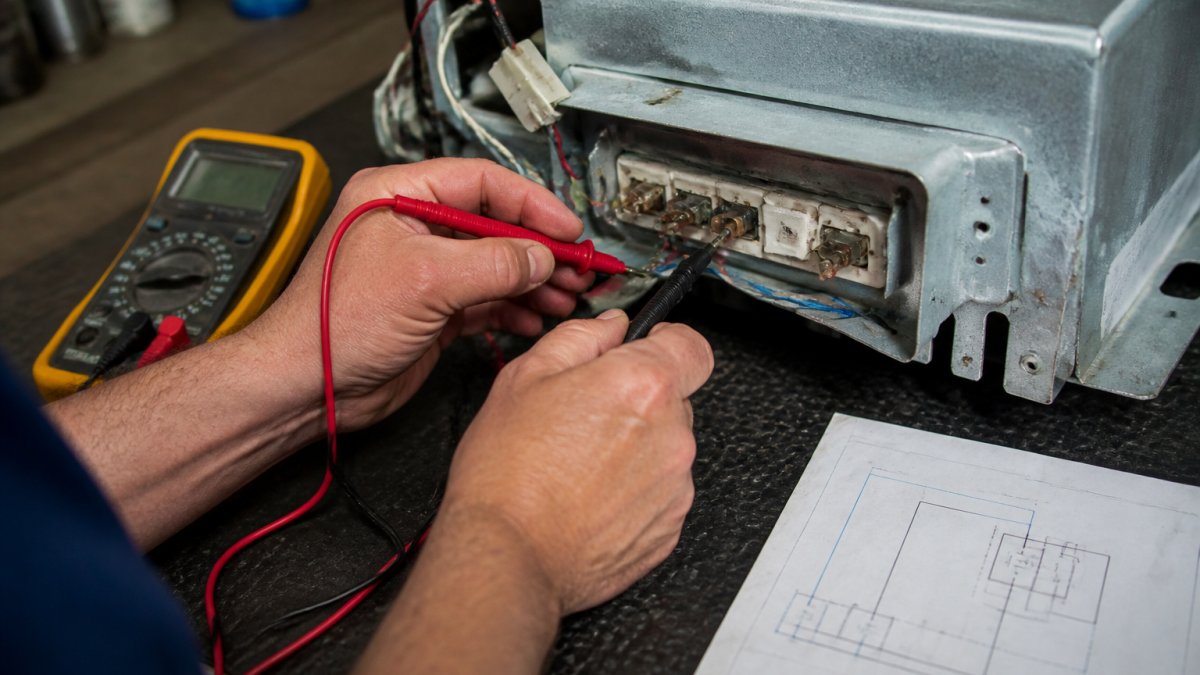
Testing a heating element with a multimeter confirms whether the element itself is bad, but the real value is ruling out the components that cause repeat failures.
Safety First: What You Must Do Before Touching a Meter
An electric dryer runs on a 240-volt circuit, and the element circuit is live whenever the dryer is plugged in and the door is closed. Before any test:
- Unplug the dryer from the wall receptacle. Do not rely on the door switch or the control panel being off.
- Shut off the dedicated breaker at the panel as a second layer of protection, especially if the cord is hard to reach.
- Wait 5 minutes after unplugging. Some control boards and capacitors hold a charge briefly.
If you are not comfortable working inside a 240-volt appliance, stop here and call a qualified technician or licensed electrician. The meter does not make the circuit safe, unplugging and verifying zero voltage does.
What You'll Need
- A digital multimeter with an ohms (Ω) setting and a continuity beep
- A screwdriver set (Phillips and flathead) and a nut driver for panel screws
- A towel or parts tray so screws and terminals don't roll away
Step-by-Step Testing Procedure
Step 3: Set the meter to the lowest ohms range. Touch the probes together; the meter should read near 0 Ω.
Step 4: Measure across the element terminals. A healthy coil typically reads roughly 8 to 30 Ω depending on wattage and model, a 5,400-watt, 240-volt element works out to about 10.7 Ω by Ohm's law, a 4,000-watt element closer to 14.4 Ω. Your model's spec sheet is the authority. What matters most:
- A reading in the expected range means the coil has continuity.
- OL or infinite resistance means the coil is broken and the element is bad.
- 0 Ω or a dead short means the coil is shorted and the element must be replaced.
Step 5: Test the element to ground. Set the meter to its highest ohms range and probe each element terminal to the metal housing.
Step 6: Test the components in the heat circuit. This is where repeat failures are usually found. With the dryer still unplugged:
- Thermal fuse: should read continuity (near 0 Ω). An open fuse means the dryer overheated, find out why before replacing it.
- Cycling thermostat: should read continuity at room temperature and open when heated. If it reads open cold, it needs replacement.
- High-limit thermostat: should read continuity cold. An open high-limit means the dryer hit unsafe temperatures.
Reading the Results Together
The pattern of readings tells you what to fix:
- Element open, thermostats and fuse good: the element wore out. Replace it and verify airflow before running a load.
- Element good, thermal fuse open: the dryer overheated. Clean the vent and blower housing, then retest before replacing the fuse.
- Element good, cycling thermostat open cold: the thermostat failed. Replace it and recheck airflow.
Dryer Thermal Fuse Keeps Blowing: Causes and Solutions
The thermal fuse is a one-time safety device that cuts power to the heating element if the dryer gets too hot.
But a thermal fuse shouldn't blow repeatedly.
Why it blows:
- Vent duct is blocked (most common)
- Lint has accumulated inside the dryer housing
- The cycling thermostat is stuck or failing
- The blower wheel is damaged and not moving air
When the thermal fuse blows, the dryer stops heating completely. Replacing the fuse without fixing what made it overheat means it will likely blow again.
Before replacing the thermal fuse, clean the vent duct and lint trap thoroughly, then run a test cycle.
Dryer Heating Element Wire Melted: Electrical and Connection Issues
Common electrical problems:
Loose or corroded terminals. Vibration from the drum loosens wire terminals over time.
Failed terminal block. If the block connecting the element wires cracks or corrodes, current flows unevenly and creates hot spots.
Check the terminals and wires where they connect to the heating element. They should be clean, shiny, and tight.
Tighten loose terminals carefully. If they're corroded, replace the terminal block or element assembly; if the wire insulation is damaged, replace the wire.
Diagnosing Root Cause vs. Treating Symptoms
Here's a diagnostic flow to consider when a heating element keeps failing:
Step 1: Check the vent. Is the vent duct clear? Does air flow freely from the outside vent hood? If the vent is blocked, clean it and see if the problem stops, a clogged vent will burn out a brand-new heating element in weeks.
Step 2: Clean the lint trap and interior. Remove the lint trap and vacuum inside the trap opening.
Step 3: Test the thermostat. The cycling thermostat controls when the element turns on and off.
Step 4: Inspect the heating element and connections. Look for burn marks, melted wire, or loose terminals.
Step 5: Check the power supply. Is the dryer getting full voltage?
Most repeat failures stop after step 1 or 2.
When to Repair vs. Replace Your Dryer
Once you've identified why the heating element keeps burning out, the next question is whether the fix is worth it. The answer depends less on the dryer's age than on three numbers: repair cost, replacement cost, and the likelihood the same failure returns.
The Three Numbers That Drive the Decision
1. Repair cost. A heating element is usually one of the cheaper dryer parts. A cycling thermostat, thermal fuse, and blower wheel are also generally affordable components.
2. Replacement cost. A new mid-range electric dryer commonly runs several hundred to over a thousand dollars, plus delivery, haul-away, and possibly a new vent kit or cord.
3. Repeat-failure risk. This is the number most homeowners skip. Fix the root cause, airflow, a clogged blower, a failing thermostat, and the new element should last years.
A Practical Decision Framework
Use this sequence rather than a single age cutoff:
- Repair when the root cause is identified and inexpensive to fix, clogged vent, lint-packed blower housing, failed thermostat, loose terminal, or a single bad element, and the dryer is otherwise sound (drum turns freely, no grinding, heats and tumbles normally after the fix).
- Repair when the dryer is under roughly 8 years old and the repair is a single component, even if labor pushes the bill toward $200 to $350. You are still well under replacement cost.
- Consider replacing when the repair estimate approaches half the price of a comparable new dryer, or when the dryer is past roughly 10 to 12 years and has had more than one major repair in the past two years.
- Replace when the failure is a sealed-system or major component problem, a failed motor, a cracked drum, a bad transmission on a front-load unit, or a control board that is no longer available, because parts availability and labor both climb.
The Energy-Cost Angle
An older dryer that takes two cycles to dry clothes because of restricted airflow is also an energy problem. A dryer running 90 minutes instead of 45 per load uses roughly twice the electricity, over a year of regular laundry, that can narrow the gap between repairing an inefficient older unit and replacing it. Factor wasted energy into the repair-versus-replace math, not just the part price.
What to Ask Before You Approve a Repair
- What is the diagnosed root cause, and what test confirmed it?
- Is the repair price for the part, labor, or both, and is there a diagnostic fee that applies to the repair?
- Is there a warranty on the part and on the labor, and how long does each last?
- If the same failure returns within the warranty window, what is the callback policy?
A technician who cannot answer these questions clearly is a reason to get a second estimate. The cheapest repair is the one that fixes the cause the first time.
Frequently Asked Questions
Why does my dryer heating element keep burning out after replacement?
A heating element that burns out repeatedly almost always points to an underlying problem, not a defective element. The most common culprits are restricted airflow from a clogged vent, a faulty thermostat that doesn't cycle off, or a failed thermal fuse that allows the element to overheat. Replacing the element without fixing the root cause means it will fail again in weeks or months. Diagnosis is essential: check your vent for lint buildup, test the thermostat and thermal fuse for continuity, and verify your breaker isn't tripping.
Can a clogged dryer vent cause the heating element to fail?
Yes. A blocked vent or exhaust duct forces hot air to recirculate inside the dryer drum instead of venting outside. This causes the internal temperature to climb far above normal operating levels, overheating the heating element and thermal fuse. The element burns out prematurely because it's running continuously without the thermostat cycling it off. Check for lint buildup in the vent duct, lint trap, and exhaust opening. A clean vent will restore proper airflow and prevent repeated heating element failure.
How do I test a dryer heating element with a multimeter?
Unplug the dryer and locate the heating element (consult your model number manual for its position). Set your multimeter to the resistance setting (ohms). Touch the probes to the element's terminals, a working element typically reads within a specific ohms range, depending on the model. A reading of 0 ohms or infinity indicates the element is burned out or broken. If the element tests good but your dryer still has no heat, the problem lies elsewhere: thermostat, thermal fuse, wiring, or power supply. Always verify your breaker is on and your household power is stable before concluding the element is bad.
What does it mean if my dryer thermal fuse keeps blowing?
The thermal fuse is a one-time safety device that blows when the dryer overheats, cutting power to prevent fire. If it blows repeatedly, something is causing excessive heat: a blocked vent, a faulty thermostat that won't cycle off, or a worn motor drawing excess current. Never bypass a blown thermal fuse with a higher-amperage fuse, this defeats the safety mechanism. Instead, diagnose why the dryer is overheating. Clean the vent, test the thermostat for continuity, and inspect the motor. Replacing just the thermal fuse without addressing the heat source will result in another blown fuse.


