 how-to
DIY Appliance Maintenance for Beginners: 2026 Guide
Table of Contents
- DIY Appliance Maintenance for Beginners: Start Here
- How Often to Maintain Household Appliances
- Your Home Appliance Maintenance Checklist, Appliance by Appliance
- Washing Machine Maintenance Tips for First-Timers
- Appliance Maintenance Tools Every Beginner Should Own
- Troubleshooting Symptoms: DIY or Call a Professional?
- Common Mistakes Beginners Make With Appliance Maintenance
- Frequently Asked Questions
Last Updated: October 16, 2026
DIY Appliance Maintenance for Beginners: Start Here
Most homeowners ignore appliances until something breaks, a costly habit. DIY appliance maintenance for beginners is mostly cleaning, checking, and knowing when to stop.
You don't need a repair license to vacuum refrigerator coils or clear a dryer vent, just basic tools and a schedule.
Some jobs belong to a licensed technician: sealed refrigerant systems, gas lines, and anything behind a live-voltage control panel.
What Beginners Can Safely Do Themselves
Start with tasks that involve no disassembly of sealed systems:
- Vacuuming condenser coils behind or beneath the refrigerator
- Wiping door seals and gaskets with warm soapy water
- Emptying and rinsing lint traps and dishwasher filters
The Safety Boundaries: Unplug, Shut Off, and Know Your Limits
The first rule of appliance maintenance: unplug the unit or shut off its breaker before touching anything wet, sharp, or electrical.
- Refrigerators: Unplug before pulling them out. Never puncture a refrigerant line.
- Washers and dryers: Shut off both water valves and unplug the unit.
- Dishwashers: Kill power at the breaker, not just the wall switch.
How Often to Maintain Household Appliances
Most household appliances need attention every one to three months, plus a few annual tasks. Use the calendar below as a default, then tighten intervals if your household runs appliances harder than average.
A Practical Maintenance Calendar
| Frequency | Task | Appliance | Time | Tools |
|---|---|---|---|---|
| Weekly | Wipe door gasket, leave door ajar | Front-load washer | 2 min | Damp cloth |
| Weekly | Check lint trap, remove lint | Dryer | 1 min | None |
| Monthly | Vacuum condenser coils | Refrigerator | 15 min | Vacuum, brush attachment |
| Monthly | Inspect vent hose and wall duct | Dryer | 10 min | Flashlight |
| Monthly | Rinse filter, wipe door gasket | Dishwasher | 10 min | Soft brush |
| Monthly | Run cleaning cycle | Washer | 1 cycle | Washer cleaner tablet |
| Every 3 months | Inspect supply hoses for cracks or bulges | Washer | 10 min | Flashlight, towel |
| Every 3 months | Degrease range hood filter | Range hood | 15 min | Degreaser, sink |
| Every 6 months | Replace water filter | Refrigerator | 5 min | New filter |
| Every 6 months | Vacuum refrigerator coils a second time if you have pets | Refrigerator | 15 min | Vacuum, brush attachment |
| Annually | Flush sediment from tank | Water heater | 30-60 min | Garden hose, bucket |
| Annually | Replace filter | HVAC system | 10 min | New filter |
| Annually | Inspect dryer vent run to exterior | Dryer | 20 min | Vacuum, vent brush |
Print it and stick it on the fridge.
How to Adapt the Calendar to Your Home
Three variables move tasks up or down the schedule:
- Pets in the home. Refrigerator coils and dryer vents load up faster. Vacuum coils every two to three weeks instead of monthly, and check the dryer vent monthly.
- Hard water. Dishwasher filters, washer drums, and water heater tanks accumulate mineral scale faster. Add a monthly vinegar cycle to the dishwasher and consider a descaling flush for the water heater every six months instead of annually.
- High-use laundry. If you run more than one load a day, inspect washer hoses monthly rather than quarterly, and replace rubber hoses with braided steel on a five-year cycle regardless of appearance.
Seasonal Tasks Worth Adding
Two seasonal habits prevent the costliest failures:
- Before heating season. Replace the furnace filter, vacuum the return grille, and confirm the dryer vent flap outside opens freely. A stuck flap traps lint and moisture.
- Before cooling season. Vacuum refrigerator coils, clean the condenser area behind the kick panel, and check that the fridge has at least an inch of clearance on all sides for airflow.
What to Record Each Time
A one-line entry per task is enough: date, appliance, what you did, anything worn. Over a year, that log shows which appliance is trending toward failure and when a filter was last changed.
Your Home Appliance Maintenance Checklist, Appliance by Appliance
This is where DIY appliance maintenance for beginners becomes a real routine. Each appliance follows the same structure: prepare, do the work, confirm it's done.
Refrigerator Coils, Door Seals, and Water Filters
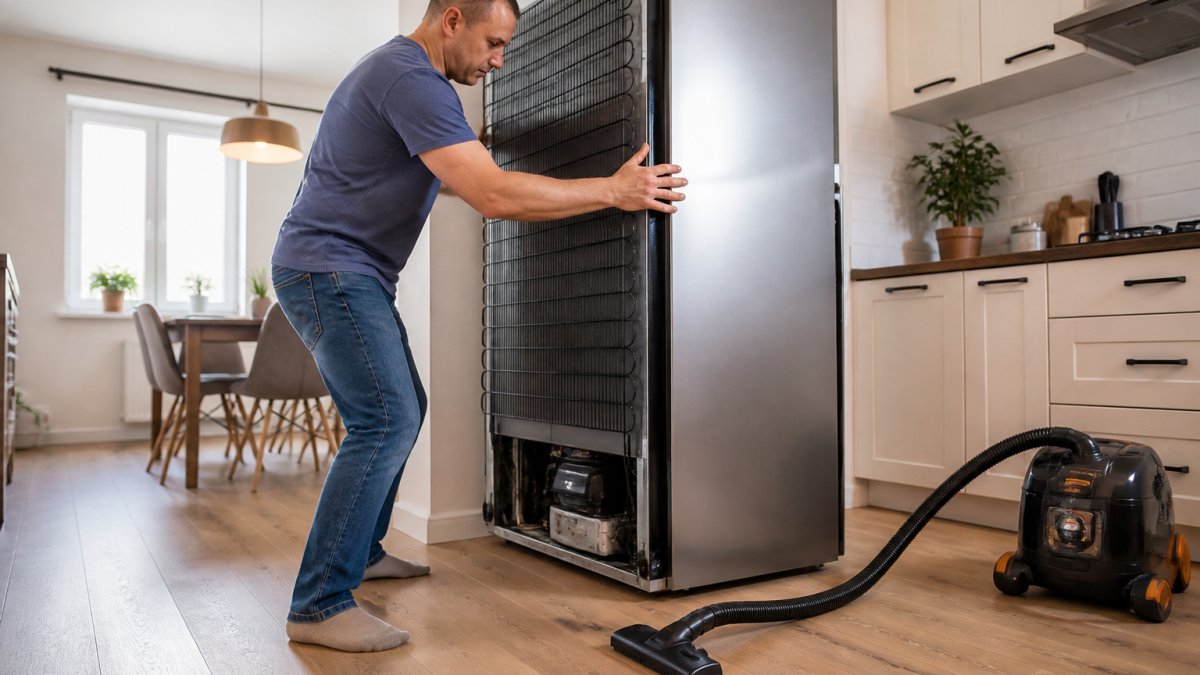
Prepare. Unplug the fridge. Pull it out from the sides, not the handle, with a second person if it's large.
Do the work.
- Locate the coils. On most models they are behind a kick panel at the bottom front, or on the back of the cabinet. Remove the kick panel with a nut driver if screws are present.
- Vacuum the coils front to back with the brush attachment. Do not bend the fins; if they are bent, straighten them gently with a fin comb.
- Wipe the rubber door gaskets with warm soapy water, then dry them. Run a finger along the gasket and feel for gaps or hard spots.
- Replace the water filter every six months, or sooner if the dispenser slows or the ice tastes off.
Confirm it's done. Close the door on a dollar bill and pull gently. If the bill slides out with no resistance, the gasket is not sealing and needs replacement.
Stop and call a pro if: you see oily residue near the coils, hear a hissing sound, or the compressor runs constantly without cooling.
Dryer Lint Traps, Vents, and Hoses
Prepare. Unplug the dryer and shut off the gas valve if it's a gas model. Pull it out far enough to reach the vent connection. Have a vacuum, vent brush, and flashlight.
Do the work.
- Clean the lint trap before every load. That is the easy part.
- Disconnect the vent hose from the back of the dryer and from the wall duct.
- Vacuum the hose, the wall duct opening, and the exterior vent flap. Run a vent brush through the wall duct if it's longer than a few feet.
- Check the hose for crushed or kinked sections and replace any that are damaged.
- Reconnect with a rigid or semi-rigid metal duct. Never use plastic or vinyl flex duct.
Confirm it's done. Run an empty timed cycle on air fluff. Air should flow strongly from the exterior vent. If the dryer still takes two cycles to dry a load, the vent is still restricted or the run is too long.
Stop and call a pro if: the dryer won't heat, you smell gas, or the vent run is buried inside a wall you can't access.
Dishwasher Filters, Drains, and Door Gaskets
Prepare. Kill power at the breaker, not just the wall switch. Empty the bottom rack. Have a soft brush, damp cloth, and white vinegar.
Do the work.
- Twist out the removable filter at the bottom of the tub. Rinse it under warm water and scrub off grease with a soft brush.
- Check the drain area for food residue and clear any obstructions with a gloved hand or a plastic utensil. Never use metal tools near the drain.
- Wipe the door gasket with a damp cloth. Look for cracks, mold, or a gasket that has pulled away from the door.
- Run a hot cycle with a cup of white vinegar in an empty machine once a month to cut grease and odor.
Confirm it's done. The filter should be free of visible film. The gasket should sit flat against the door frame with no gaps.
Stop and call a pro if: water pools under the unit, the door won't latch, or the machine trips the breaker when you restore power.
Washer Hoses, Gaskets, and Cleaning Cycles
Prepare. Shut off both water valves behind the washer and unplug it. Have a flashlight, towel, and bucket.
Do the work.
- Inspect the two supply hoses end to end. Look for cracks, bulges, blisters, or damp spots near the fittings.
- Check the connections at both ends. Hand-tighten any that feel loose, then snug with an adjustable wrench.
- On a front-loader, wipe the rubber door gasket dry after every few loads. Pull the gasket back and check the fold for trapped debris.
- Run a cleaning cycle with a washer cleaner tablet monthly to remove detergent residue and odor.
- Leave the door cracked open between cycles so the drum dries.
Confirm it's done. Run a short cycle and watch the hoses and connections for the full cycle. No drips, no bulges, no damp spots.
Stop and call a pro if: a hose bursts, water pools under the unit after a cycle, or the machine won't drain and the pump filter is already clear.
Range Hood and Oven
Prepare. Turn off the hood and let the filter cool. For the oven, unplug it or kill the breaker.
Do the work.
- Remove the range hood filter. Most are metal mesh and dishwasher-safe; run them through a hot cycle with degreaser.
- Wipe the hood exterior and the underside with a degreaser-soaked cloth.
- For a self-cleaning oven, run the clean cycle per the manual. For a manual oven, wipe the interior with warm soapy water after it cools.
Confirm it's done. The hood filter should be free of sticky residue. The oven interior should be free of burnt-on food that can smoke on the next use.
Stop and call a pro if: you smell gas near a gas range, the oven won't heat evenly, or the control panel shows an error code you can't clear.
Water Heater
Prepare. Shut off power at the breaker for an electric unit, or set a gas unit to pilot. Shut off the cold water inlet.
Do the work.
- Open a hot water tap upstairs to let air in.
- Open the drain valve and let the tank drain until the water runs clear.
- Open the cold inlet briefly to stir up remaining sediment, then drain again.
- Close the drain valve, remove the hose, and refill the tank before restoring power.
Confirm it's done. The water runs clear and the tank is full before you restore power. Running an electric element in a dry tank burns it out.
Stop and call a pro if: you see rust-colored water, the tank leaks from the body, the pilot won't stay lit, or you hear rumbling that continues after a flush.
Finding Your Model Number and Manual
Before any task, find the model and serial number plate, usually on a sticker inside the door, behind the kick panel, or on the back. Snap a photo.
With the model number, you can:
- Download the manufacturer's manual from the brand's website.
- Verify the correct filter or replacement part before you buy.
- Give a technician the exact model if you need to call one.
Washing Machine Maintenance Tips for First-Timers
Washing machine maintenance tips start with the hoses, rubber supply lines are the top cause of laundry-room water damage.
Inspect them every three months:
- Look for cracks, bulges, or damp spots
- Check the connections at both ends
- Replace rubber hoses with braided steel every five years
Clean the door gasket on front-loaders. That rubber seal traps moisture and mildew. Wipe it dry after every few loads. Leave the door cracked open between cycles.
Run a cleaning cycle with a washer cleaner tablet monthly. It removes detergent residue and odor.
Appliance Maintenance Tools Every Beginner Should Own
A basic appliance maintenance tools kit covers nearly every beginner task:
- Vacuum with brush attachment for coils and vents
- Nut driver set for hex-head screws on panels
- Adjustable wrench for water connections
Troubleshooting Symptoms: DIY or Call a Professional?
Match the symptom to the fix. Some problems are beginner-friendly. Others need a licensed technician.
| Symptom | Likely Cause | DIY or Pro |
|---|---|---|
| Fridge not cooling | Dirty coils, blocked airflow | DIY first |
| Fridge warm, compressor silent | Sealed system fault | Pro |
| Dryer takes two cycles | Clogged vent | DIY |
| Dryer won't heat | Heating element or gas valve | Pro |
| Washer won't drain | Clogged pump filter | DIY |
| Washer leaks from bottom | Worn hose or seal | DIY, then Pro |
| Dishwasher leaves film | Clogged filter, hard water | DIY |
| Water heater rumbling | Sediment buildup | Pro flush |
When to Stop and Call a Licensed Technician
Stop immediately if you see any of these:
- A refrigerant leak or oily residue near coils
- Any smell of gas near a range or water heater
- Burn marks, melted wiring, or a tripped breaker that resets and trips again
Sealed-system work requires EPA 608 certification, not a DIY job, and not worth the risk.
If a repair needs a certified hand, Home Tech's EPA 608-certified technicians handle sealed-system and refrigerant work on Samsung Bespoke refrigerators, LG compressor and ice maker repairs, and tankless water heater error codes.
Common Mistakes Beginners Make With Appliance Maintenance
The biggest mistake is skipping maintenance until something fails. A clogged dryer vent or a dusty condenser coil doesn't warn you. It just quits one day.
Other common errors:
- Using too much water on electrical parts. Damp cloth only, never a soaked rag near wiring.
- Forcing stuck parts. If a filter won't twist out, you're turning it the wrong way.
- Ignoring the water heater. Sediment builds quietly and kills efficiency.
One more thing most guides miss: document what you did and when. A notebook with dates, tasks, and parts replaced tells a technician a lot if something goes wrong later.
Appliances fail at the worst times, and some problems sit past the DIY line. When a repair needs a licensed hand, Home Tech is ready. We're a family-owned, Google Guaranteed company with same-day and next-day appointments, EPA 608-certified technicians, and a 100% satisfaction guarantee on every repair.
Frequently Asked Questions
What appliance maintenance can beginners safely do themselves?
Beginners can handle cleaning tasks that do not require opening sealed systems or touching electrical components. That includes vacuuming refrigerator condenser coils, wiping rubber gaskets and door seals, clearing dryer lint traps, rinsing dishwasher filters, and checking hoses and water connections for leaks. Unplug the appliance first and shut off the water supply before inspecting lines. Anything involving refrigerant, gas lines, heating elements, or control boards should go to a licensed technician.
How often should you clean refrigerator coils?
Clean refrigerator coils every six to twelve months in most homes. If you have pets or a dusty environment, aim for every three to six months. Pull the fridge away from the wall, unplug it, and vacuum the condenser coils with a brush attachment. Dusty coils make the compressor work harder, which raises energy use and shortens the appliance's life. Add it to your home appliance maintenance checklist so it does not get skipped.
What tools do you need for basic appliance maintenance?
A basic appliance maintenance tools kit includes a vacuum with a brush attachment, a soft-bristle brush, microfiber cloths, a mild degreaser, a bucket, a flashlight, and a set of screwdrivers. Add adjustable pliers for hose clamps and a sponge for filter cleaning. You do not need specialty equipment for routine tasks like wiping door seals, clearing lint traps, or checking water connections. Keep the kit in one place so maintenance stays quick and easy to start.
When should you stop DIY appliance maintenance and call a professional?
Stop and call a licensed technician when you see sparks, smell gas, notice burning odors, or find standing water near electrical parts. The same applies to sealed-system problems like a refrigerator that runs but does not cool, refrigerant leaks, or compressor noise. Gas appliances, water heaters, and any repair that requires opening a panel behind live wiring are not beginner territory. HomeTech Appliance Repair serves the Phoenix metro area with same-day appointments for these situations.


