 how-to
Best Dryer Vent Cleaning Tools for Homeowners
Table of Contents
- Why Dryer Vent Cleaning Tools Matter for Fire Prevention
- Types of Dryer Vent Cleaning Kits and What They Do
- Drill-Powered Brush Kits: Safe Use and Selection
- How to Clean a Dryer Vent Step by Step
- How Often to Clean Dryer Vents and Warning Signs
- When to Call a Professional Instead
- Frequently Asked Questions
Last Updated: October 10, 2026
Why Dryer Vent Cleaning Tools Matter for Fire Prevention
A clogged dryer vent is a serious fire hazard. When restricted, heat builds up and flammable lint accumulates in confined spaces, creating a fire risk that grows with every load of laundry.
The right dryer vent cleaning tools remove lint buildup before it becomes dangerous. Options range from simple brush kits to rotary systems and vacuum attachments.
A clean dryer vent also improves airflow, reduces drying time, and extends your dryer's lifespan by reducing strain on components.
Types of Dryer Vent Cleaning Kits and What They Do
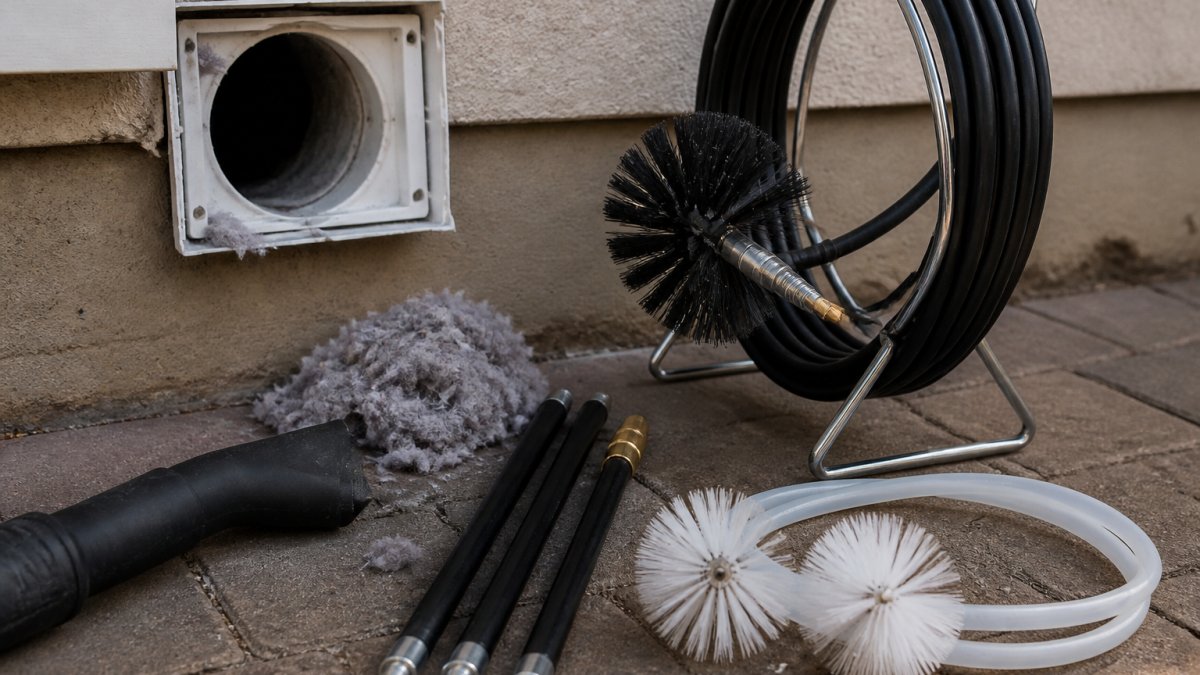
Dryer vent cleaning tools fall into three main categories: rotary brush systems, manual brush kits, and vacuum attachments. Each suits different vent layouts, duct materials, and buildup severity.
Manual Brush Kits
Manual brush kits use your pushing and twisting motion to scrub lint from vent walls. The Holikme Dryer Vent Cleaner Kit is a budget-friendly option with a brush head and flexible rods extending 6 to 8 feet total.
Manual kits work best for routine maintenance on rigid metal ducts and are gentler on flexible ducts. They require more physical effort and are insufficient for vents longer than 8 feet or heavy compacted lint.
Best for: Short vents (under 8 feet), light annual maintenance, rigid metal ducts, homeowners who prefer low-cost entry tools.
Rotary Brush Systems
A rotary brush system spins to dislodge lint as you push it through the duct. The Gardus LintEater Rotary Dryer Vent Cleaning System is a top choice with adapters for most configurations. Rotary systems excel at breaking up compacted debris that manual brushes can't loosen.
Rotary systems handle longer vent runs (12+ feet) and tighter bends but require technique to avoid damaging flexible ducts. They generate more dust, so a shop vacuum is needed. Sharp 90-degree turns or wall runs may cause jamming.
Best for: Heavy buildup, longer vents (12+ feet), metal ducts, homeowners comfortable with power tools.
Drill-Powered Brush Kits
Drill-powered brush kits combine power tool convenience with manual control. The Everbilt 12 ft. Extendable Drill-Powered Duct Lint Brush Dryer Vent Cleaning Kit and Deflecto Dryer Duct Cleaning Kit extend 12 feet, covering most residential vents in a single pass.
Variable speed settings provide control over a fixed-speed rotary system. Drill-powered kits clean longer runs from a single access point but are less powerful than dedicated rotary systems and work better for moderate buildup.
Best for: Most residential vents, moderate buildup, homeowners with cordless drills, balanced control and reach.
Vacuum Attachments
Vacuum attachments work best as a finishing step after brush cleaning to capture lint and reduce mess. They're ineffective for heavy buildup because they don't dislodge compacted lint.
Best for: Finishing step after brush cleaning, light maintenance, capturing loose lint, reducing mess.
Choosing by Vent Layout and Condition
Short, straight vents (under 8 feet, no bends): A manual brush kit is sufficient and cost-effective.
Medium vents (8-12 feet, one or two bends): A drill-powered kit offers the best balance of power, reach, and control.
Long or complex vents (12+ feet, multiple bends, roof termination): A rotary system or professional cleaning is necessary.
Heavy, compacted buildup: Start with a rotary system or drill-powered kit at moderate speed. Manual brushes alone will be ineffective and exhausting.
Flexible ducts (foil or plastic): Use manual or drill-powered kits at low speed.
Metal rigid ducts: Any tool works, but rotary systems are most efficient for heavy buildup.
Drill-Powered Brush Kits: Safe Use and Selection
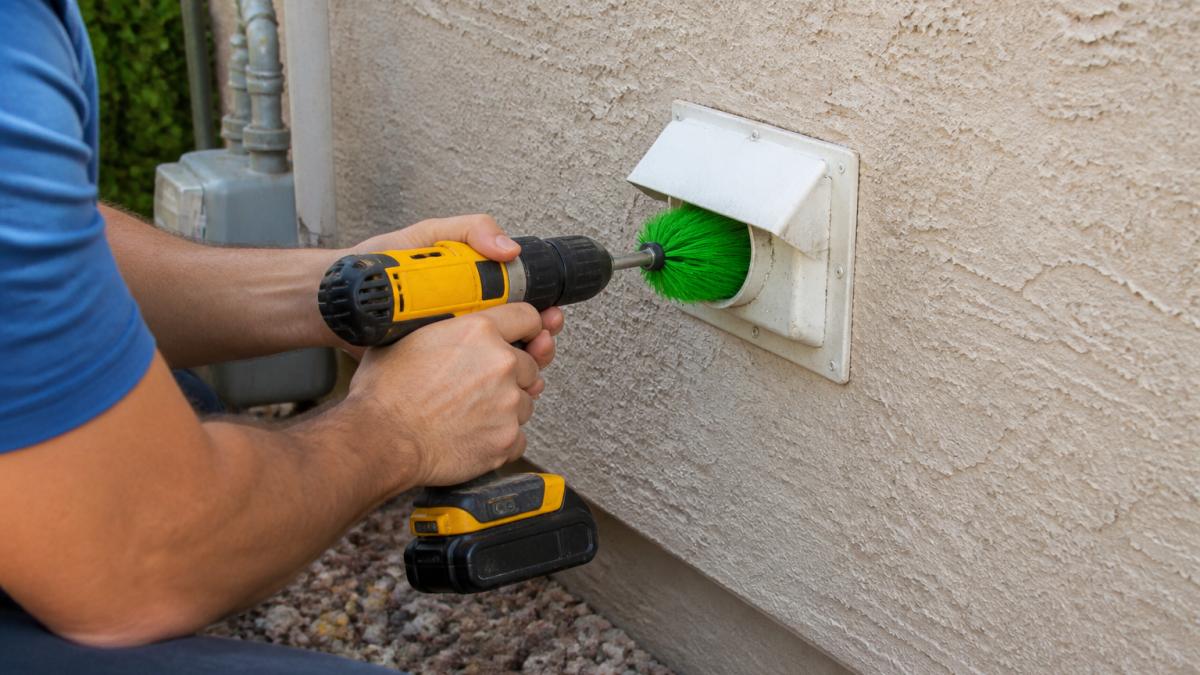
Drill-powered brush kits combine the convenience of power tools with the control of manual systems. Models like the Everbilt 12 ft. Extendable Drill-Powered Duct Lint Brush Dryer Vent Cleaning Kit and the Deflecto Dryer Duct Cleaning Kit (which works with or without a drill) give you extended reach and rotational force without the complexity of a full rotary system. These kits extend up to 12 feet, which covers most residential dryer vents. A drill-powered brush kit lets you clean longer vent runs from a single access point, reducing the need to disconnect ducts or access multiple sections.
Drill Direction and Rod Connection
Always run your drill in forward (clockwise) rotation when pushing the brush into the vent. Never use reverse rotation while the brush is inside the duct, this can cause rods to unscrew and become stuck. If backing out, stop the drill completely, then manually unscrew the rods by hand before reversing.
Verify all rod connections are hand-tight before inserting the brush. Loose connections will separate under drill torque, potentially leaving brush segments inside your duct. Test each connection by hand and tighten if loose.
Speed and Pressure Settings
Start at low speed (0-500 RPM). Low speed is sufficient to dislodge lint and provides maximum control. High speeds are unnecessary and risky, increasing the chance of binding, rod separation, or tearing flexible duct material.
Apply steady, gentle forward pressure and let the brush do the work. If you feel significant resistance, stop immediately. Manually twist the rods back and forth to loosen the blockage, then try again at low speed. If the brush won't move forward or backward after multiple attempts, stop, forcing it can tear the duct or separate rods. This indicates a severe blockage requiring professional equipment.
Flexible Duct Protection
Flexible ducts are vulnerable to tearing. Keep drill speed under 300 RPM, move the brush straight in and out without side-to-side twisting, and never let it spin freely without forward motion. If the brush catches or snags, stop and pull back gently. For primarily flexible ducts, consider a manual brush kit instead.
Recognizing When to Stop
Stop and call a professional if: the brush won't advance more than a few feet (severe blockage or duct collapse), you hear grinding or unusual noise (binding or separating rods), the brush becomes stuck and won't reverse out, your vent is longer than 12 feet or makes multiple sharp turns, or you suspect the duct is damaged or collapsed.
Tool Selection by Vent Complexity
Drill-powered kits work best for straight runs or gentle bends. Multiple sharp 90-degree turns, roof-terminating vents, or vents running through walls or attic spaces may require professional cleaning.
How to Clean a Dryer Vent Step by Step
Cleaning your dryer vent takes 30 to 60 minutes for most residential setups.
What You'll Need Before You Start
Gather: your cleaning tool, a flashlight, a shop vacuum, a screwdriver, hose clamps or duct tape, and a drop cloth.
The Cleaning Process
Step 1: Disconnect the dryer. Unplug it, never work on a plugged-in dryer.
Step 2: Locate your vent opening. Most residential dryers vent through an exterior wall or roof.
Step 3: Disconnect the duct if accessible. Use a screwdriver to disconnect it from the dryer for direct access.
Step 6: Vacuum out loosened lint. Use a shop vacuum to capture debris and prevent it from escaping into your home.
Step 7: Reconnect and secure. Reattach the duct using hose clamps or duct tape, ensuring an airtight connection.
Common Mistakes to Avoid
Pushing too hard can tear flexible duct material. Ignoring the exterior vent allows lint to accumulate at the exit point. Using high speed on power tools is unnecessary and risky. Skipping the vacuum step allows debris to settle back into the duct.
How Often to Clean Dryer Vents and Warning Signs
Clean your dryer vent at least once per year, or twice yearly if you have a large household or longer vent run. Watch for warning signs: increased drying time, hot exterior, lint around the exterior opening, burning smell, or a vent hood flap that doesn't open properly. Any of these indicate restricted airflow requiring prompt cleaning.
When to Call a Professional Instead
Call a professional if your vent is longer than 25 feet, makes multiple turns, runs through walls or attic spaces, or if cleaning doesn't restore airflow. Professionals have high-powered rotary systems and video inspection tools.
A clean dryer vent is the foundation of safe, efficient drying. Whether you tackle it yourself with the right tools or call a professional, regular vent maintenance protects your home from fire risk and keeps your dryer running smoothly. If you're in the Phoenix area and need professional dryer or appliance service, Home Tech offers same-day appointments and a 100% satisfaction guarantee.
| Tool Type | Best For | Reach | Power | Ease of Use |
|---|---|---|---|---|
| Manual Brush Kit | Routine maintenance, light buildup | 6-8 feet | Low | High |
| Rotary System | Heavy buildup, longer vents | 12+ feet | High | Medium |
| Drill-Powered Kit | Most residential vents, balanced control | 12 feet | Medium | Medium |
| Vacuum Attachment | Finishing step, lint capture | Variable | Low | High |
Frequently Asked Questions
What tools do I need to clean a dryer vent?
The essential tools depend on your vent layout. A dryer vent cleaning kit with a brush head, flexible rods, and extension pieces covers most residential setups. If your vent is longer than 8 feet or hard to reach, a drill-powered brush attachment speeds the job and applies more cleaning force. A vacuum with a hose attachment removes loosened lint from the vent opening. For vents you cannot access safely, a professional has commercial-grade tools and can reach areas homeowners cannot.
How often should homeowners clean their dryer vents?
Most homeowners should clean their dryer vent at least once per year, ideally before heavy use in winter. Households with pets, longer vent runs, or frequent dryer use may need cleaning every 6 months. Warning signs that cleaning is overdue include longer drying times, lint around the dryer base, or a hot dryer exterior. A clogged vent reduces airflow, increases drying time, and creates a fire hazard, so regular maintenance prevents both safety risks and energy waste.
Can I use a drill to clean my dryer vent?
Yes, a drill-powered brush attachment is safe and effective for most residential dryer vents when used correctly. Use a low to medium speed (not maximum), hold the drill steady, and never force the brush into a tight vent. Stop immediately if you feel unusual resistance, you may have hit a blockage or damaged section. Drill-powered kits extend your reach and apply rotary force that manual brushing cannot, making them ideal for vents longer than 8 feet or heavily clogged ducts.
When should I hire a professional to clean a dryer vent?
Call a professional if your vent is inaccessible, longer than 15 feet, has multiple sharp bends, or if you feel resistance when attempting to clean it yourself. If drying times remain long after cleaning, a blockage deeper in the ductwork or in the dryer itself may require professional diagnosis. Professionals have tools to reach hidden lint, inspect for damage, and safely clear blockages that could cause a fire. A professional cleaning typically costs less than replacing a dryer or recovering from a vent fire.


